Working with Workspace Files
17
NetLinx Studio - Instruction Manual
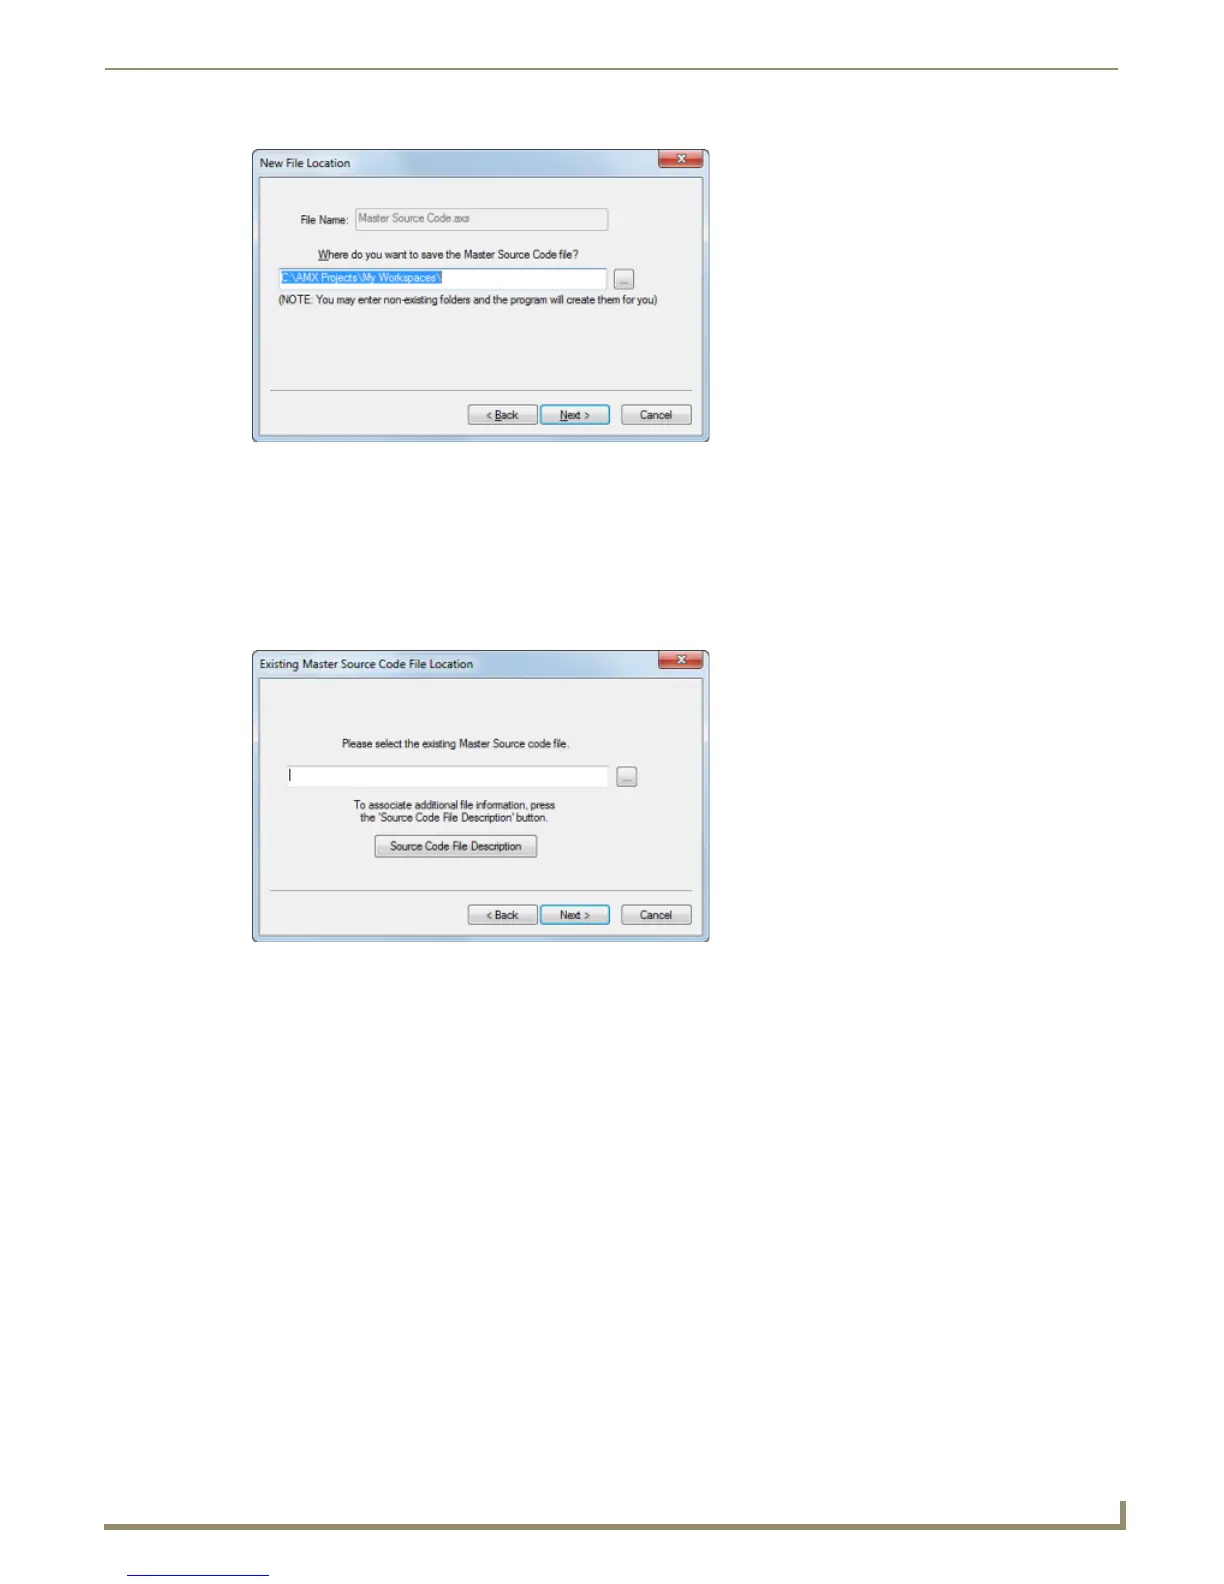
5. Specify the target location for the new file in the text box (click the Browse (...) button to locate and select a target
directory via the Browse For Folder dialog).
6. Click Next to complete the Wizard.
Add an Existing AXS File to the System
This option adds an existing AXS file to the System as the Master Source Code File:
1. Click Next to proceed to the Existing Master Source File Location dialog (FIG. 32).
2. Enter a path and filename of the desired Master Source Code File, or click the Browse (...) button to locate and
select the desired AXS file via the Open dialog.
3. Click Source Code File Description to enter an optional description (up to 2,000 characters) in the Source Code
File Description dialog, and click OK to return to the Existing Master Source File Location dialog.
4. Click Next to complete the Wizard.
Create an AXS File Using Templates
This option generates an AXS file using either the NetLinx or Axcess template, depending on the System type specified
in Step 9. This option results in a Source Code file that is formatted with header/footer information and all of the main
sections of a typical Source Code File of the selected type:
1. Click Next to proceed to the File Template dialog (FIG. 33).
FIG. 31 New File Location dialog
FIG. 32 Existing Master Source File Location dialog