Setting Program Preferences
211
NetLinx Studio - Instruction Manual
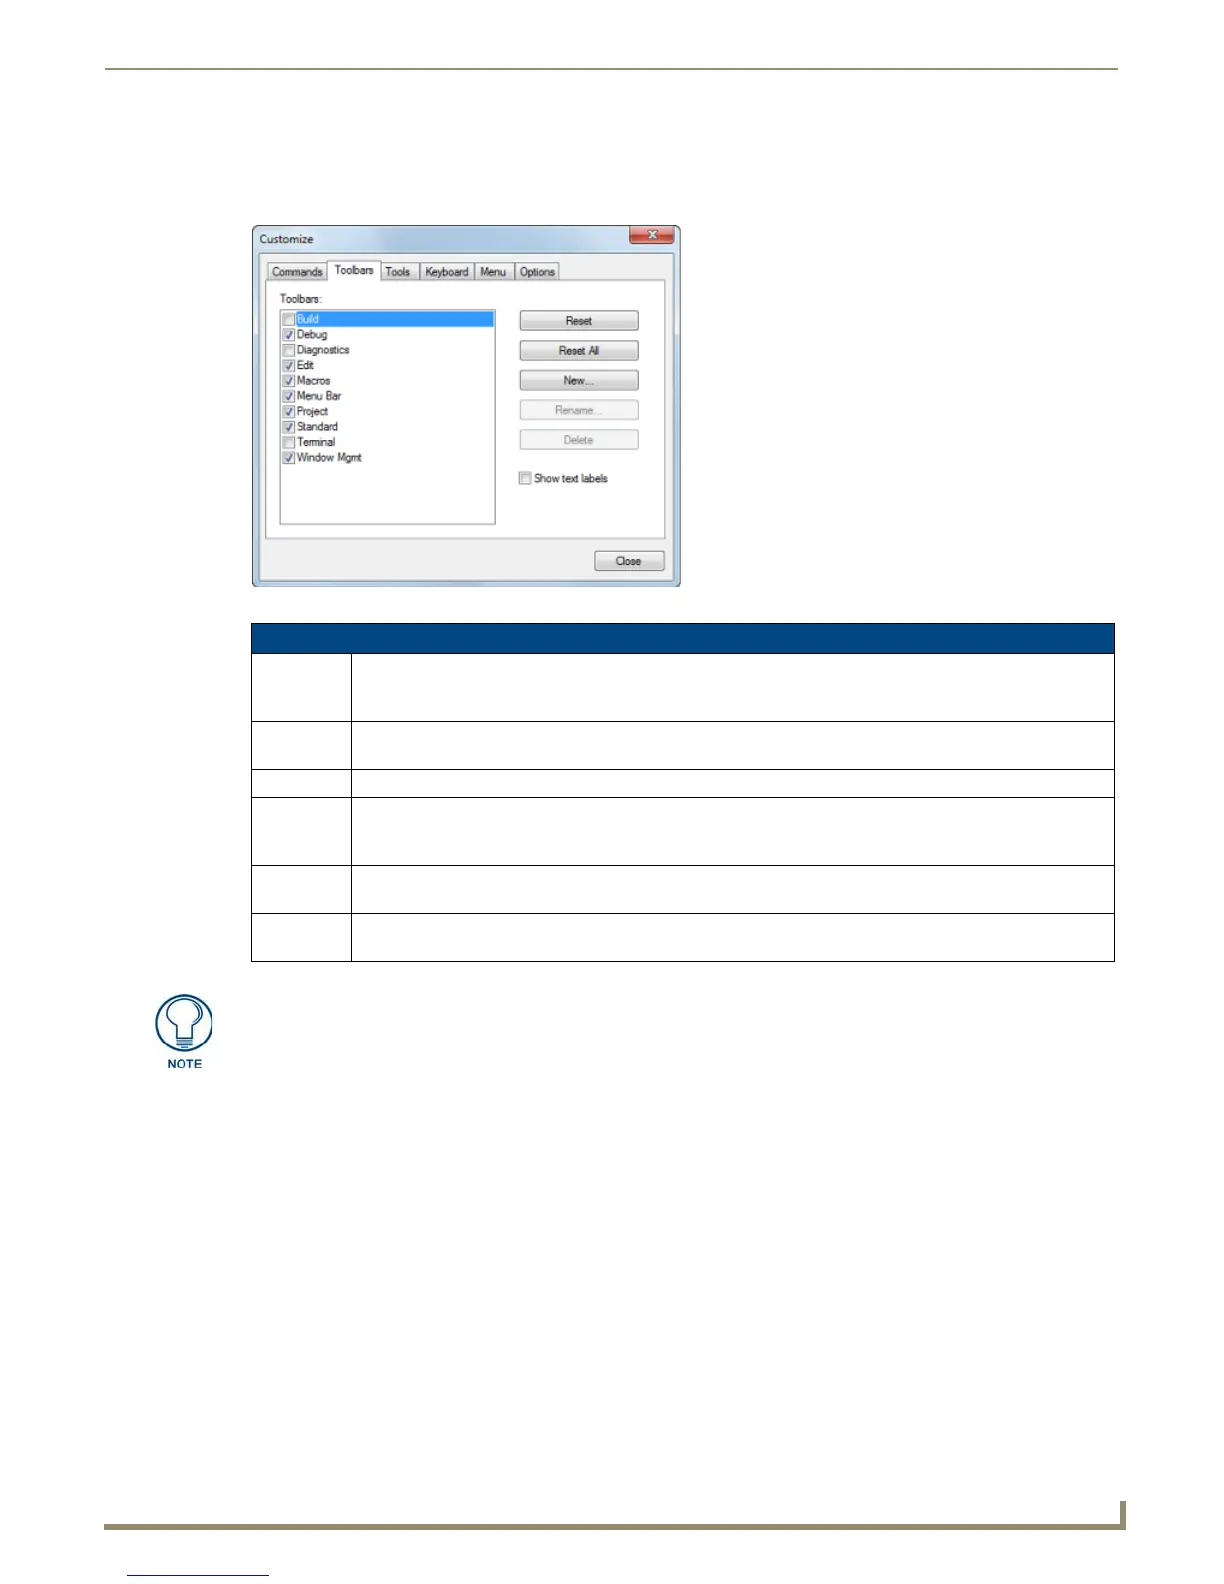
Customize dialog - Toolbars tab
Use the options in the Toolbars tab of the Customize dialog to control the TPD4 toolbars, including custom toolbars
(FIG. 296).
Adding Buttons to Existing Toolbars
1. Select a command category (under Categories). The commands included in the selected category are displayed
(under Commands), along with their associated toolbar icon, if one exists. Alternatively, select All Commands to
view a full list of all commands, regardless of category.
2. Click to highlight a command/icon (under Commands).
3. While holding the mouse-button down, drag the command/icon to a toolbar. Note that the cursor symbol indicates
that it is not allowed to be placed anywhere except inside the area of a toolbar (any toolbar).
4. Position the command/icon right where you want to drop it in the toolbar, and release the mouse button.
5. The command/icon is placed as a button in the toolbar.
Associating an Icon with a New Command
Once you have added a new command to a toolbar or menu, you can associate an icon with the command:
1. For toolbar buttons, right-click on the select the button that you want to associate an icon with. For menu items,
right-click on a menu item to open the Command context menu.
FIG. 296 Customize dialog - Toolbars tab
Customize dialog - Toolbars tab options
Toolbars: This list box contains a list of all toolbars currently associated with NetLinx Studio (including custom
toolbars). Each listed toolbar has a check box. Select/de-select these check boxes to show/hide the named
toolbar.
Reset: Select one or more toolbars in the list (via the check boxes), and click Reset to reset the selected
toolbar(s) to their default configuration (commands, names and icons).
Reset All: Click to reset all listed toolbars to their default configuration (commands, names and icons).
New: Click to create a new toolbar. This opens the Toolbar Name dialog. Type a name for the new toolbar in the
text box and click OK to add the new toolbar to the toolbar list, and create a new "empty" toolbar. Click and
drag to move the new toolbar into a blank area near the other toolbars.
Rename: Select a custom toolbar from the list and click Rename to open the Toolbar Name dialog. Type a new name
for the selected toolbar and click OK to rename it. The standard TPD4 toolbars cannot be renamed.
Delete: Select a custom toolbar from the list and click Delete to delete the selected toolbar. The standard TPD4
toolbars cannot be deleted.
To specify which toolbars to display, select View > Toolbars to access the Toolbars
sub-menu. Select the Toolbar(s) that you want to display; de-select Toolbars that you
want to hide.