Working with System Files
68
NetLinx Studio - Instruction Manual
Creating Device Mapping Assignments
1.
Select and open the Project containing the Source Code file to be mapped to a device (in the Workspace tab of the
Workspace Bar).
2. Select the System containing the file.
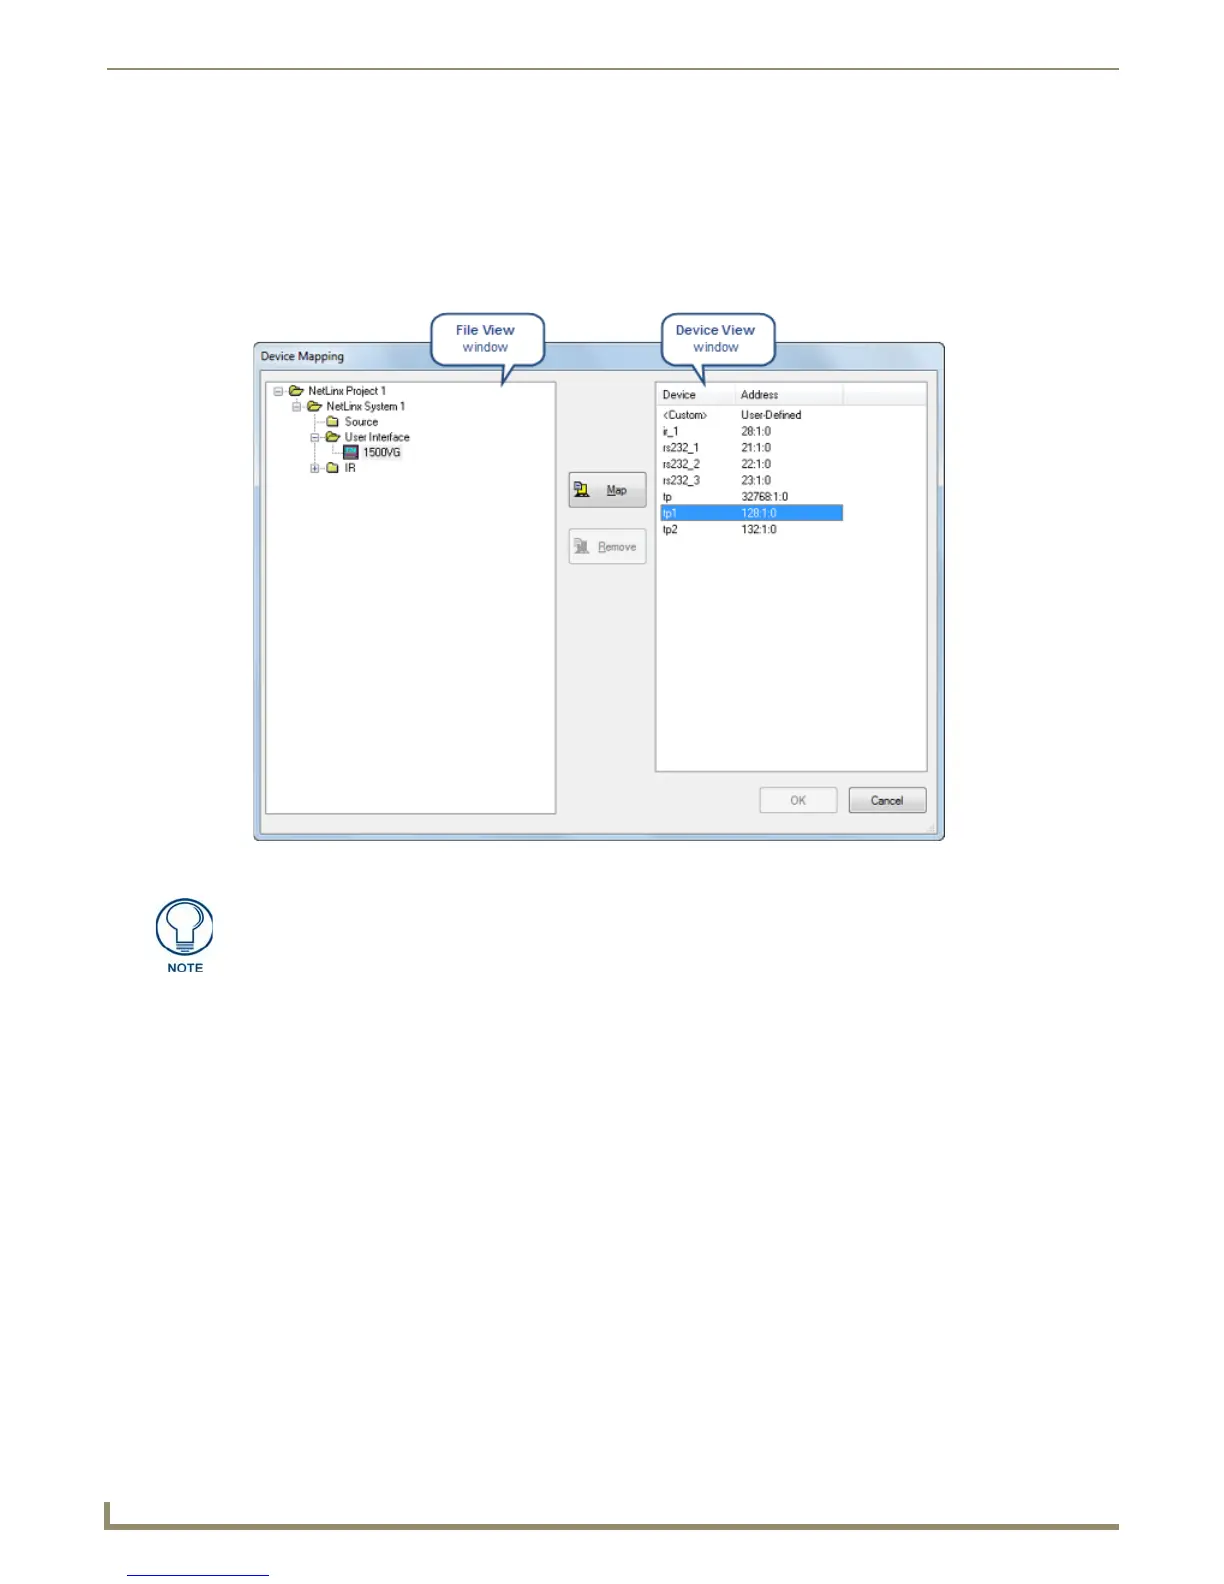
3. Select Device Mapping from the Project menu to open the Device Mapping dialog. Use this dialog to map files to
System devices for file transfers (FIG. 128).
4. In the Device Mapping dialog, select a System from the File View window (if different than the System already
selected). The File View window presents a view of the Projects, Systems, and System Files contained in the open
Workspace file in a tree structure similar to the one displayed in the Workspace tab of the Workspace Bar.
Double-click the Project folders to show the System folders.
Double-click to expand the System folders to show the System File folders (Source, User Interface, and IR
only, since these are the only file types that can mapped).
Double-click these folders to view the System files.
5. Select the file you want to map.
6. In the Device View window, select the target device for the selected file from the list of devices. The device list is
based on the DEFINE_DEVICE section of the selected System's Master Source Code file, with their associated
device numbers. There is also a <Custom> listing, which allows you to specify a D:P:S assignment other than what
is specified within the Master Source Code file.
Files can be mapped to multiple devices (Ctrl + click to select multiple devices).
In Axcess, Master Source Code files are always mapped to the Master Controller (device = 0), and cannot be
mapped to any other device. This does not apply to NetLinx Master Source Code files.
To map to a device that is not specified in the Master Source Code file, select <Custom>, and enter the
device's D:P:S assignment in the Enter DPS dialog (FIG. 129).
FIG. 128 Device Mapping dialog
You can also access the Device Mapping command via the Project Toolbar as well
as Source File, User Interface, and IR File context menus. The Device Mapping
option is only available if you have selected a Source Code file that is not designated
as the Master Source Code file.