Diagnostics Menu Options
183
NetLinx Studio - Instruction Manual
6. Proceed to a network device and push the ID push-button on the device (for panels push a button) to ID the device.
By pressing the ID push-button on the device, NetLinx Studio will set that device's network address information
(Device Addressing and Device IP Addressing values) according to the settings in this dialog.
The program remains in ID Mode.
7. Proceed to the next network device within the system and press the ID push-button on the second device. NetLinx
Studio will set the network address information (Device Addressing and Device IP Addressing values) on the
second device according to the settings in this dialog.
The program remains in ID Mode.
8. Proceed to all the devices within the system resetting the network devices (without having to return to the PC).
9. When all network devices have been identified and updated, click the Done button to terminate ID Mode and close
this dialog.
Identification Mode - Continuous Increment Mode (Specify IP Addresses)
The steps below describe using the Continuous Increment Mode feature of the Network Device Addressing dialog to
specify network address information for multiple devices, by using Identification Mode and the ID push-button (a
physical push-button found on the network device).
1. Select Diagnostics > Network Device Addressing to access the Network Device Addressing dialog, and open the
Set Identification Mode tab.
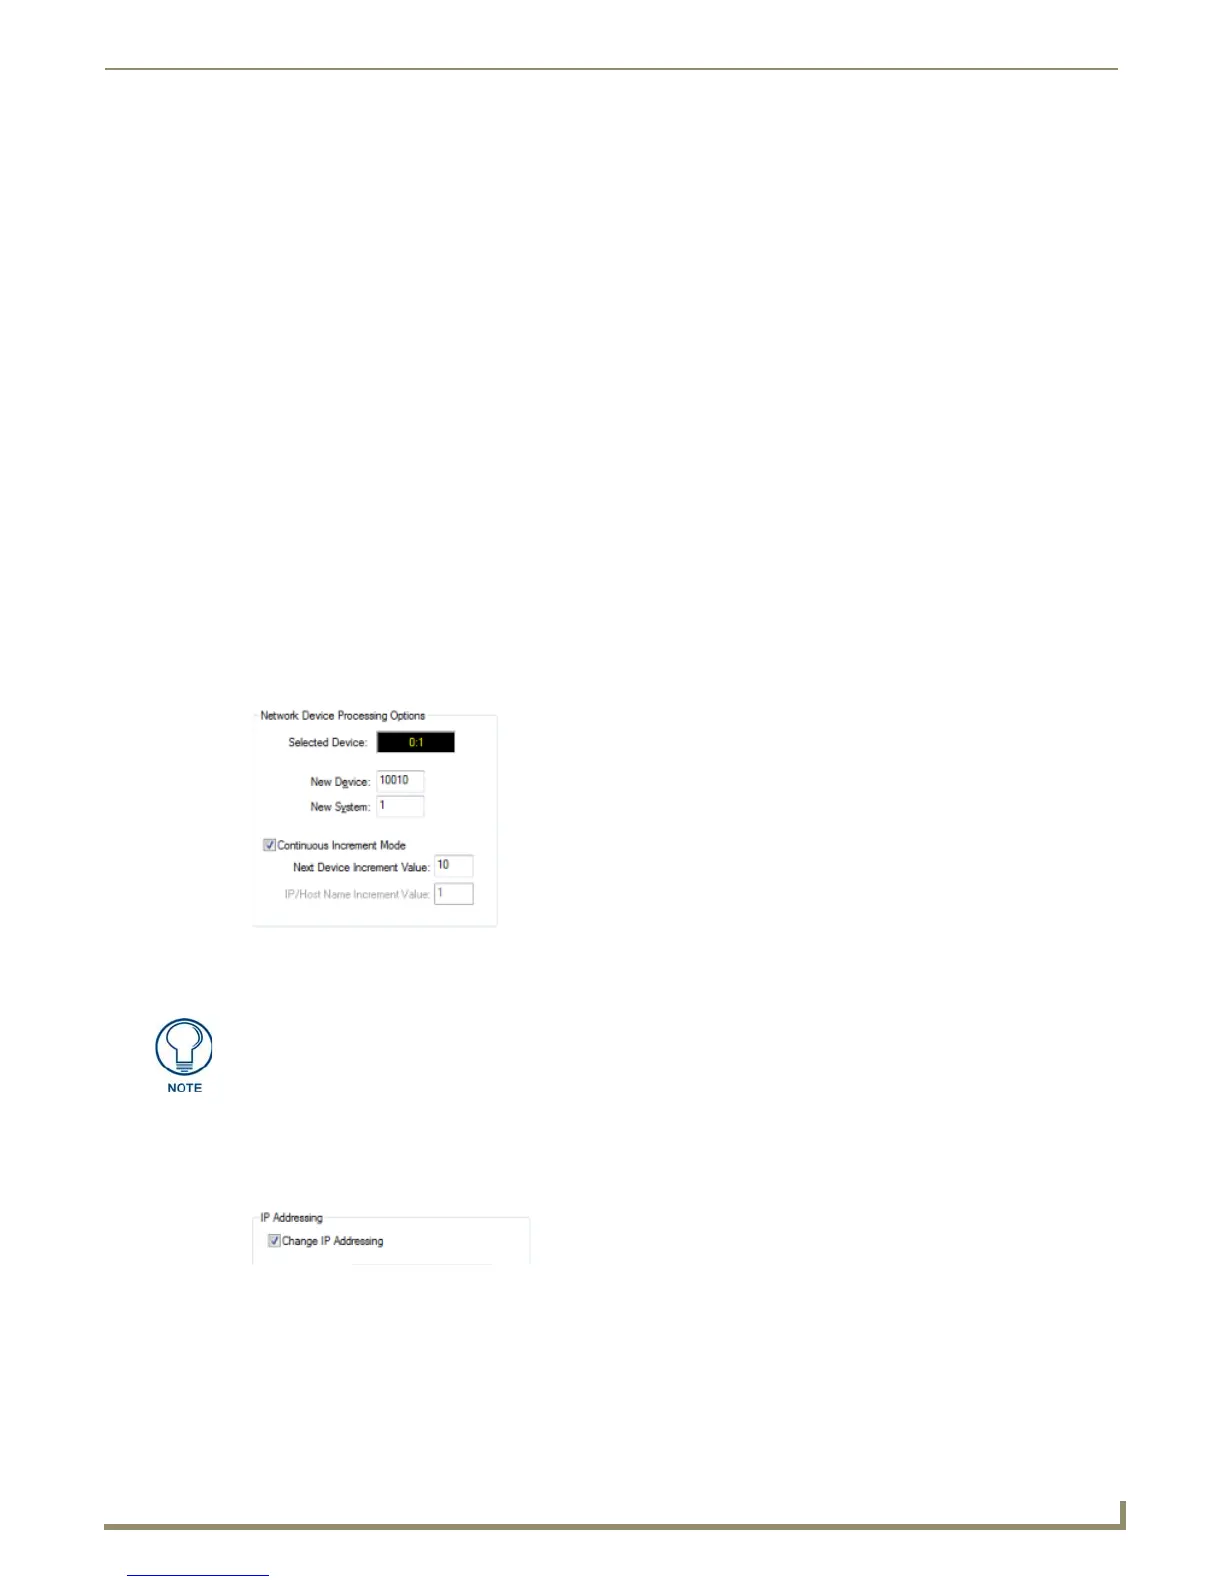
2. Under Network Device Processing Options, enter a device number in the New Device field to use for the first device
found via ID Mode (default = 10010).
3. In the New System field, enter a system number to use for the first device found via ID Mode (default = 1).
4. Select the Continuous Increment Mode option. Note that this selection enables the Next Device Increment Value
field (FIG. 266).
5. Enter a Next Device Increment Value (default = 10).
6. Under IP Addressing, select the Change IP Addressing option. Note that this selection enables the Host Name field
(FIG. 267).
7. Select the Specify IP Address option. Note that this selection enables the Host Name, IP Address, Subnet Mask and
Gateway fields, as well as the IP/Host Name Increment Value field (under Continuous Increment Mode - see
FIG. 268).
FIG. 266 Set Identification Mode tab - Network Device Processing Options
This directs the program to auto-increment the Device and System Number
assignments for the network devices, using the Next Device Increment Value to
increment the Device values, when a device has been identified.
For example, with a starting New Device value of "10010", and 10 as the Next Device
Increment Value, the program will set the first device identified to "10010", and set the
next device identified to "10020", etc.
FIG. 267 Set Identification Mode tab - IP Addressing Options