Diagnostics Menu Options
184
NetLinx Studio - Instruction Manual
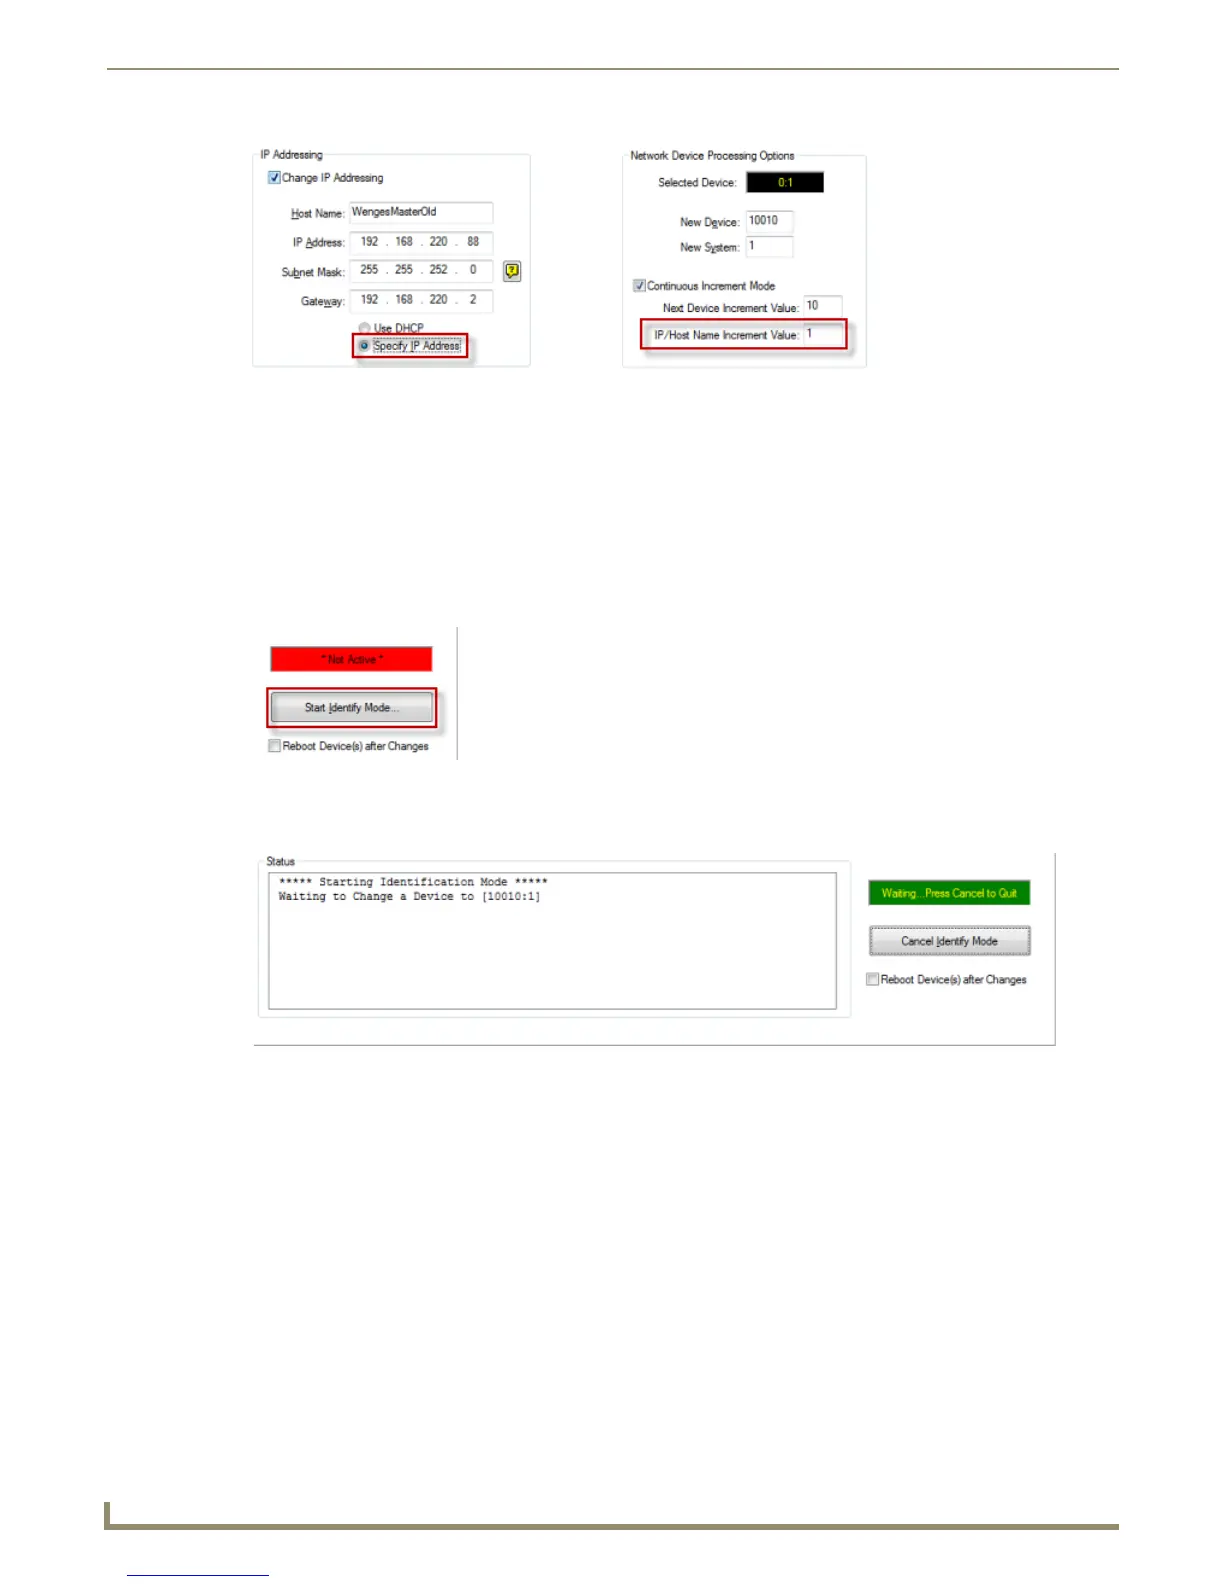
These selections direct the program to set the static IP addresses for network devices, using the IP/Host Name
Increment Value to increment the IP address and Host Name when a device has been identified.
For example, with a starting IP Address of "192.168.xxx.10", and 10 as the IP/Host Name Increment Value, the
program will increment the IP address to "193.168.xxx.20" for the next device identified. The next device identified
would be "193.168.xxx.30" , etc.
Similarly, with a starting Host Name of "EXB DEVICE-", and 10 as the IP/Host Name Increment Value, the
program will increment the Host Name to "EXB DEVICE-10" for the next device identified. The next device
identified would be " EXB DEVICE-20", etc.
8. Click the Start Identify Mode button (FIG. 269).
This puts the program into ID Mode, waiting for a device on the network to have it's ID push-button pressed, which
sends a device ID message for that device to the program (FIG. 270).
9. Proceed to a network device and push the ID push-button on the device (for panels push a button) to ID the device.
By pressing the ID push-button on the device, NetLinx Studio will set that device's network address information
(Device Addressing and Device IP Addressing values) according to the settings in this dialog.
The program remains in ID Mode.
10. Proceed to the next network device within the system (no need to return to your PC) and press the ID push-button
on the second device. NetLinx Studio will set the network address information (Device Addressing and Device IP
Addressing values) on the second device according to the settings in this dialog.
The program remains in ID Mode.
11. Proceed to all the devices within the system resetting the network devices, (without having to return to the PC).
12. When all network devices have been identified and updated as desired, click the Done button to terminate ID Mode
and close this dialog.
FIG. 268 Set Identification Mode tab - Change IP Addressing (Specify IP Address option enabled)
FIG. 269 Set Identification Mode tab - Start Identify Mode
FIG. 270 Set Identification Mode tab - Identify Mode active