File Transfer Operations
158
NetLinx Studio - Instruction Manual
3. Select the type of file that you want to add to the transfer.
4. Click the Add command button to invoke the Save As dialog. Note that the selected file type is pre-selected in the
Save as type drop-down menu. Use this options in this dialog to assign a name and target directory for received
files.
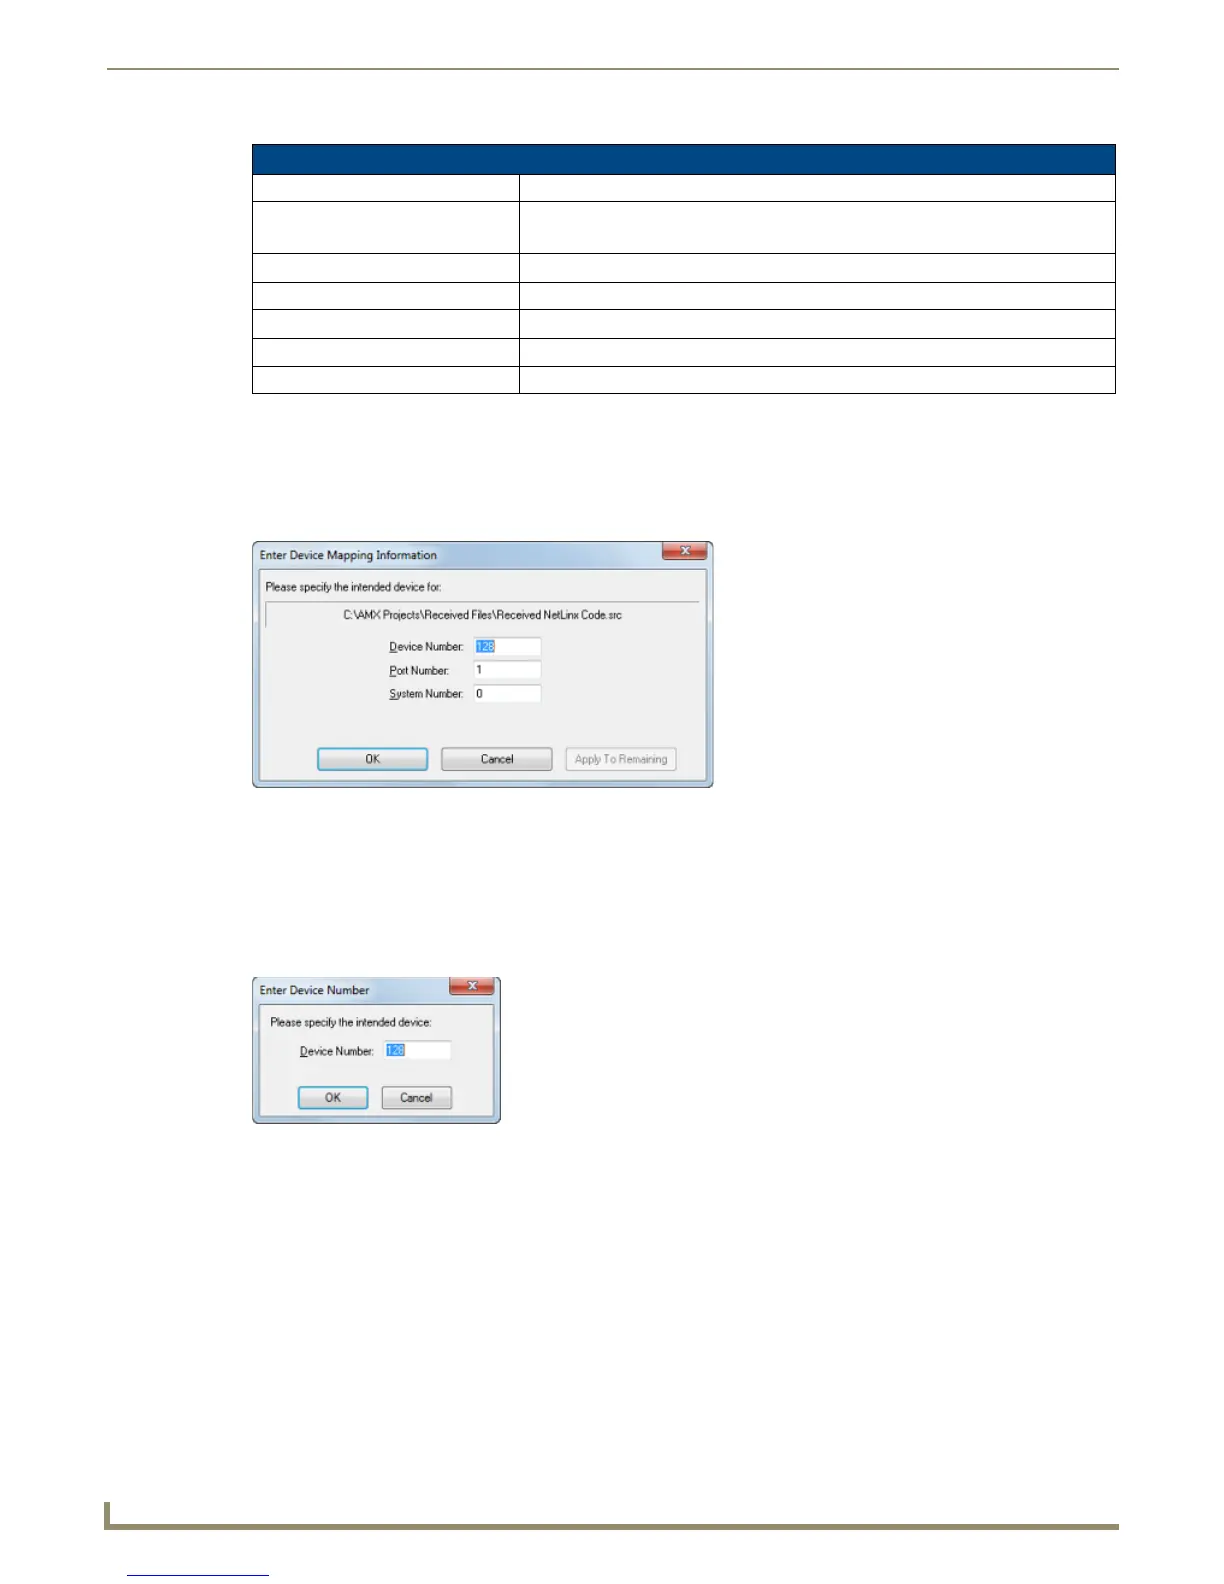
5. Click Save to close the Save As dialog. and invoke the Enter Device Mapping Information dialog (FIG. 239).
The Enter Device Mapping Information dialog is automatically invoked for each file that is added. See the
Device Mapping section on page 67.
Device Mapping information can be edited later via the Mapping command button (see below).
For Axcess systems (Axcess selected as the Platform Selection in the Communication Settings dialog), the
Enter Device Number dialog is invoked (rather than the Enter Device Mapping Information dialog shown
above). In this case, enter the device number of the target device (FIG. 240).
6. Click OK to close the Enter Device Mapping Information dialog and return to the File Transfer dialog. Note that
the selected files are now indicated in the Receive tab (FIG. 234).
Select Files For File Transfer dialog - File types
Label Description (extension)
IRL/IRV Files IR Files (*.irl, *.irv)
Note: IR files cannot be received from Axcess Master controllers.
Touch Panel Design File TouchPanel Design generated UI files (*.tpd)
NetLinx Source Code File NetLinx Source Code Files (*.src)
Axcess Source Code File Axcess Source Code Files (*.axs)
TP4 Touch-panel File TPDesign generated UI files (*.tp4)
DMS - Keypad Builder File Keypad Builder generated DMS File (*.kpb)
FIG. 239
Enter Device Mapping Information dialog
FIG. 240 Enter Device Number dialog (Axcess only)