Protected by copyright. Copying for private or commercial purposes, in part or in whole, is not
permitted unless authorised by AUDI AG. AUDI AG does not guarantee or accept any liability
with respect to the correctness of information in this document. Copyright by AUDI AG.
♦ Torque Wrench 1331 5-50Nm - VAG1331-
♦ Torque Wrench 1783 - 2-10Nm - VAG1783-
♦ Standard socket open end 12 mm
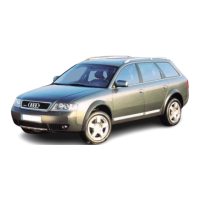
Remove front pressure reservoir at underbody
– Place vehicle on hoist, refer to
⇒ “4 Positioning Vehicle on Hoist and Wheels”, page 10 .
– Perform pressure reservoir system vent using -Vehicle Diag‐
nostic Tester- , refer to
⇒ “3.9 System, Venting or Filling”, page 221 .
– Remove left underbody trim, refer to ⇒ Rep. Gr. 50 .
– Slowly loosen air line -1- on pressure reservoir -2- and allow
air pressure to escape. When air pressure has escaped, re‐
move air line -1-.
– Remove screw -3- and guide out pressure reservoir -2- and
remove,
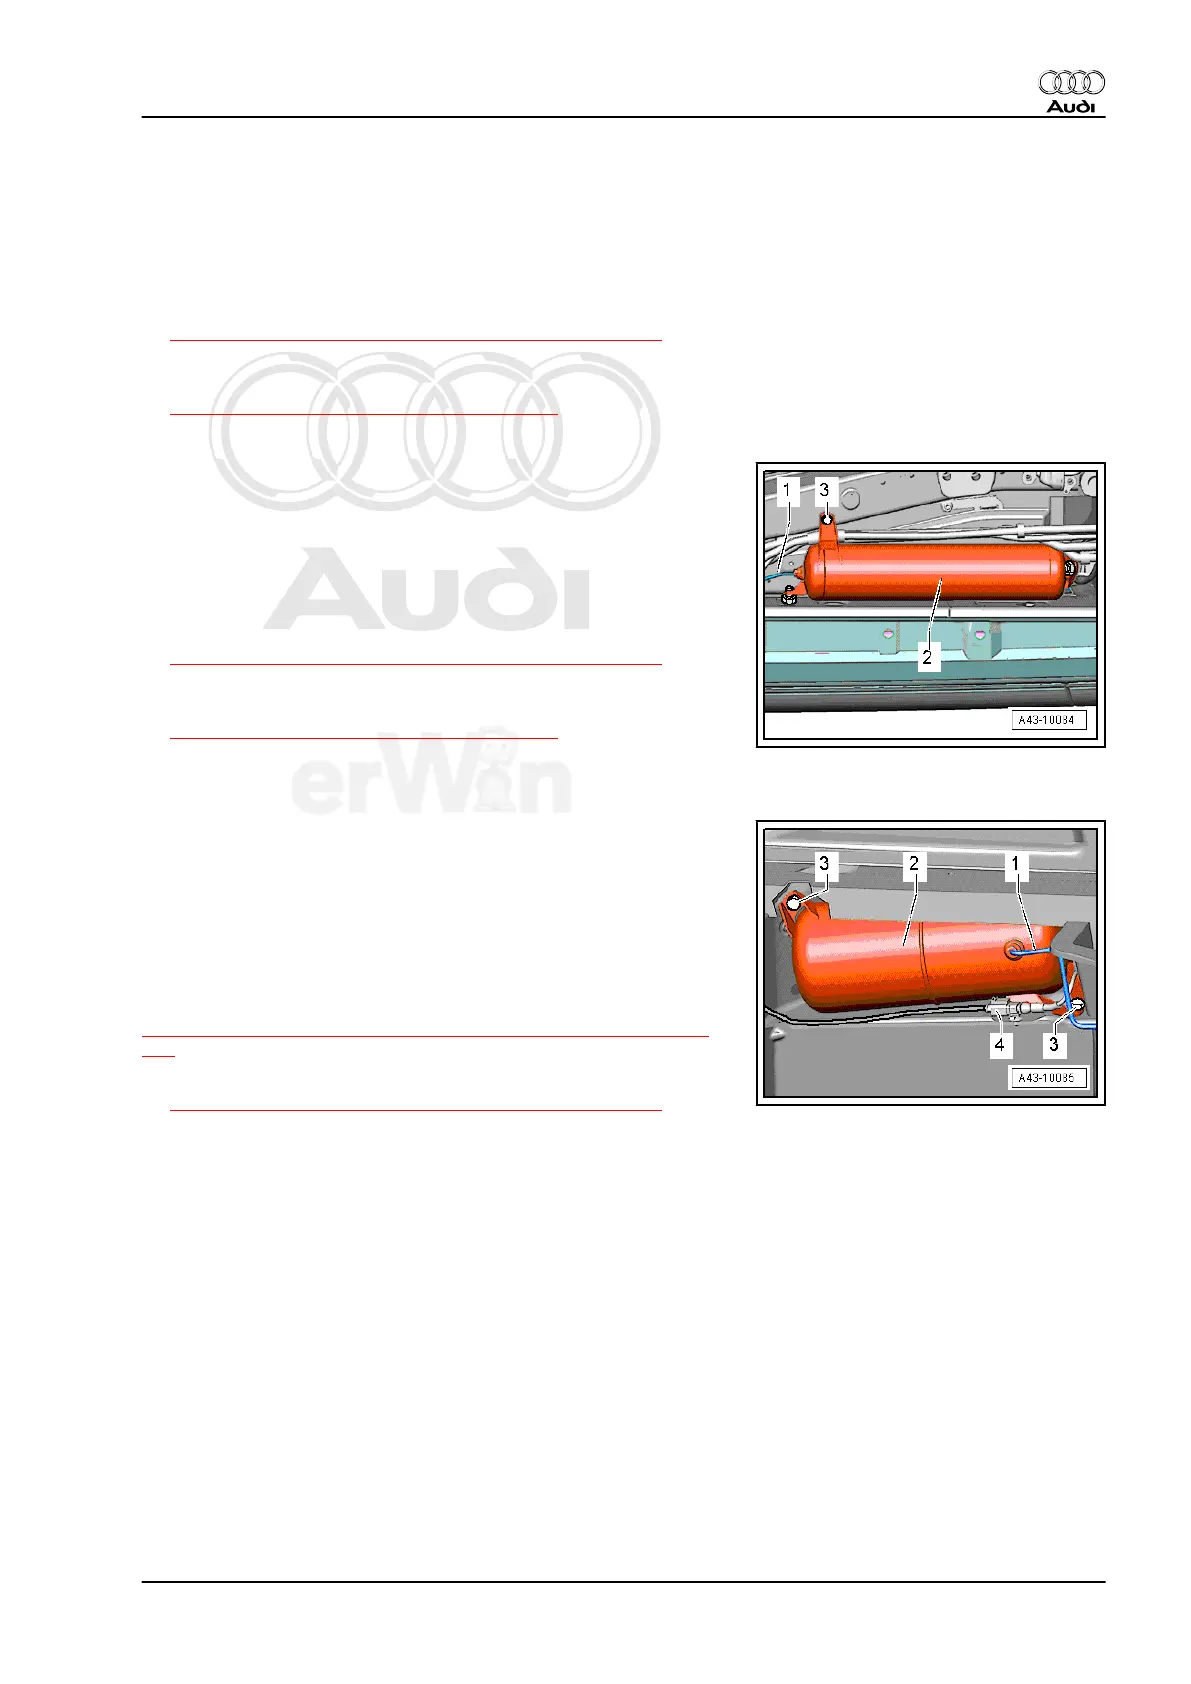
Pressure Reservoir in Luggage Compartment, Removing
– Place vehicle on hoist, refer to
⇒ “4 Positioning Vehicle on Hoist and Wheels”, page 10 .
– Perform pressure reservoir system vent using -Vehicle Diag‐
nostic Tester- , refer to
⇒ “3.9 System, Venting or Filling”, page 221 .
– Remove the luggage compartment floor covering and the
compressor on the left side.
– Slowly loosen air line -1- on pressure reservoir -2- and allow
air pressure to escape. When air pressure has escaped, re‐
move air line -1-.
– Remove screws -3- and pressure reservoir -2-.
Front pressure reservoir, installing on underbody
Install in reverse order of removal. Note the following:
Tightening specifications, refer to
⇒ “4.4 Air Supply Unit and Solenoid Valve Block Overview”, page
225
– Place vehicle on wheels, refer to
⇒ “4 Positioning Vehicle on Hoist and Wheels”, page 10 .
Audi Q7 2007 ➤
Suspension, Wheels, Steering - Edition 01.2014
4. Pneumatic Level Control System 233

 Loading...