Protected by copyright. Copying for private or commercial purposes, in part or in whole, is not
permitted unless authorised by AUDI AG. AUDI AG does not guarantee or accept any liability
with respect to the correctness of information in this document. Copyright by AUDI AG.
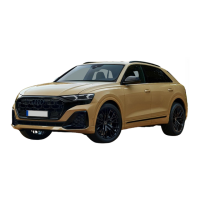
– Place the tools on the front bonded rubber bushing as shown
in the illustration.
1 - Thrust Piece - T10301/7-
2 - Bonded Rubber Bushing
3 - Thrust Plate - T10301/6-
4 - Hydraulic Press - VAS6178-
5 - Washer - T10205/4-
6 - Nut - T10301/2-
7 - Spindle - T10301/1-
– Press in bonded rubber bushing until shoulder lies »gap-free«
at subframe sleeve. Release the pressure several time over
the cylinder and then install it again.
Note
♦
After replacing bearing, remove abrasions on subframe with a
file.
♦
Correct paint damage on subframe with corrosion protection,
primer and black top coat.
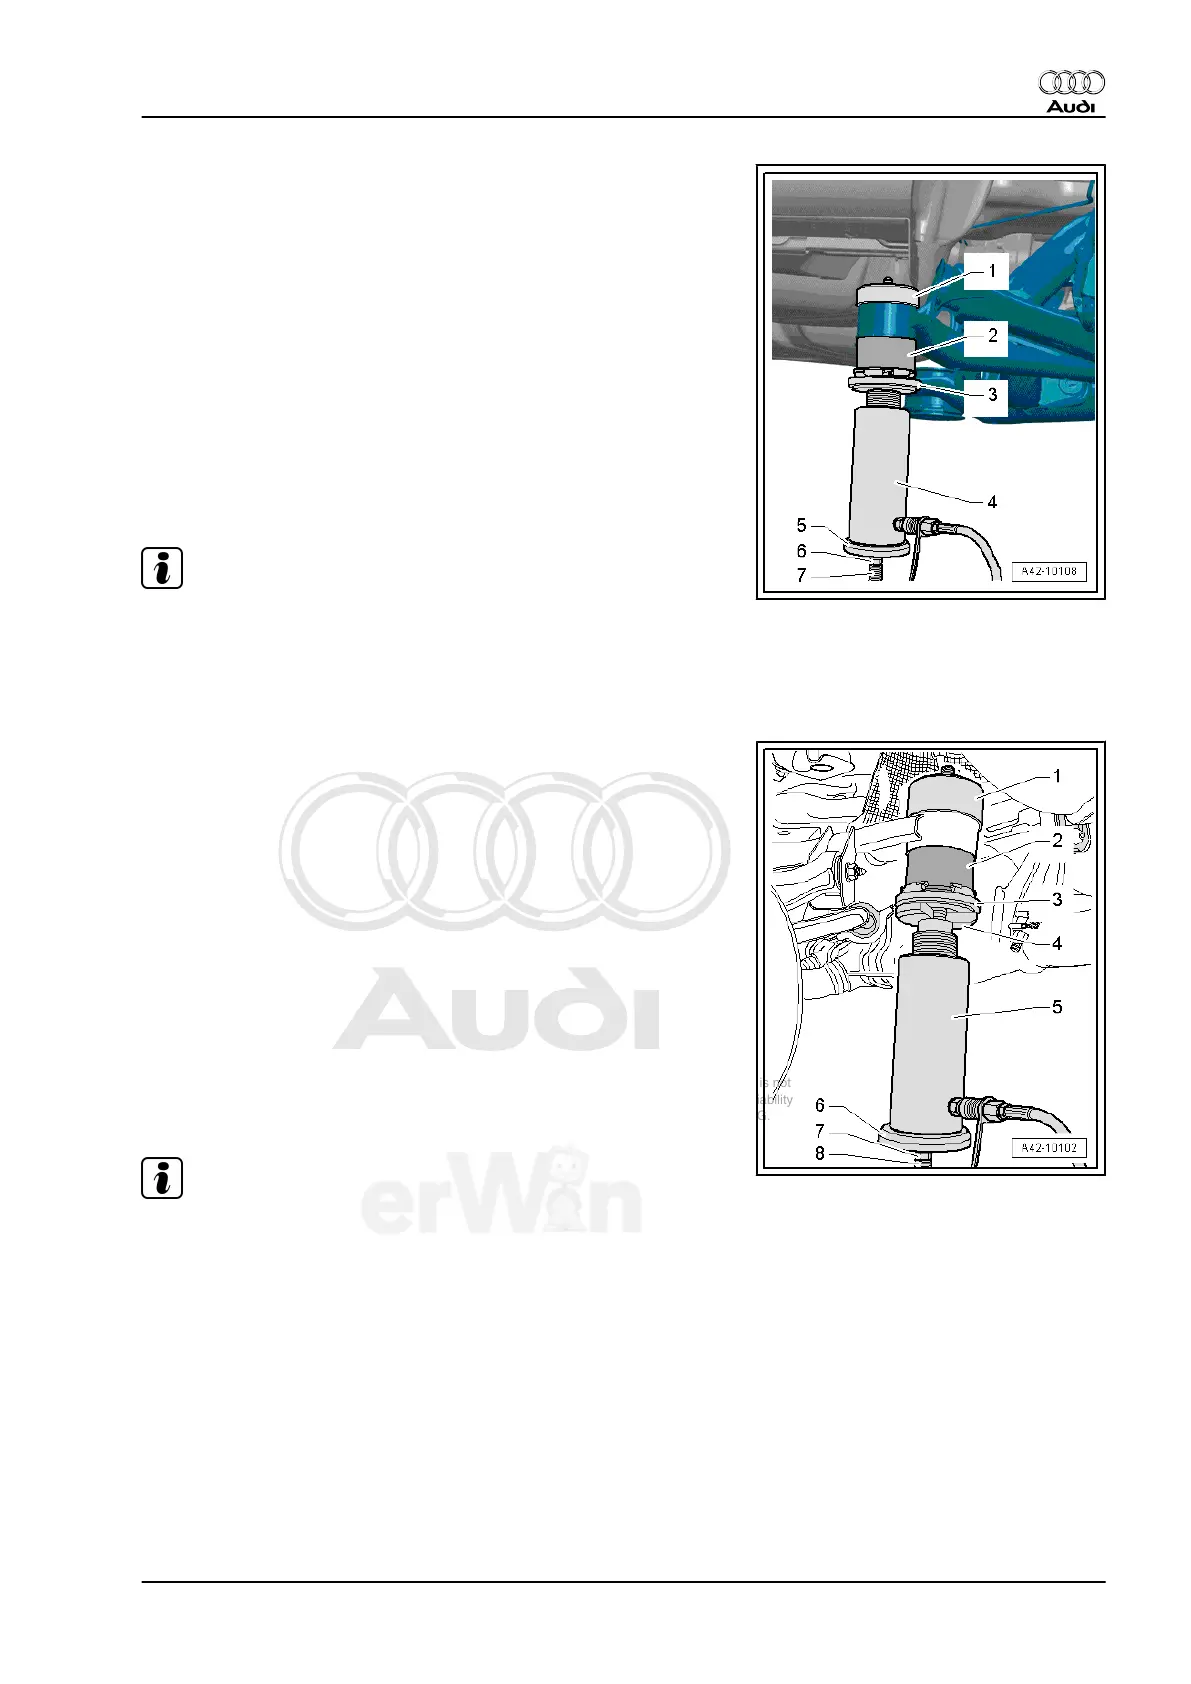
– Place the tools on the rear bonded rubber bushing as shown
in the illustration.
1 - Thrust Piece - T10301/12-
2 - Bonded Rubber Bushing
3 - Thrust Plate - T10301/6-
4 - Thrust Plate - T10301/10-
5 - Hydraulic Press - VAS6178-
6 - Washer - T10205/4-
7 - Nut - T10301/2-
8 - Spindle - T10301/1-
– Press in bonded rubber bushing until shoulder lies »gap-free«
at subframe sleeve. Release the pressure several time over
the cylinder and then install it again.
Note
♦
After replacing bearing, remove abrasions on subframe with a
file.
♦
Correct paint damage on subframe with corrosion protection,
primer and black top coat.
– Install subframe with a 2nd technician and remove Assembly
Carrier Locating Pins - T10300- .
Install in reverse order of removal.
2.5 Stabilizer Bar, Removing and Installing
Special tools and workshop equipment required
♦ Torque Wrench 1332 40-200Nm - VAG1332-
Audi Q7 2007 ➤
Suspension, Wheels, Steering - Edition 01.2014
2. Subframe, Stabilizer Bar, Coupling Rod and Stone Deflector 133

 Loading...