Protected by copyright. Copying for private or commercial purposes, in part or in whole, is not
permitted unless authorised by AUDI AG. AUDI AG does not guarantee or accept any liability
with respect to the correctness of information in this document. Copyright by AUDI AG.
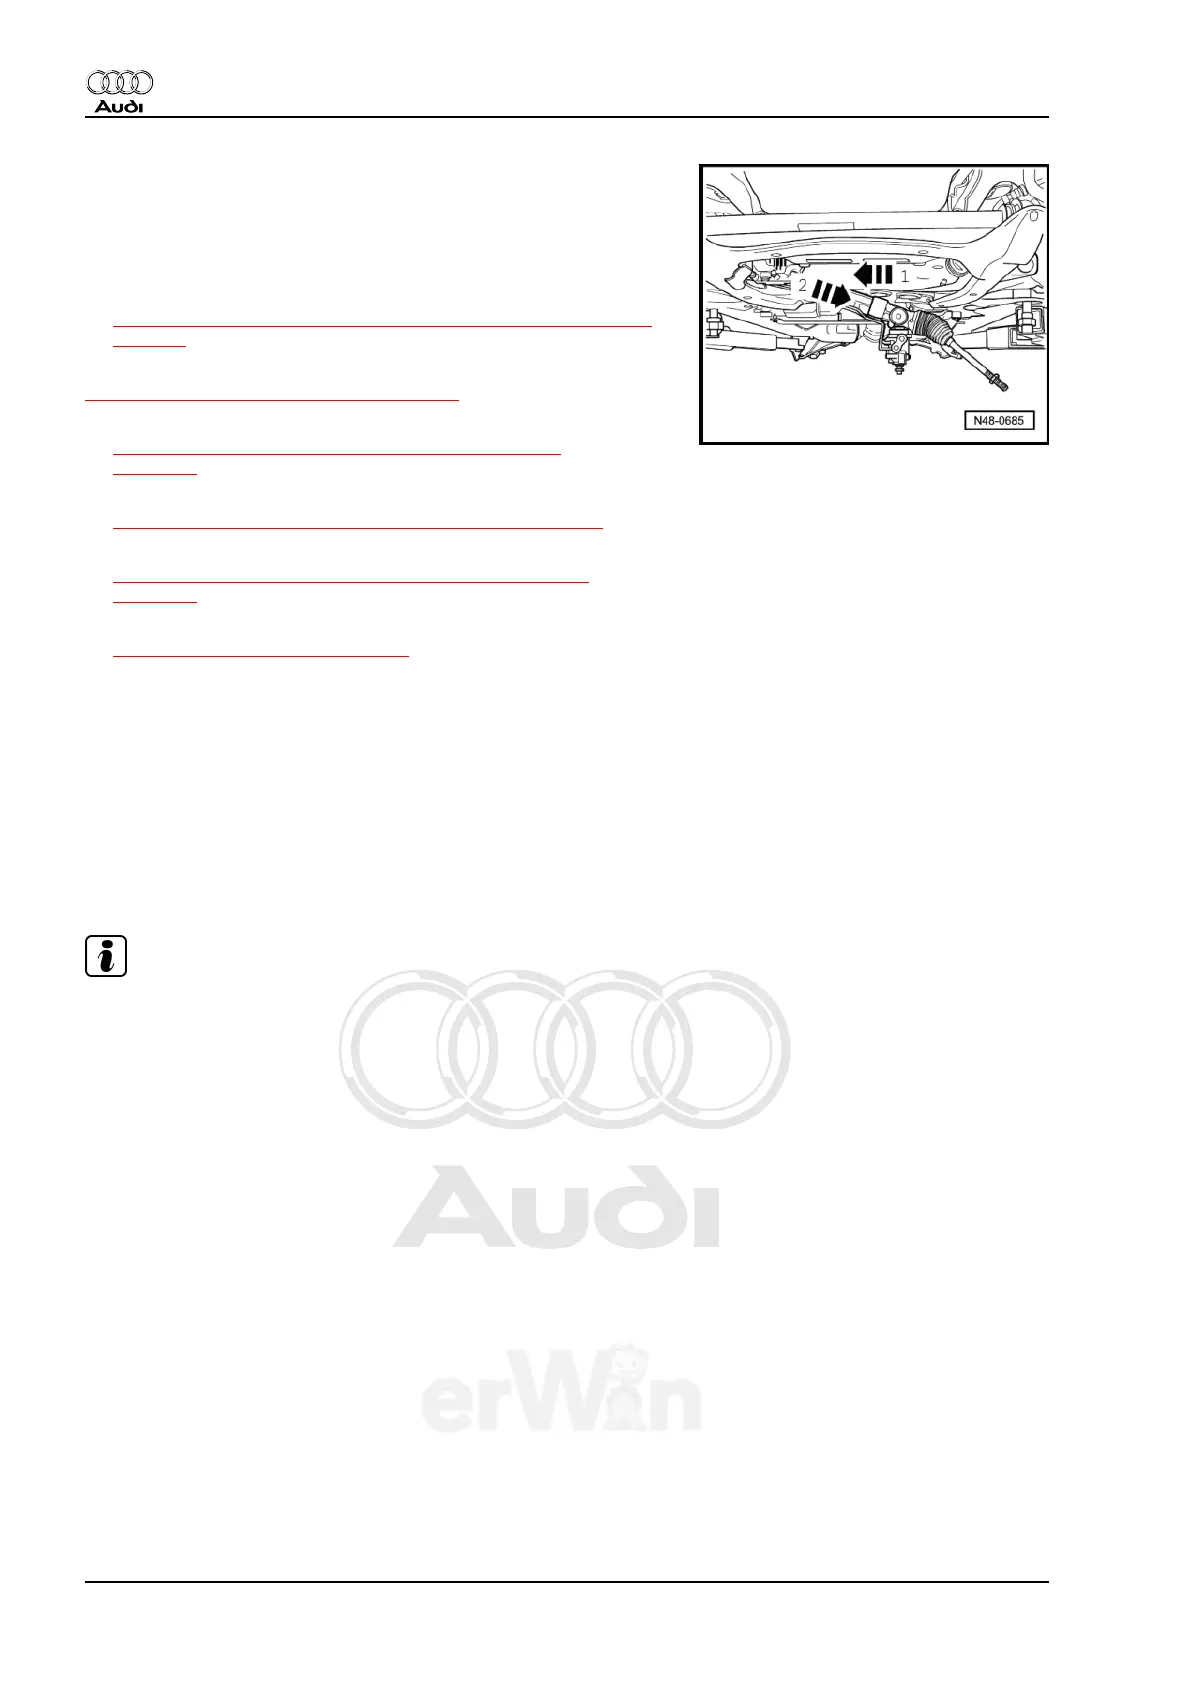
– Remove steering gear downward toward left side of vehicle
-direction of arrow 2-.
Installing
Install in reverse order of removal. Note the following:
– Tighten new screws from subframe, refer to
⇒ “2.1 Subframe, Stabilizer Bar and Coupling Rod Overview”,
page 17 .
Tightening specifications, refer to
⇒ “3.1 Steering Gear Overview”, page 292 .
– Bleed steering system, refer to
⇒ “4.2 Steering System, Bleeding after Replacing”,
page 311 .
– Check the steering system for leaks, refer to
⇒ “4.3 Steering System, Checking for Leaks”, page 312 .
– Check hydraulic fluid level and fill, if necessary, refer to
⇒ “4.1 Power Steering, Checking Hydraulic Oil Level”,
page 310 .
– An axle alignment may be required. Refer to
⇒ “5 Wheel Alignment”, page 247 .
– Perform Steering Angle Sensor - G85- basic setting with -Ve‐
hicle Diagnostic Tester- .
3.3 Steering Gear, Servicing
Special tools and workshop equipment required
♦ Hose Clip Pliers - VAG1275A-
♦ Torque Wrench 1332 40-200Nm - VAG1332-
♦ Steering Gear Grease
Note
♦
Always replace self-locking nuts and bolts.
♦
Welding or straighten work on any steering components is not permissible.
♦
To grease the rack, only use Steering Gear Grease .
♦
There are two different tie rod ends being installed: one marked with “R” and one marked with “L” and an
“arrow”. They indicate the driving direction. For allocation, refer to the Parts Catalog.
Audi Q7 2007 ➤
Suspension, Wheels, Steering - Edition 01.2014
298 Rep. Gr.48 - Steering