107R5910032 /00 Freya
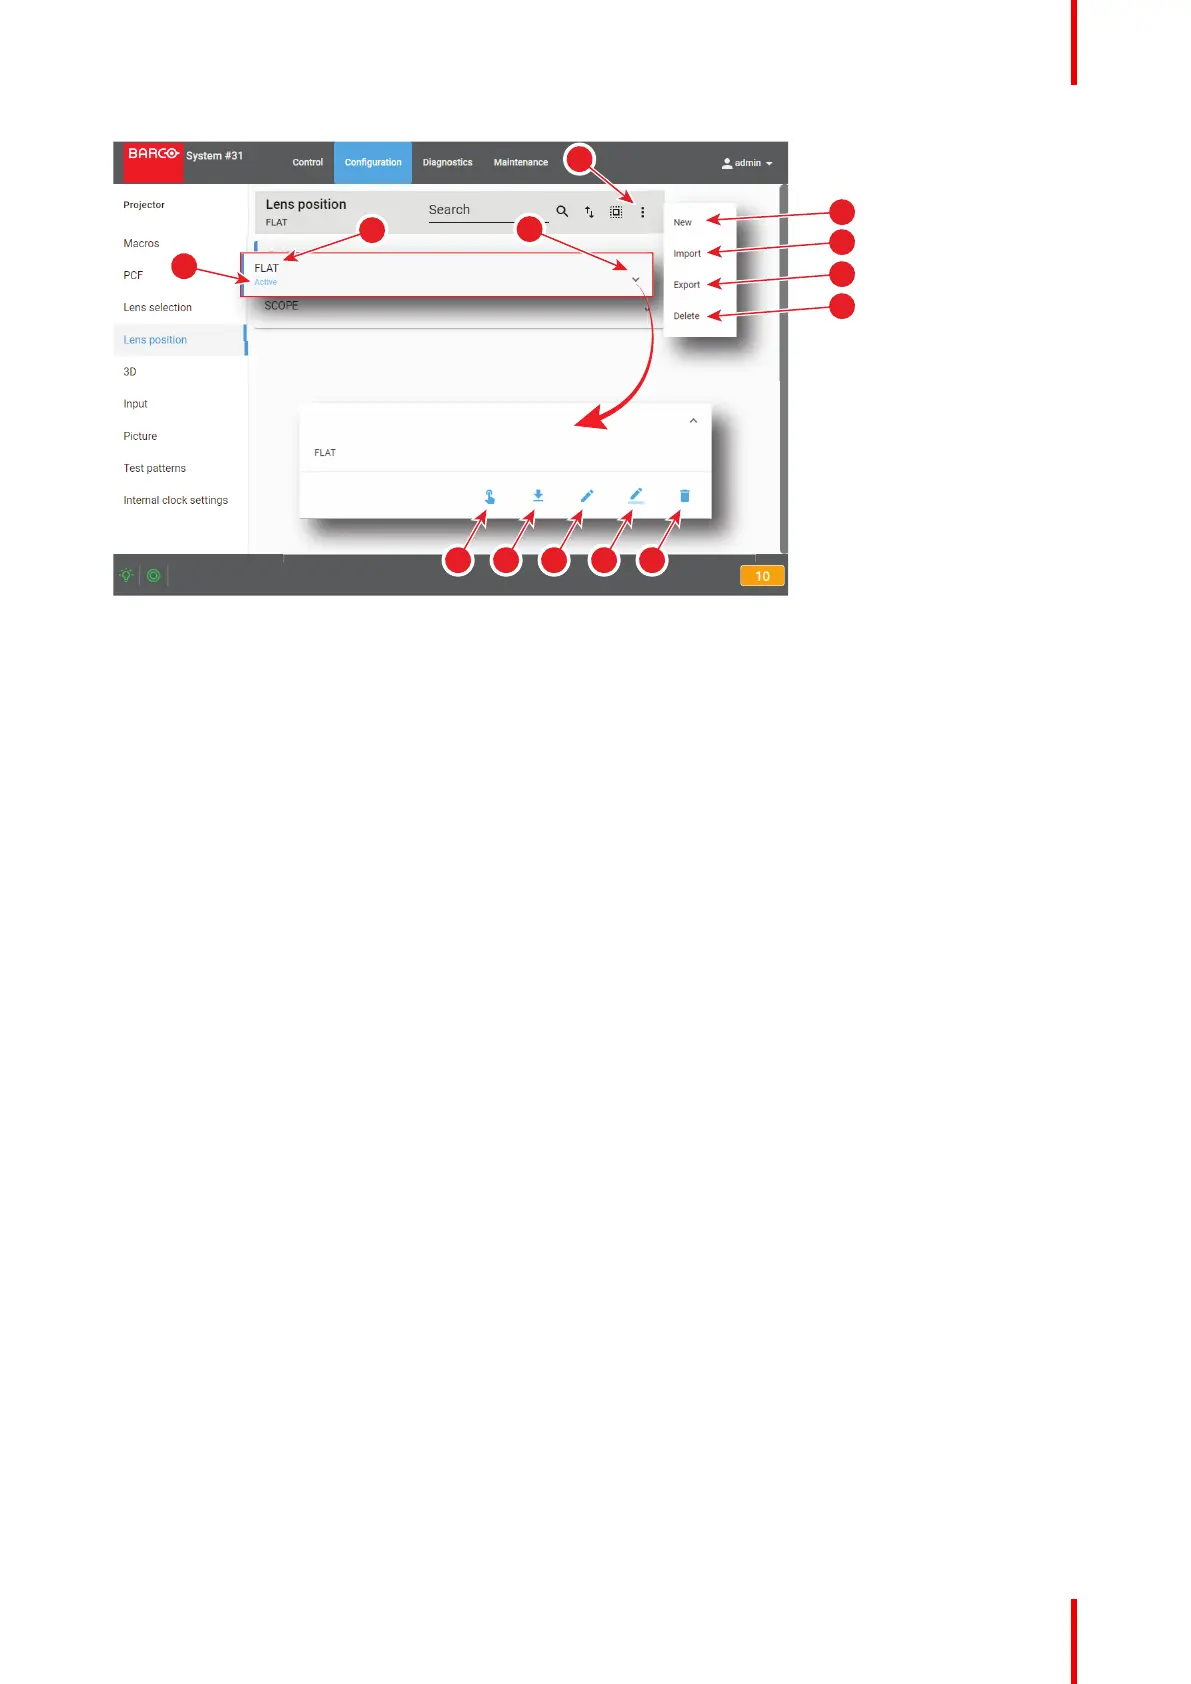
Image 7–61
Each lens position file displayed here has a name (reference 1). When a lens position file is activated the
status (reference 2) turns to Active and its name is noticed on top of the list.
Clicking on a file (reference 3) in this list allows to show it in its expanded form and displays a contextual
menu.
Following actions are available in this menu:
• Activate (reference 4) allows to activate the lens position file.
• Export (reference 5) creates a downloadable backup package.
• Edit (reference 6) allows to modify the lens position file.
• Rename (reference 7) allows to rename the lens position file.
• Delete (reference 8) allows to remove the file from the list.
Clicking on menu (reference 7) displays the lens position general menu.
Following actions are available in this menu:
• New (reference 10) allows to create a new lens position file based on current configuration.
• Import (reference 11) allows to import lens position file.
• Export (reference 12) creates a downloadable backup package that contains all lens position files selected
in the list.
• Delete (reference 13) allows to remove several lens position files selected in the list.
7.4.2 Creating a lens position file
Location & access
Menu: Configuration > Projector > Lens position
Level: Administrator, Service technician
How to create lens position file from an active configuration
1. While in Configuration > Projector > Lens position, click on the Lens position general menu (reference 1)
located on the top right of the list.
Lens position menu is displayed.
Configuration - Projector