317R5910032 /00 Freya
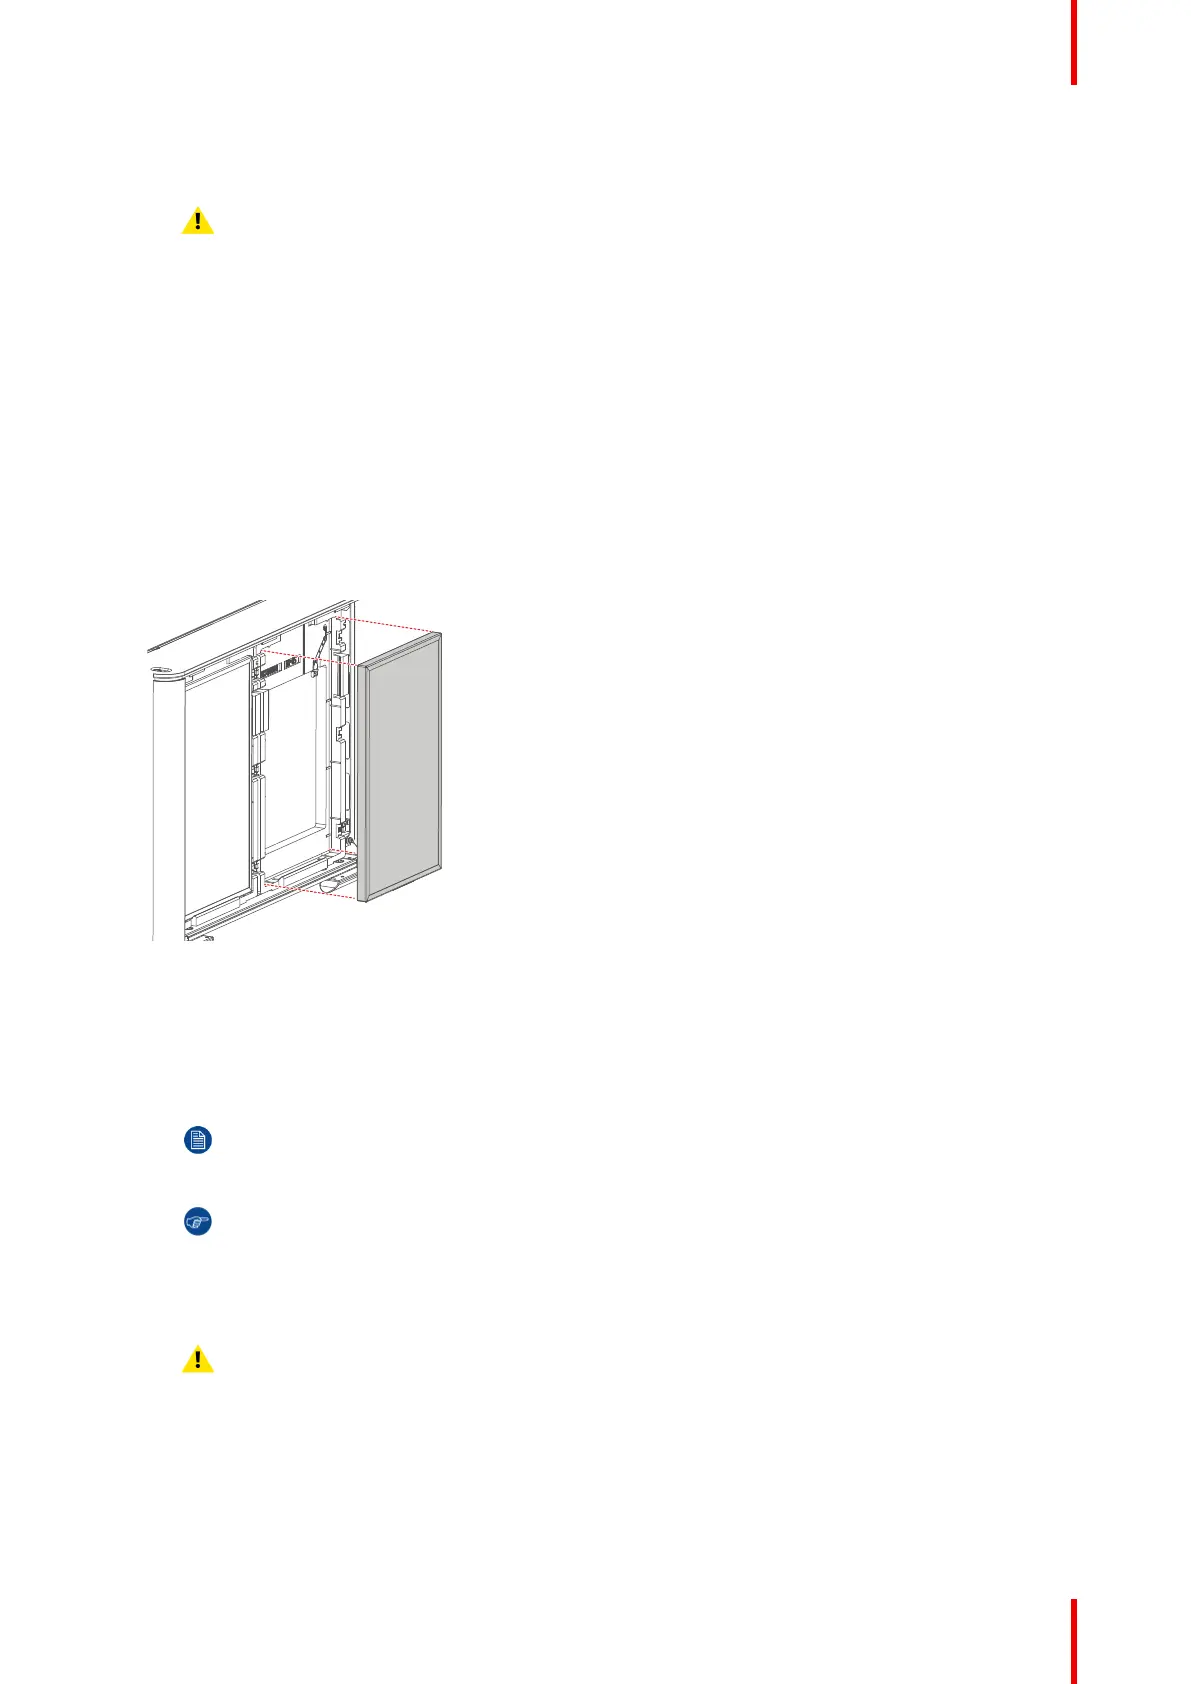
5. Place clean dust filters in the filter holder. Make sure the filters are fully inserted and respect the airflow of
the filter, which should be pointed inwards.
Caution: UNDER NO CIRCUMSTANCES SHOULD WET FILTERS BE INSTALLED BACK
INTO THE PROJECTOR. THIS CAN HAVE SERIOUS SAFETY CONSEQUENCES AS WELL
AS JEOPARDIZE THE INTERNAL OPTICS OF THE SYSTEM.
6. Mount the front cover. For more info, refer to “Mounting the front cover”, page 326.
19.2 Checking the rear dust filters
Required tools
No tools required.
How to check the rear dust filters
1. Remove the rear cover. For more info, refer to “Removal of the rear cover”, page 324.
2. Detach the desired dust filter (left, right or both) from the holder.
Image 19–3
3. Check the “air in” side of the dust filter for dust and/or grease.
In case the filter is contaminated with grease wash and dry the dust filter. See cleaning procedure
“Washing and drying the dust filters”, page 319.
In case the filter contains dust but doesn't feel greasy then vacuum clean the dust filter. See procedure
“Vacuum cleaning of the dust filters”, page 318.
Note: Grease on the filter can build up after several months in an environment contaminated
with greasy air. Note that areas where popcorn is consumed are subject to greasy air.
Tip: Take into account that the time needed to dry the dust filters may be 24 hours or more. For
that, it's recommended to have a second set of dust filters which can be used while cleaning the
first set.
4. Place a clean dust filter in the filter holder. Make sure the filter is fully inserted and respect the airflow of
the filter, which should be pointed inwards.
Caution: UNDER NO CIRCUMSTANCES SHOULD WET FILTERS BE INSTALLED BACK
INTO THE PROJECTOR. THIS CAN HAVE SERIOUS SAFETY CONSEQUENCES AS WELL
AS JEOPARDIZE THE INTERNAL OPTICS OF THE SYSTEM.
5. Mount the front cover. For more info, refer to “Mounting the rear cover”, page 325.
Maintenance procedures


 To Next Page