Uni-Probe LB 490
BERTHOLD TECHNOLOGIES GmbH & Co. KG
2 – 155
Volume 2 2 Installation
2
Slide on the metal cap (Figure 2-10b).
Firmly push the metal onto the extension module and close the
connection clamp (Figure 2-10c). Tighten the nut (wrench size
13) such that there is no gap any more between both modules.
Tighten by approx. 2 turns, but do not use any force.
Then install the end module as described above for a regular
module. Please keep in mind that the interior of the detector of
this extension module may protrude a little from the module.
This scintillator material must not be damaged.
Then connect the detector again, as described in "3 Electrical
Installation" on page 2–183.
First measurements may be carried out three hours after installa-
tion, at the earliest.
2.4.3 Point Detectors
Function failure due to damaged detector
The detector fixture must not transfer any vibrations or heat onto
the detector; otherwise the detector will be disturbed or may fail
altogether.
Therefore, install the fixture on a vibration-free support or attenu-
ate possible vibrations using vibration absorbers. Make sure to pre-
vent heat transfer to the detector via the detector fixture by using
suitable insulating materials.
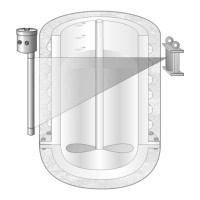
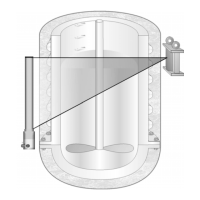
The combination of point detector and point source is typically used
for two different types of application: for measurement of a limit
level (Figure 2-11) or for continuous level measurement (Figure
2-12).
 Loading...