(2) Click [New Port].
5
Click [Next].
6
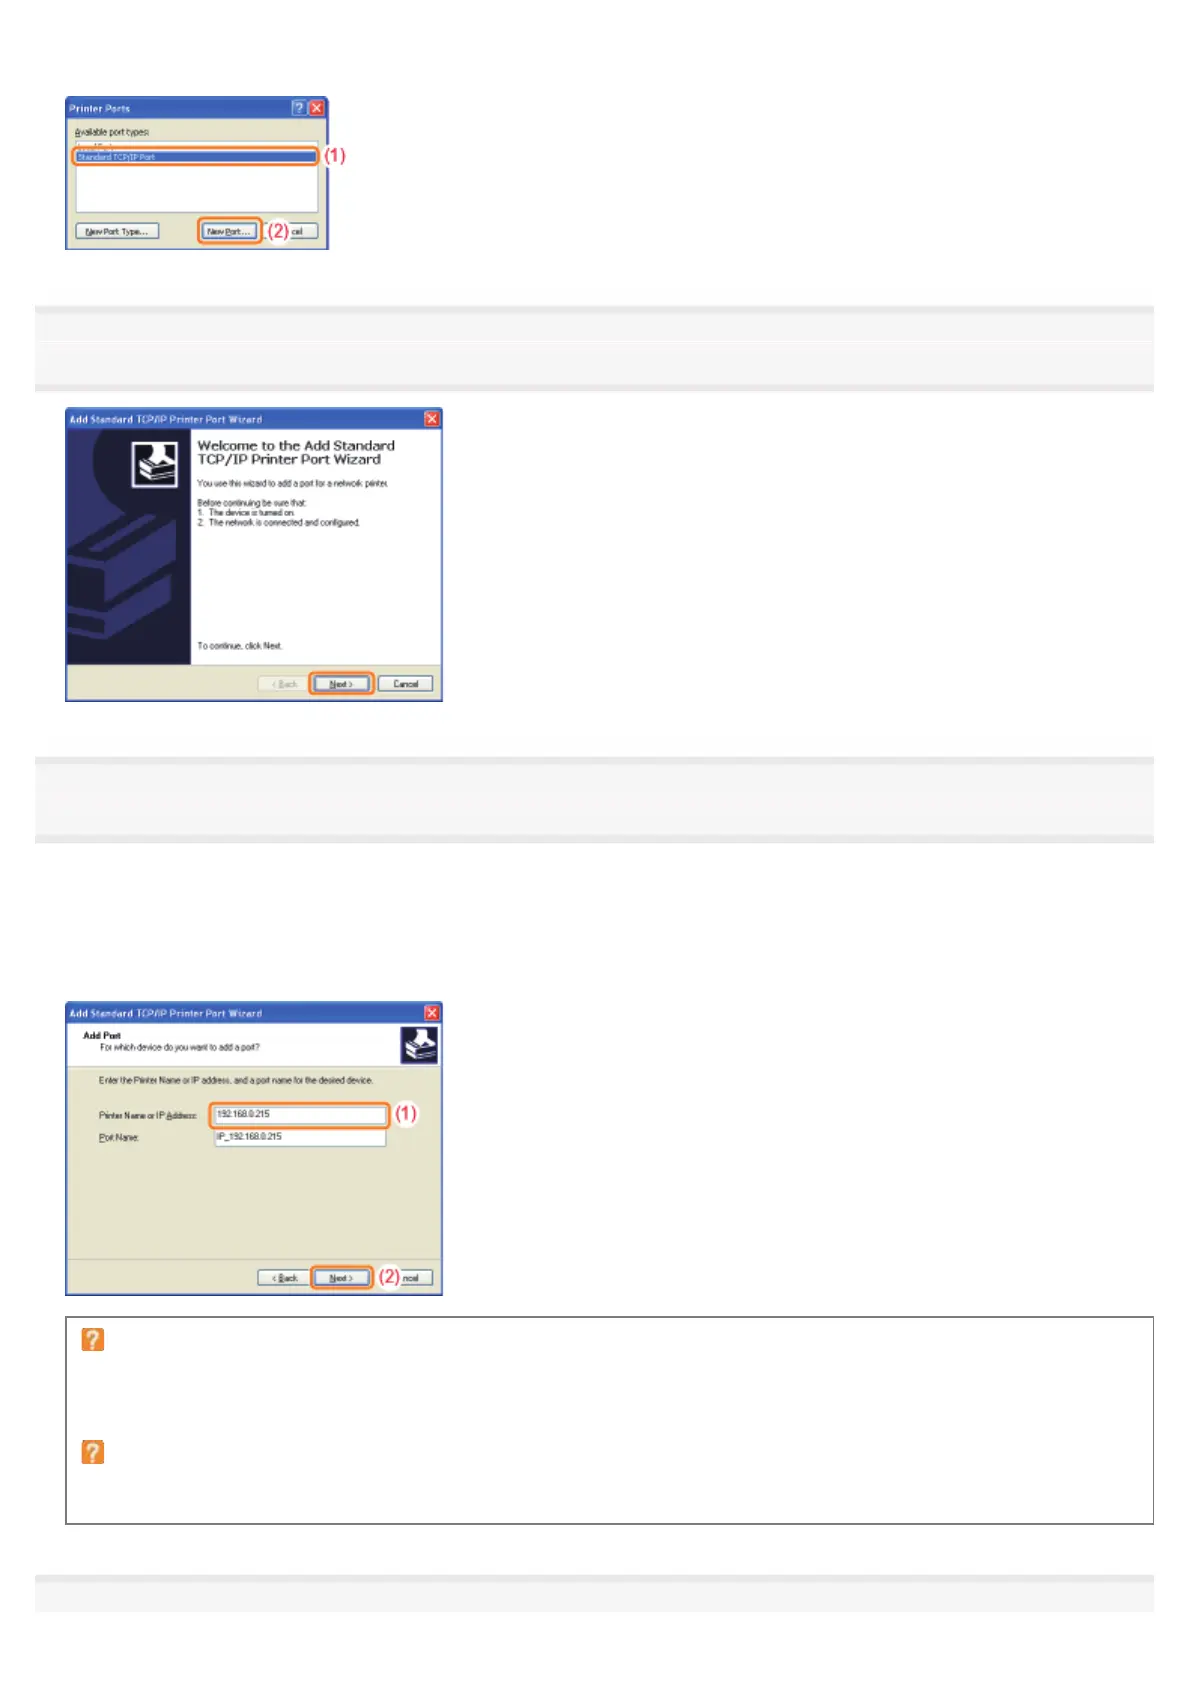
Enter the new IP address or name of the printer.
(1)
Enter the IP address or name
*
of the new printer in [Printer Name or IP Address].
*
The DNS name to be registered on the DNS server (up to 78 characters)
(2) Click [Next].
If you are not sure about the value to be entered in [Printer Name or IP Address]
The value to be entered varies depending on how the IP address of the printer was set.
For more details, see "Values for Setting a Port" or ask your network administrator.
If the printer is not detected
Follow the on-screen instructions and search again for the printer, or see "Basic Operations/Various Information for
Windows" and specify [Device Type].
7
㻞㻤㻝㻌㻛㻌㻠㻡㻞