Begin with the first port on the management unit. Next, configure both ports on each subsequent unit.
Finally, return to the management unit and configure the last port. (refer to the following example.)
6 Connect the units using stacking cables.
NOTE: The device does not require special stacking cables. The cables used to connect the data
ports are sufficient.
7 Reload the stack one unit at a time.
EXEC Privilege mode
show system brief
Start with the management unit, then the standby, then each of the members in order of their assigned
stack number (or the position in the stack you want each unit to take).
Allow each unit to completely boot, and verify that the stack manager detects the unit, then power the
next unit.
Example of a Syslog
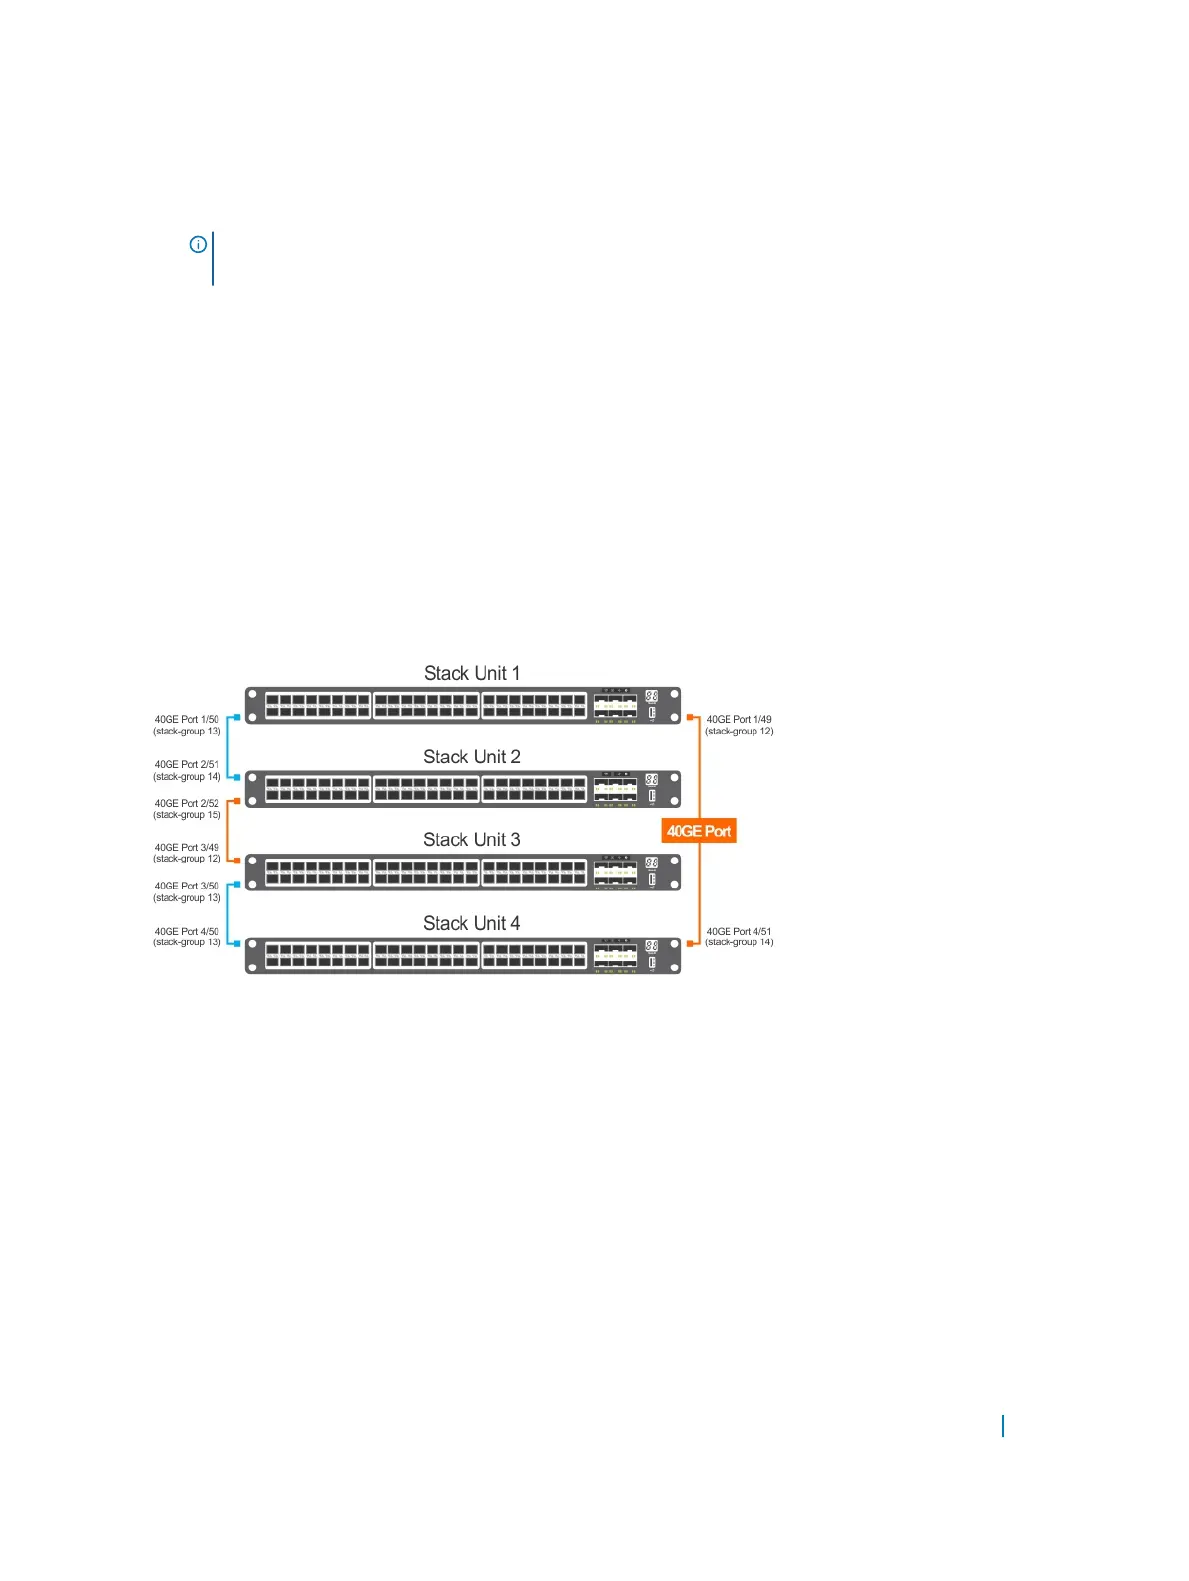
Figure 126. Creating a New Stack
In the above example, stack unit 1 is the master management unit, stack unit 2 is the standby unit. The cables
are connected to each unit.
Configure the stack groups on the units in the following order:
• Configure the first stack group on unit 1: stack-unit 1 stack-group 13
• Configure the stack groups on unit 2: stack-unit 2 stack-group 14 and stack-unit 2 stack-
group 15
• Configure the stack groups on unit 3: stack-unit 3 stack-group 12 and stack-unit 3 stack-
group 13
• Configure the stack groups on unit 4: stack-unit 4 stack-group 13 and stack-unit 4 stack-
group 14
• Configure the final stack-group on unit 1 to complete the stack: stack-unit 1 stack-group 12
Stacking 1024
 Loading...