www.dtec.net.au
Chapter 4: ‘Setup’ Menu Options
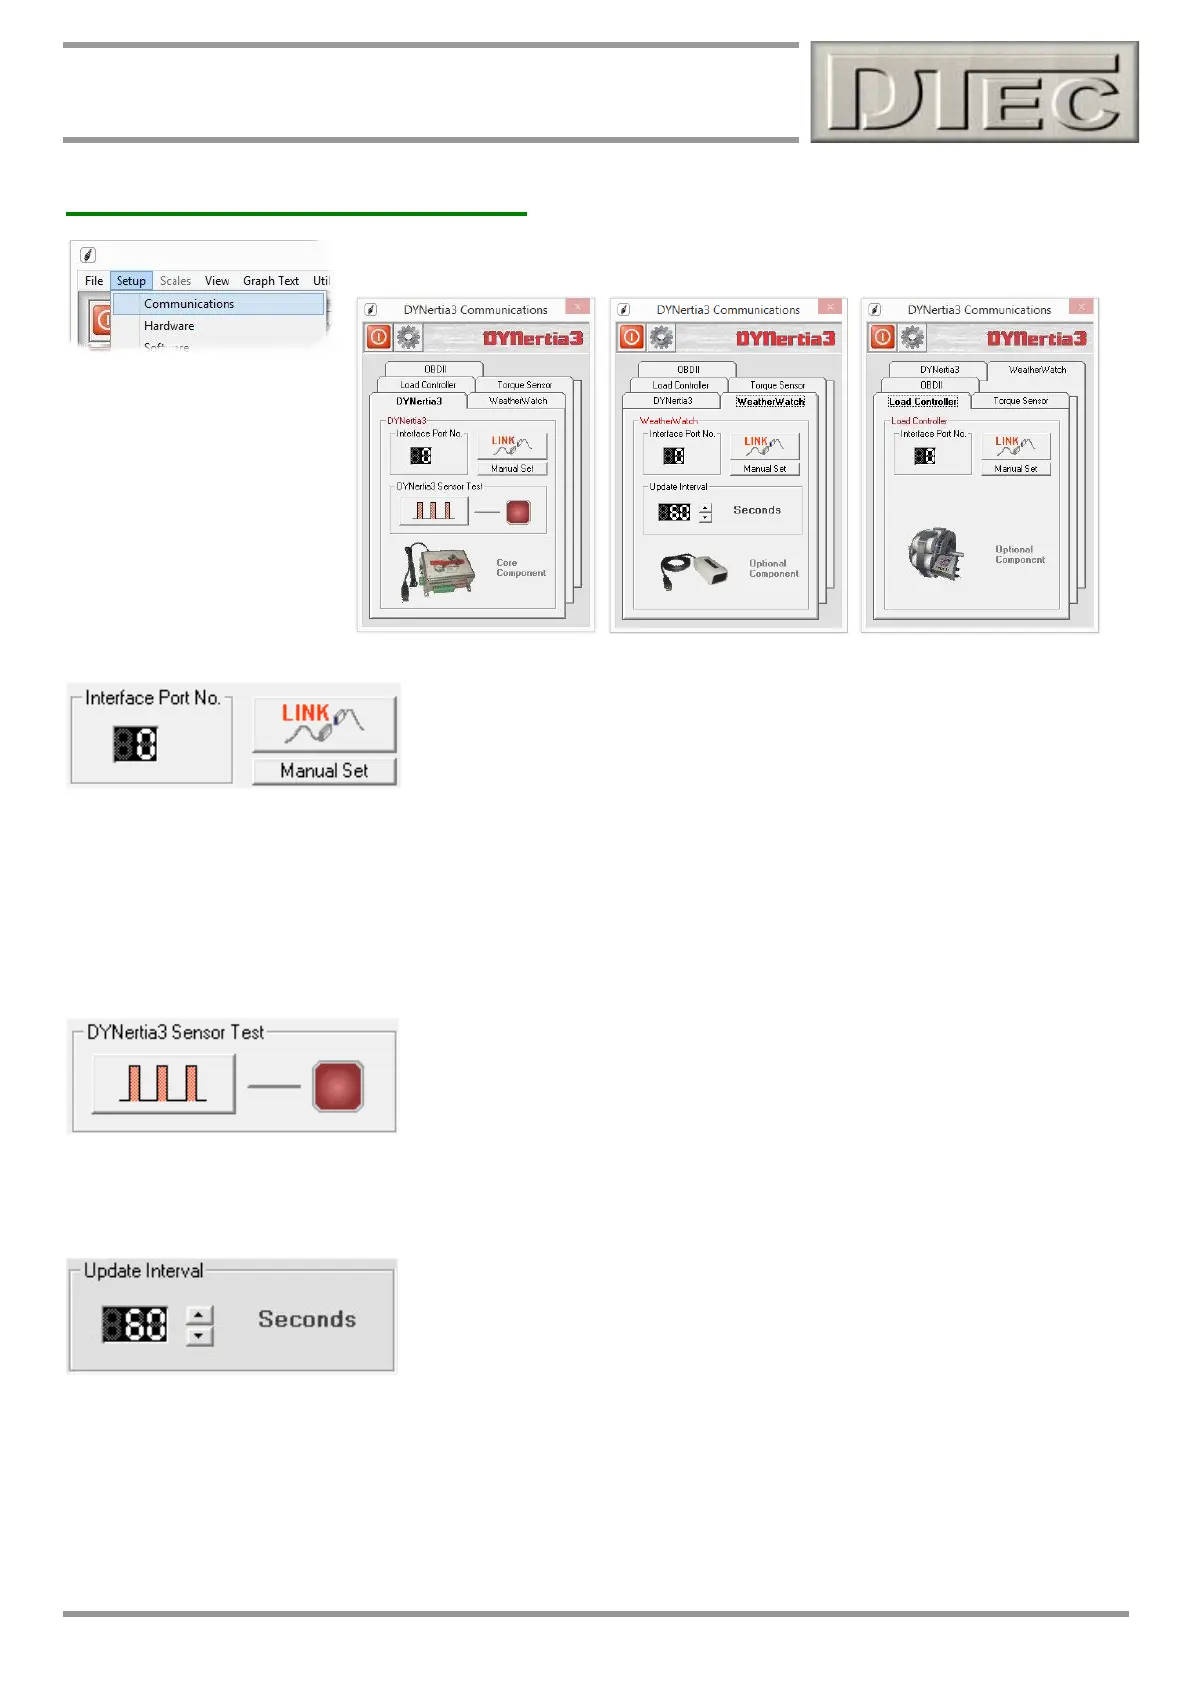
Communications- Setup Menu
Select each tab in turn depending on device being linked.
Interface Port No.: DYNertia3 software needs to know which USB PC port the
hardware has been allocated to. Unfortunately, when installing particular USB
devices, modern PC’s allocate them to almost any communication port number
and will even change this depending on what USB socket is being plugged into.
See “Link” below.
Link Button: The easiest way to set the “Port No.” is to plug in the hardware and press the “Link” Hardware button. It
will step through all of the port options and try to establish communication with the hardware, when found, the port
setting is automatically saved and should remain valid for the USB socket you have plugged into, if you use another
socket you may need to search again.
Manual Set Button: If you know the port that is allocated you can manually set the number.
DYNertia3
DYNertia Sensor Test: Designed as a quick check that the sensor is working
correctly and DYNertia3 is receiving the signal. The indicator and an audible
noise can be used to confirm sensor operation during rotation. The indicator
lamp/noise triggers for a short time as the magnet approaches the sensor (only
on approach).
Note: The test will not work at high speed (lamp won’t flash); it is only a setup test at low very RPM.
Weather Watch
Weather Watch is an optional USB device that will allow weather data
(temperature, pressure and humidity) to be automatically imported into
DYNertia3 rather than manually entering from a third party weather station.
Update Interval: Sets how often the weather data is imported into DYNertia3 to update the correction values.
Note: See chapter “Weather Corrections” for full details on ‘Weather Watch’ weather station.
Tip- The menu option “Utilities/Current Weather Data” allows you to view the live data from the optional ‘Weather
Watch’ station including RAD (Relative Air Density).