6.2.2 Wall mounting
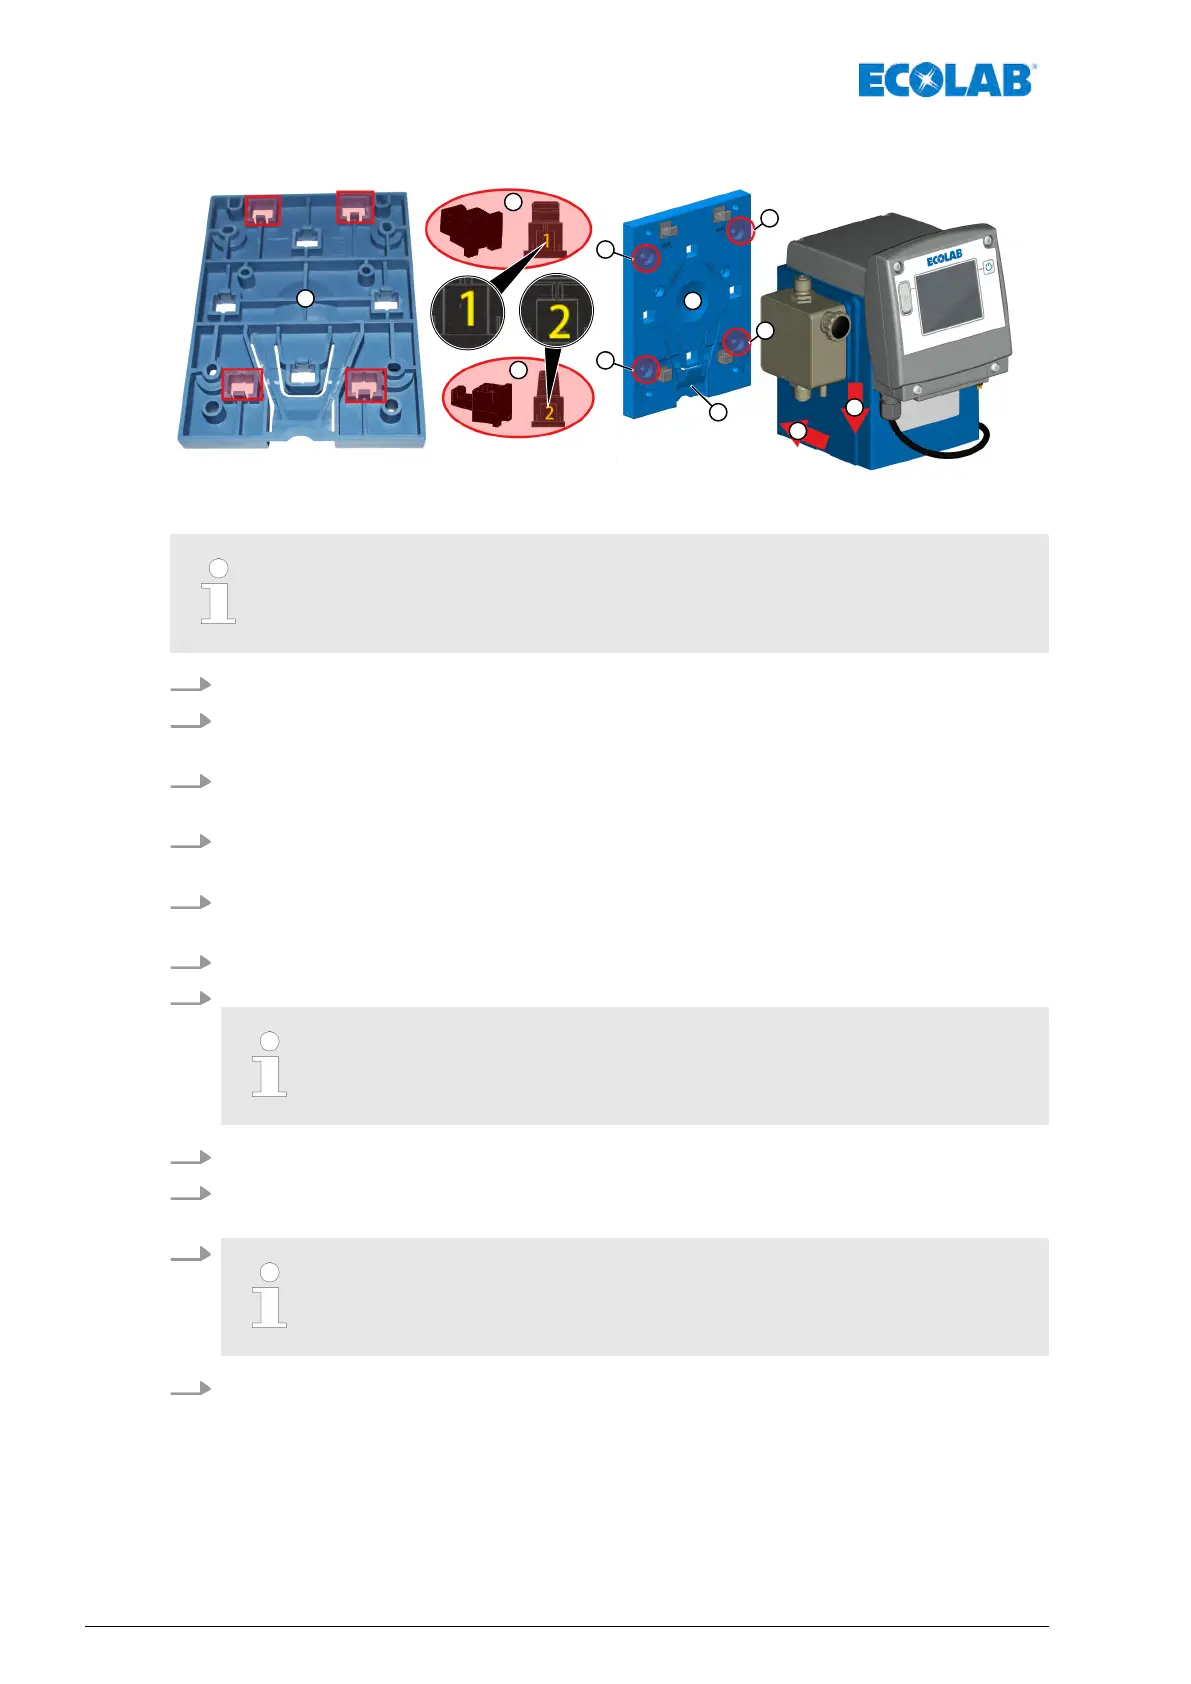
Fig. 9: Preparations for wall mounting
For wall mounting, fastening elements (supplied) with code 1
(Fig. 9, pos. 2) and code 2 (Fig. 9, pos. 3) are used.
1. T
urn the mounting plate over.
2. Insert fastening elements (code: 1, Fig. 9, pos. 2) from behind into the two upper
openings marked “wall”
(= wall mounting)and engage into position.
3. Insert fastening elements (code: 2, Fig. 9, pos. 3 ) from behind into the two lower
openings marked “wall” and engage into position.
4. T
urn the mounting plate over again and hold it against the required mounting
position.
5. Use the mounting plate as a template and mark the required boreholes with a sharp
pencil (
Fig. 9, pos. 5).
6. Drill the holes.
7. Fasten the mounting plate securely to the wall.
The hooks of the fastening elements must point upwards.
8. Place the pump onto the hooks on the mounting plate from above.
9. Slide the pump downwards onto the mounting plate until it engages with an audible
click.
10.
By pressing down the retaining bracket (Fig. 9, pos. 6), the pump can
be released from the mounting plate again.
11. Attach the connecting lines (hydraulic and electric):
Ä
Chapter 6.3 ‘Hydraulic Installation’ on page 47
Ä
Chapter 6.4 ‘Electrical installation’ on page 56.
Mounting and installation
46417102276 Rev. 5-02.2020