Maintenance 4. Cable
154 N6 Rev.2
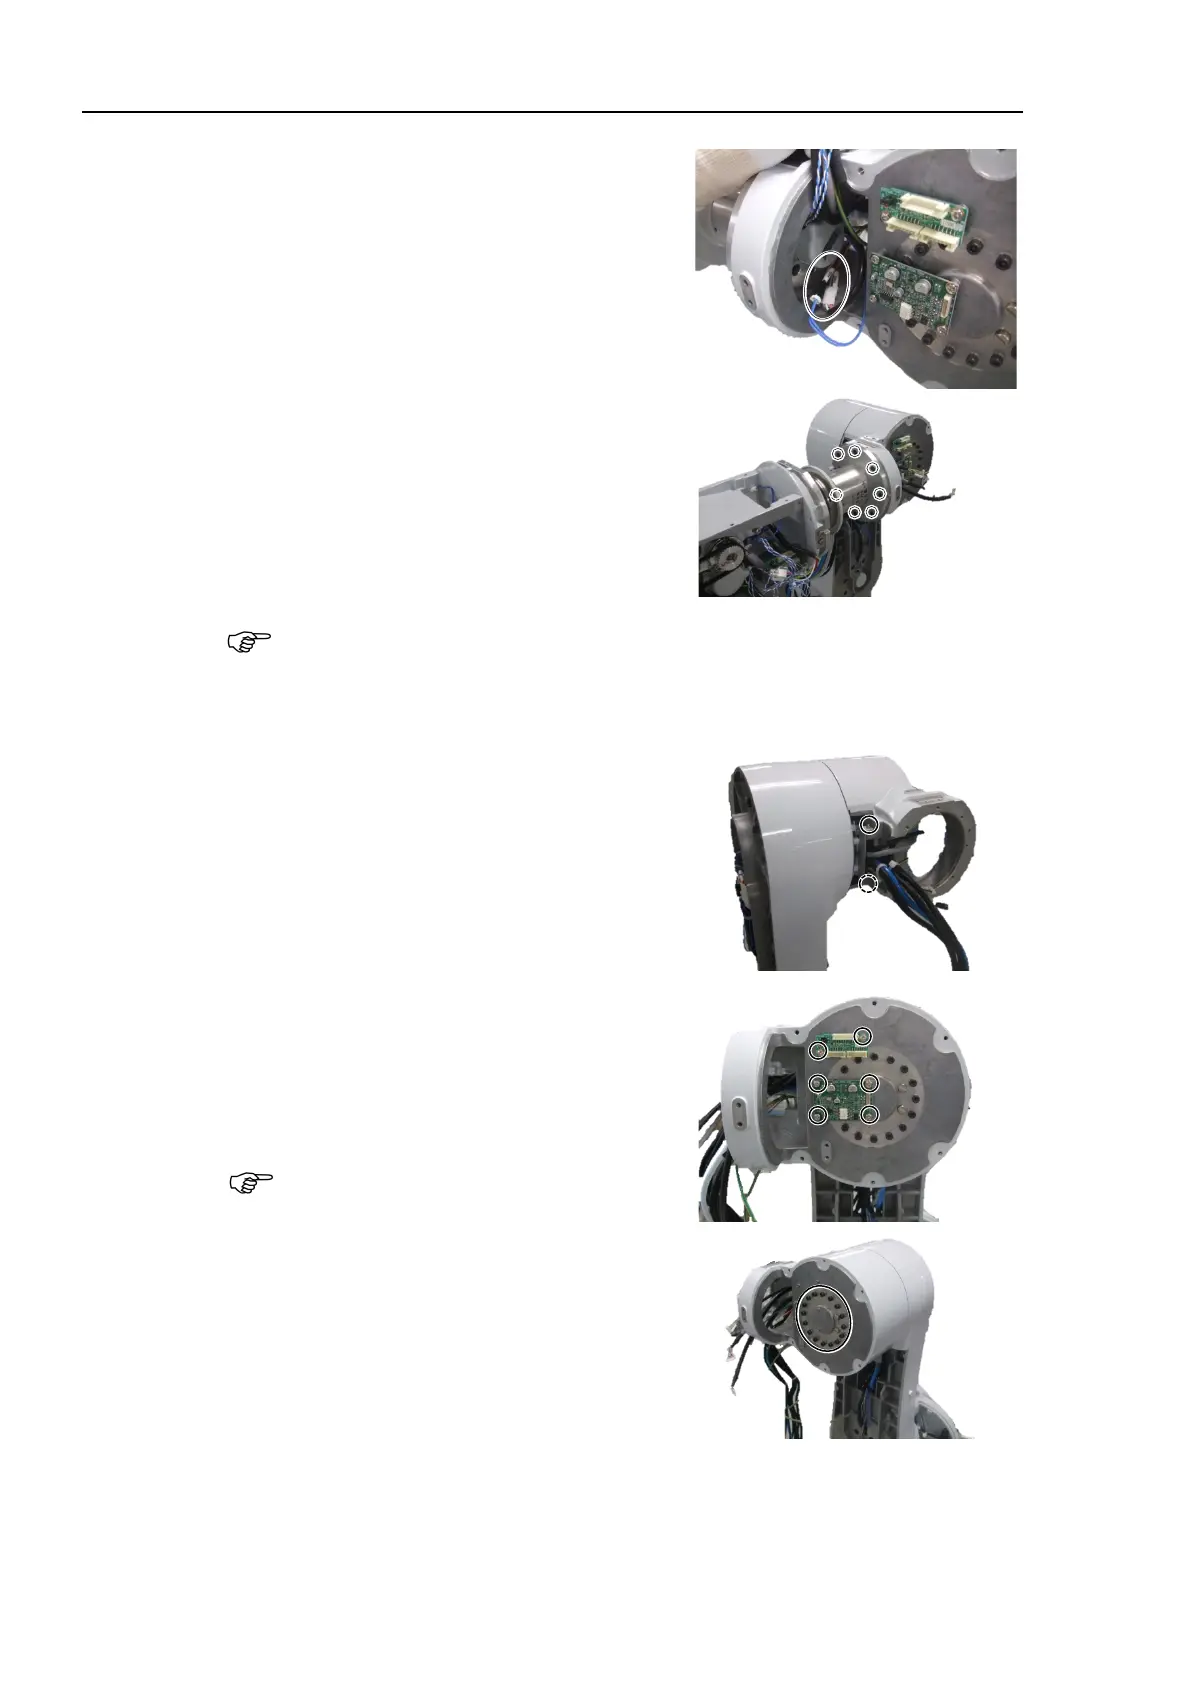
Disconnect the connectors connected to the
Joint #4 actuator unit.
Connectors: PW4, BR4
Remove the Joint #4 actuator unit from the
Arm #3.
Hexagon socket head cap bolts:
7-M4×15 (with plain washer)
Be sure to have at least 2 people to perform the operation since the parts being
heavy.
When removing it, make sure not to lose the positioning pin.
Also, be careful not to catch the cables on the Joint #4 actuator unit.
Remove the J3 cable fixing plate fixed on
the Arm #3.
Hexagon socket head cap bolts: 2-M3×6
Remove the encoder board 3 and the
control board 2.
Cross recessed binding head machine
screws: 6-M3×6
Be careful not to lose the removed board
Remove the Arm #3.
Hexagon socket head cap bolts:
16-M4×30 (with plain washer)

 Loading...


