Maintenance 4. Cable
182 N6 Rev.2
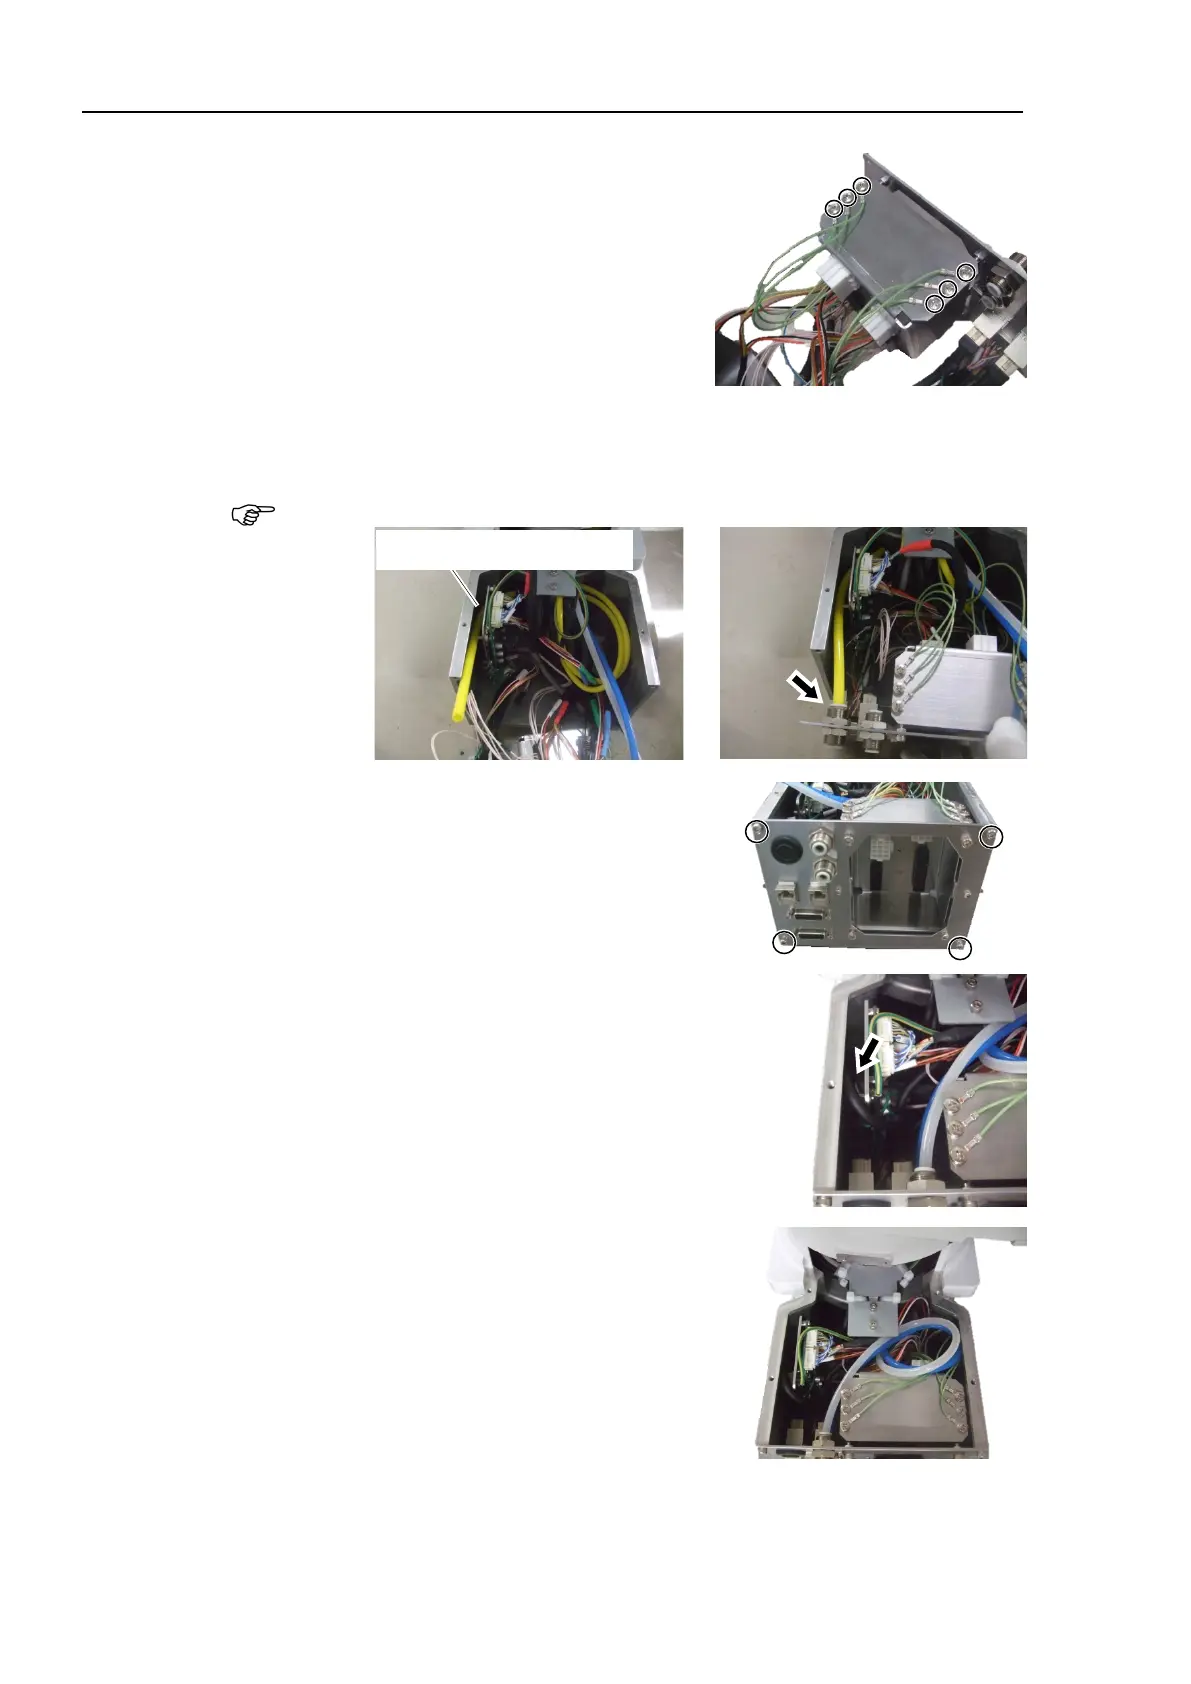
Install the six ground wire terminals from the
connector X11, X12 to the box
-shaped plate.
Cross recessed binding head machine screws:
6-M4×8
Tightening torque: 0.9 ± 0.1 N·m
For cleanroom model, install the yellow air tube as shown in the following pictures.
Pass the air tube through the
rear side of the board fixing
plate, then connect to the
fitting
s.
Be careful not to bend or collapse the air tubes.
Pass through the rear side of
the board fixing plate
Install the base side plate.
Hexagon socket head cap bolts: 4-M4×8
Tightening torque: 4.0 ± 0.2 N·m
As shown on the right, make sure that the
cable of Ether1 passes through the rear side of
the board fixing plate.
Install the two air tubes as shown on the right,
and connect them to
fittings.
Air1: White
Air2: Blue
For details, refer to Maintenance 4.6. M/C Cable.

 Loading...


