Maintenance 5. Actuator Units
N6 Rev.2 295
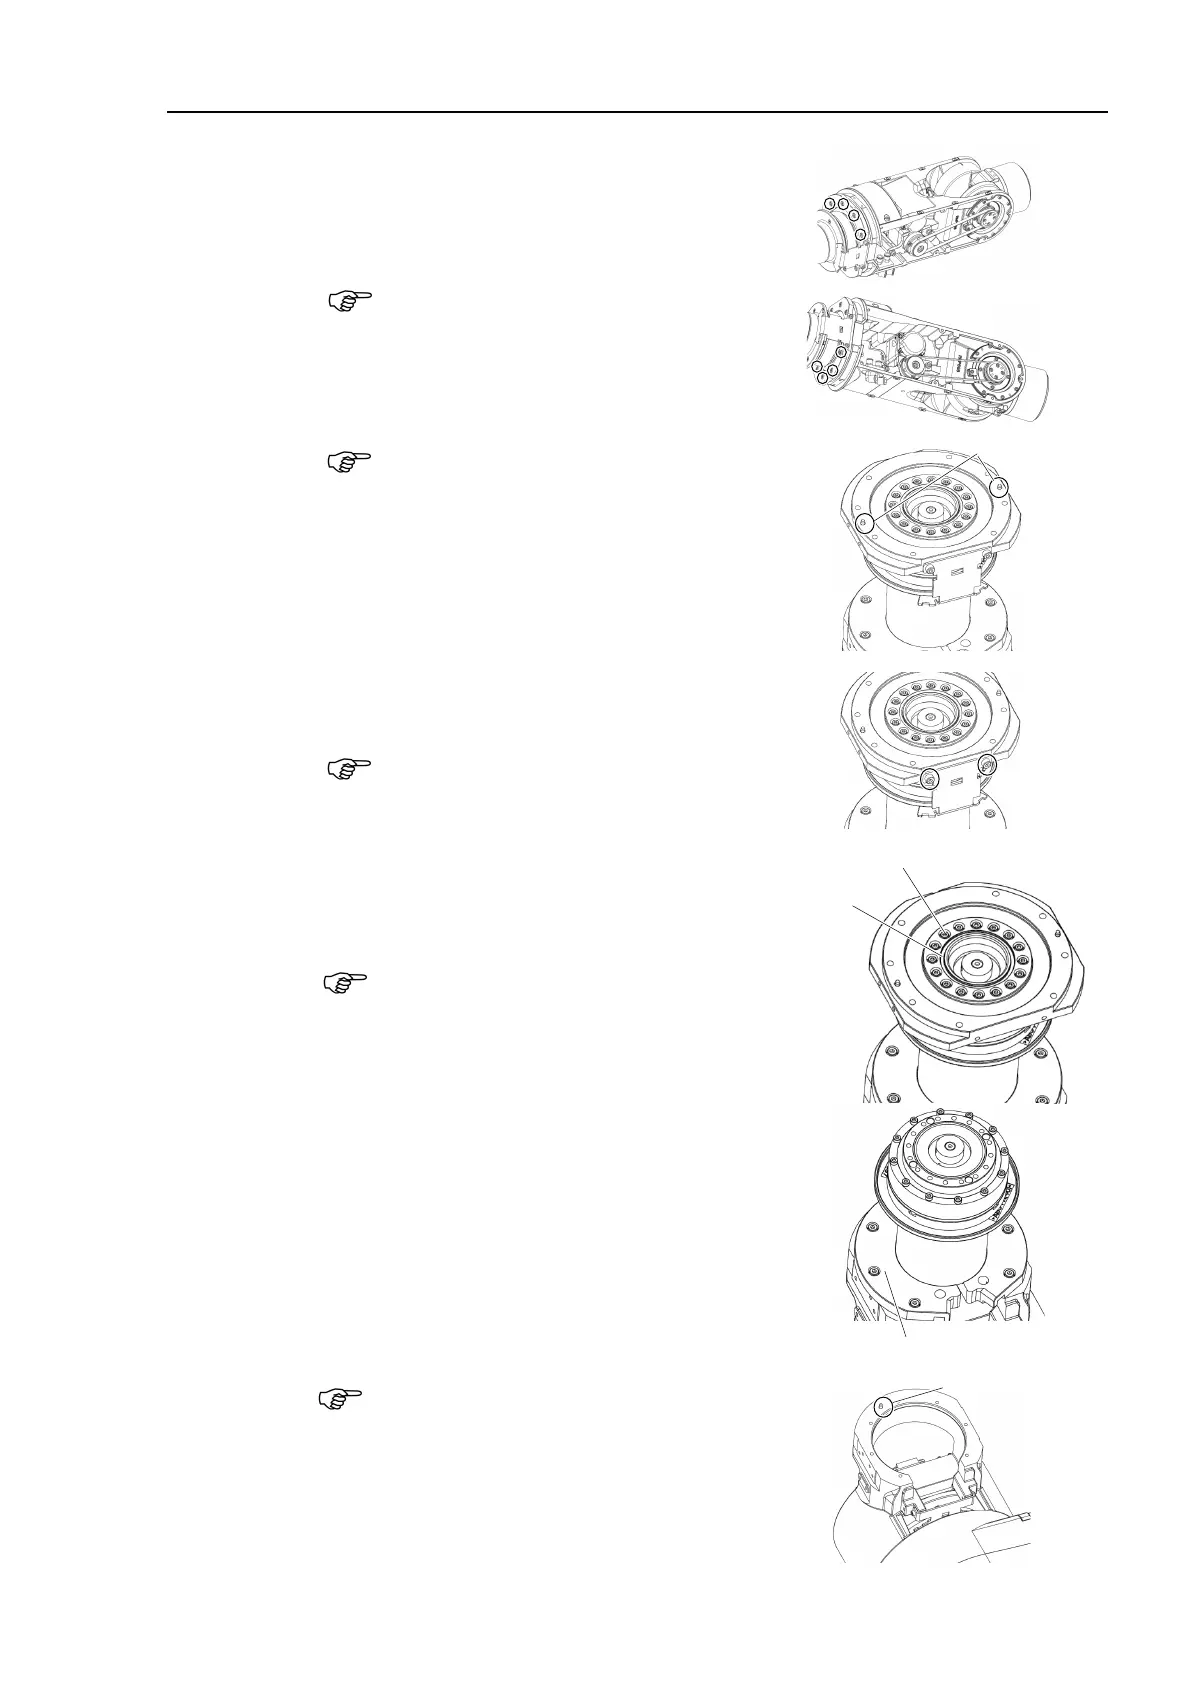
Hexagon socket head cap bolts:
8-M4×20 (with plain washer)
Be sure to have at least 2 people to perform the
operation since the parts being heavy.
hen removing it, make sure not to lose the
Remove the cable fixing plate.
Hexagon socket head cap bolts 2-M4×8
Do not disconnect the cable from the plate.
Remove the Joint #4 flange.
Hexagon socket head cap bolts:
16-M3×20 (with plain washer)
-ring as well.
16-M3×20 (with plain washer)
Remove the Joint #4 actuator unit.
Hexagon socket head cap bolts:
7-M4×15 (with plain washer)
7-M4×15 (with plain washer)
When removing it, make sure not to lose
the
catch the cables on the

 Loading...


