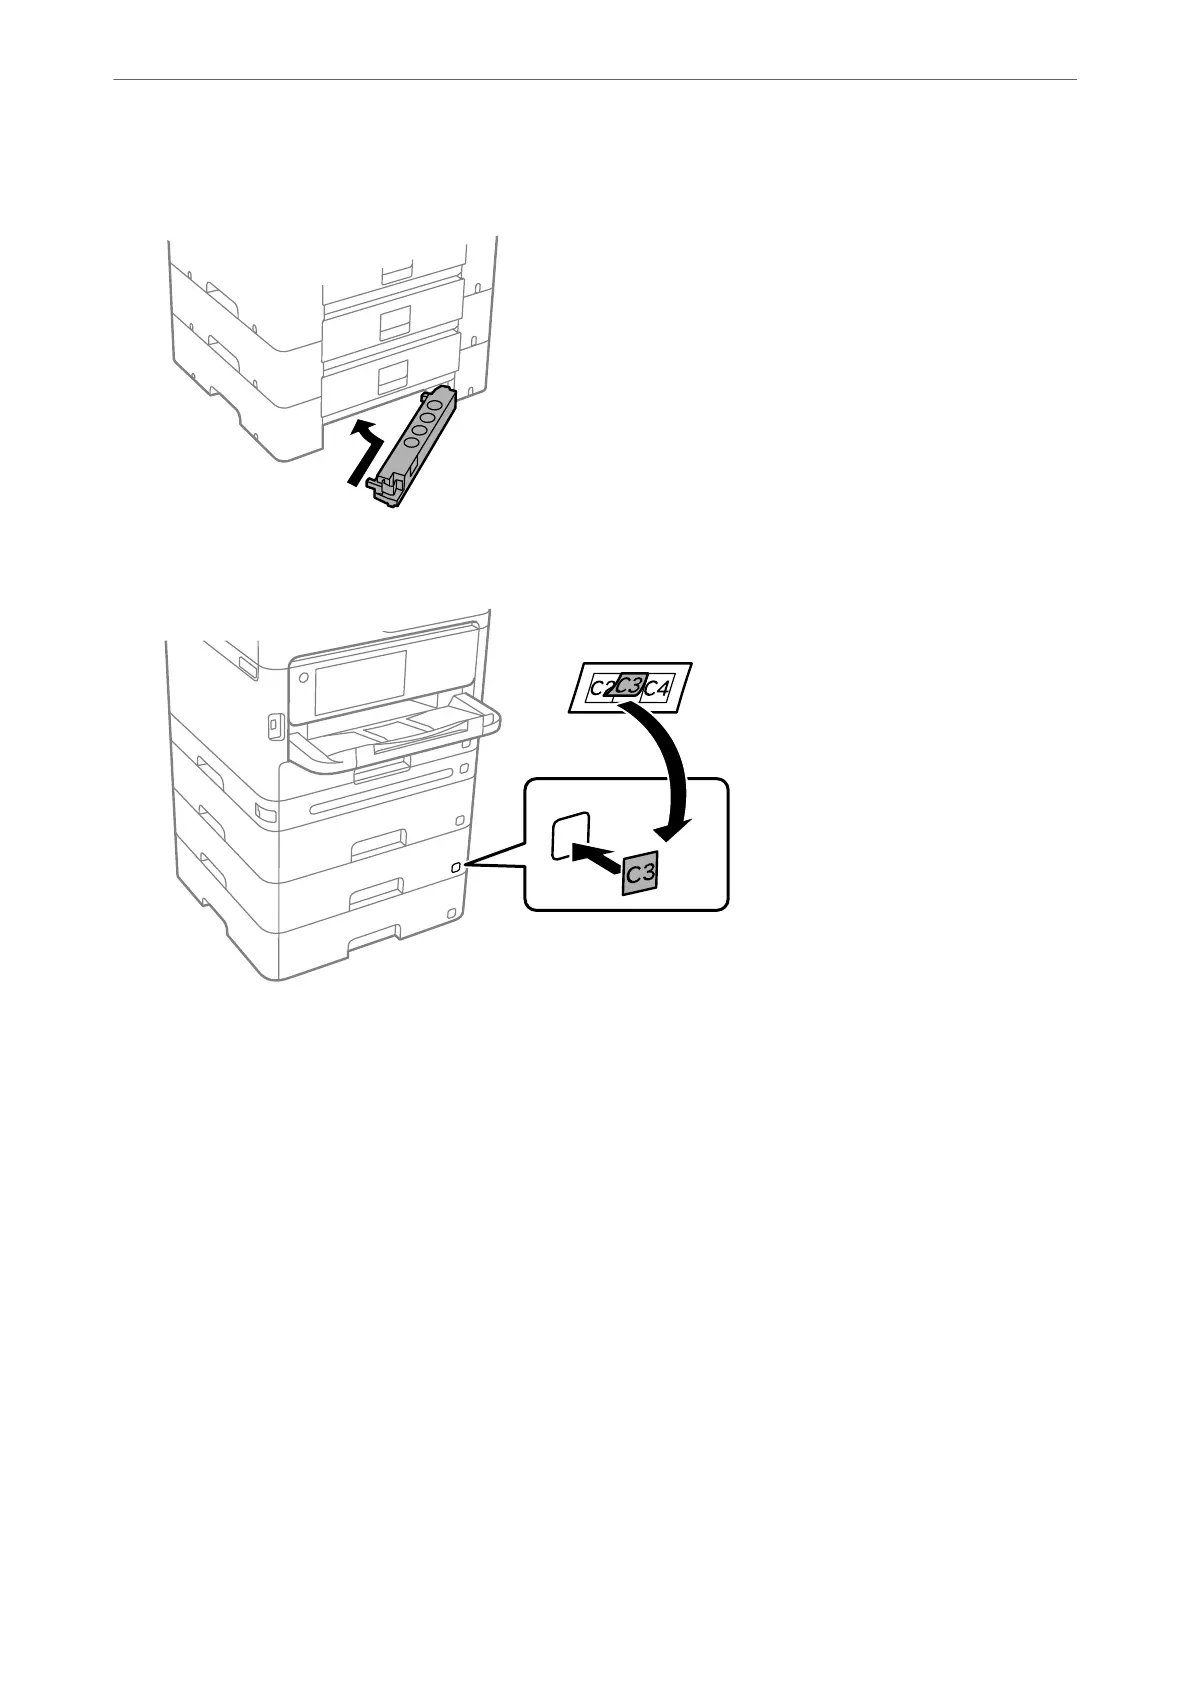
13. Attach the part that you removed in step 4 to the back of the lowest optional paper cassette unit.
14. Place the sticker indicating the cassette number.
15. Reconnect the power cord and any other cables, and then plug in the printer.
16.
Turn on the printer by pressing the
P
button.
17. Pull out and reinsert the optional paper cassette unit to check that the optional paper cassette unit is displayed
on the Paper Setting screen.
Note:
When uninstalling the optional paper cassette unit, turn o the printer, unplug the power cord, disconnect any cables,
and then perform the installation procedure in reverse.
Proceed with the printer driver settings.
Related Information
& “Setting Available Optional Items” on page 64
& “Optional Paper Cassette Unit Code” on page 356
Preparing the Printer and Making Initial Settings
>
Installing the Optional Paper Cassette Units
44

 Loading...


