Model 831 Manual Performing the Measurement 7-5
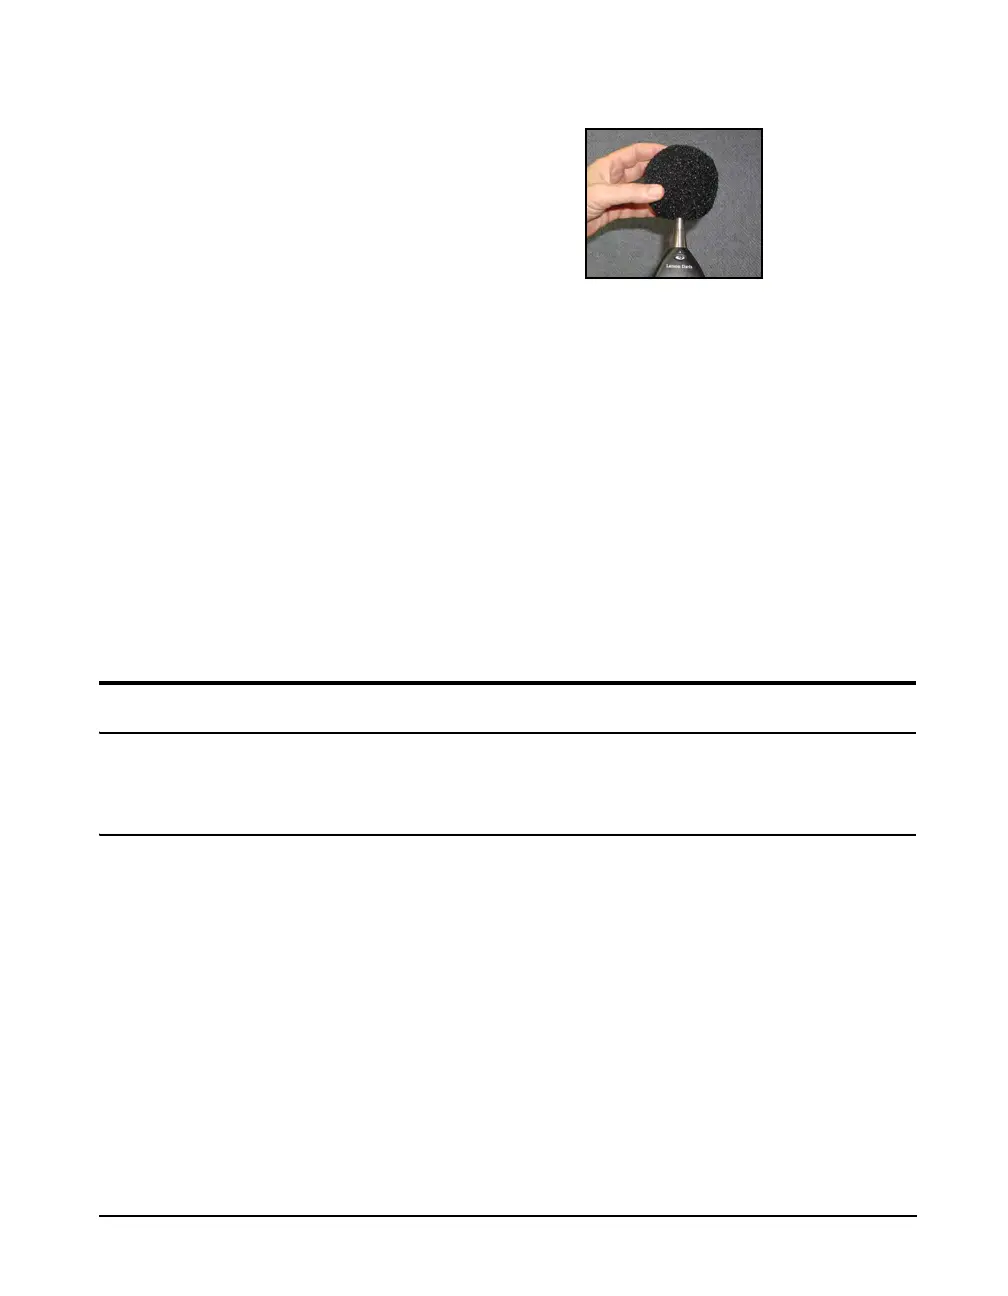
FIGURE 7-4 Placement of Windscreen
Prior to beginning the measurement, select the Live View.
You can now see a live display of the instantaneously
measured data.
The position of the vertical scroll bar
on the right side of the display
indicates the page being displayed
relative to the available pages; first
page at the top, last page at the
bottom.
The data available for display from the Live View is
distributed over three pages (four or five pages with the
optional OBA feature). Use the
8 and 2 keys to
change pages.
Take a minute or so to examine these different displays
before continuing with this example.
Use the softkeys to select the Overall View. Note that the
measurement and display of data has not yet begun and that
the measurement run time displayed at the very top of the
screen indicates 00:00:00:0.
Performing the Measurement
Starting the Measurement
The Model 831 uses a single range
for sound level measurements, so
there is no need to select a range as
part of making a measurement.
Select the Overall Display in order
to observe the measurement results
or accumulation in progress.
The Live Display provides a running sound level
measurement whether or not the 831 is actually performing a
measurement while the Overall Display provides the
measurement actually being made. Select the Overall
Display in order to observe the measurement in progress.
Press the
9 (RUN/PAUSE) key to start the measurement,
which will start the run clock and initiate the measurement
and display of overall data.
Hardkey LED Colors
Two of the hardkeys have colored LEDs behind them, as
indicated below:
• 9 key LED is Green