4.6.1.1 Installing plug-in cards
Note:
The ribbon cables are plugged into the ports (slot 12, 4) on the main board.
The cables are coded to protect against incorrect polarity.
A maximum of 2 cards can be mounted. Accordingly, there are two openings in the back
panel for the card support plates.
Procedure:
4.6.1.2 Connecting a cable in the D-Sub male connector
The ports on the rear panel are plug-in connections. The conductors taken to the
terminals must be as short as possible. The connector housings must be conductive
(containing metal) and therefore act as part of the screen. They must be screwed rmly
into the rear panel as appropriate.
NOTICE
Property damage is possible.
The cable screen with the metal housing must be connected at both cable ends.
Procedure:
1. Open the device (see Chapter 2.4.2).
2. Remove the corresponding dummy plates on the rear panel (2× M3) and replace them
with the support plates for the plug-in cards.
3. Insert the ribbon cables into the appropriate ports on the main board.
4. Close the device again.
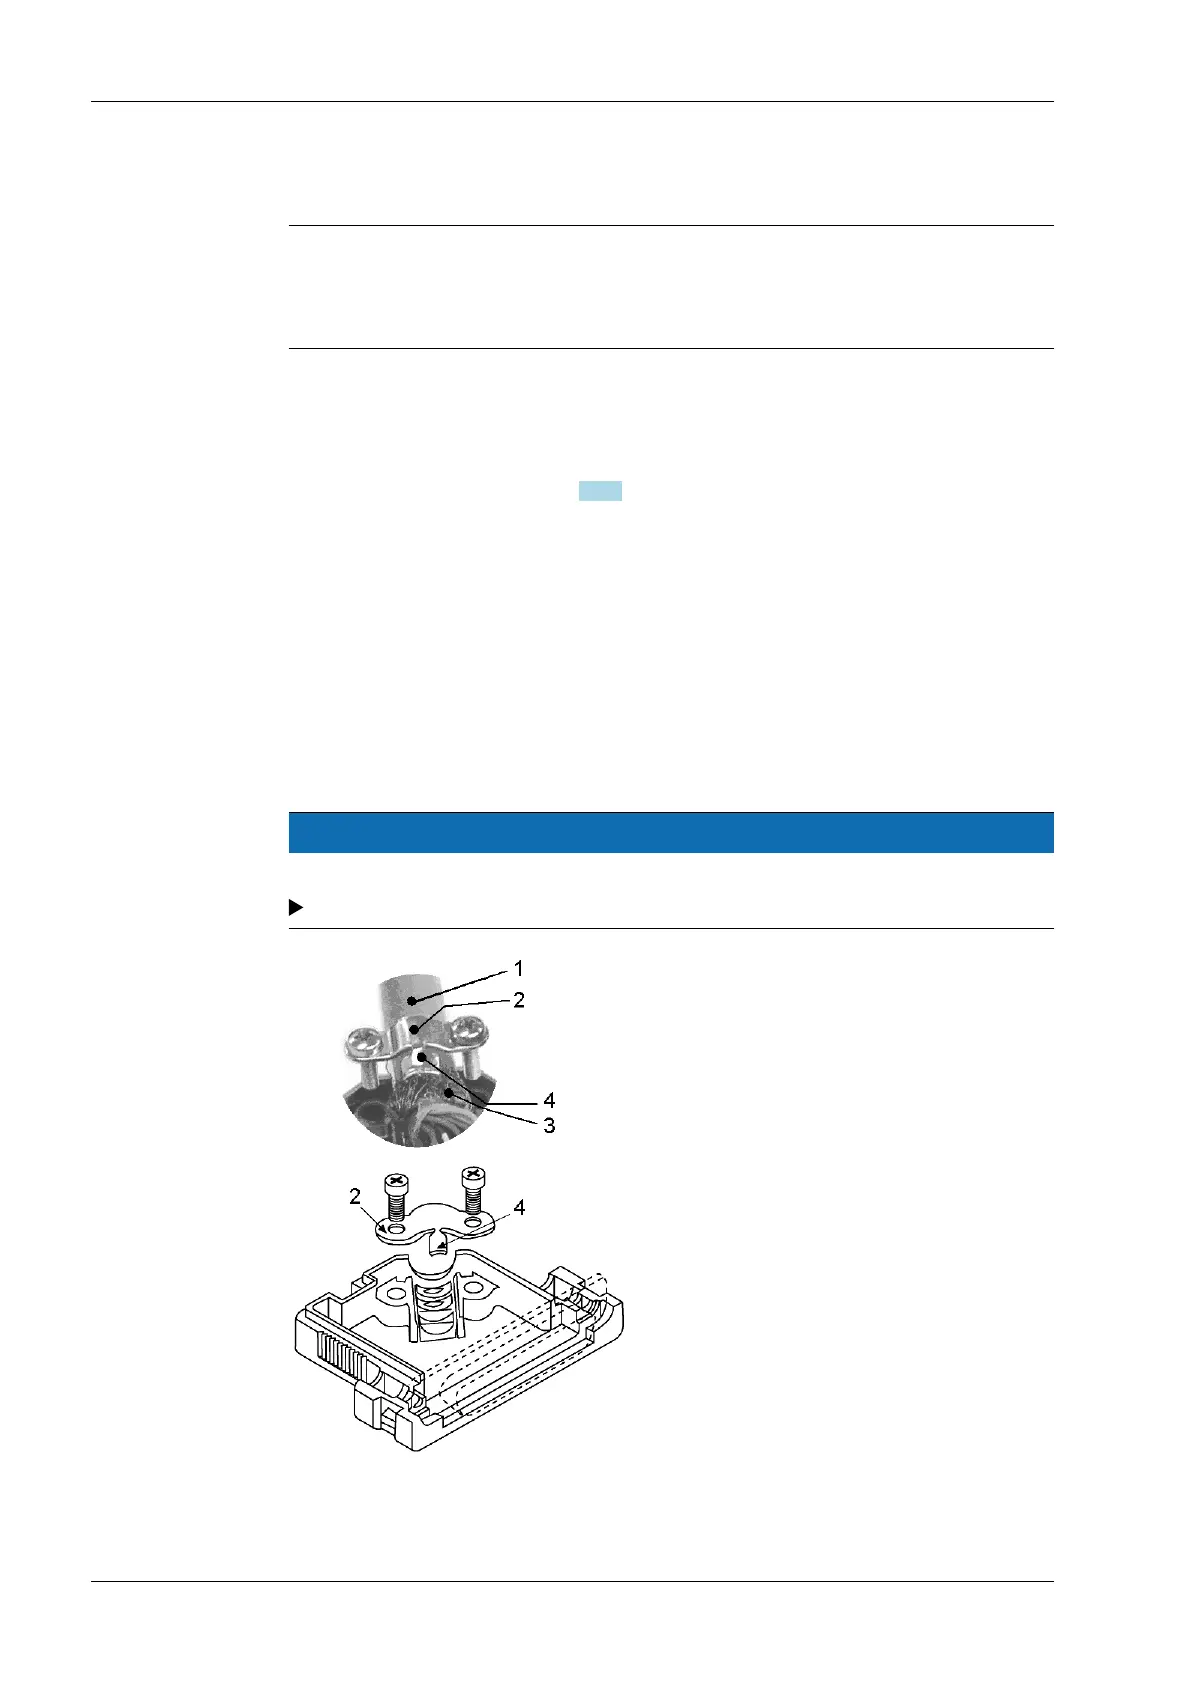
1. Open the connector housing (snap clamps).
X3 Process Indicator PR 5410 4 Device installation
Minebea Intec EN-56