8.4 Nozzle Protrusion Adjustment - Automatic
Adjustment
8.4.1 Carriage Home Position Calibration
WARNING
This procedure requires visual inspection of the machine while it is moving.
Wear eye protection.
IMPORTANT
For proper calibration, ensure the nozzle protrusion is set correctly.
The rst time the E-Multi is installed, and any time it is transferred to a new
machine with a dierent mold, the carriage home position and contact force
must be set.
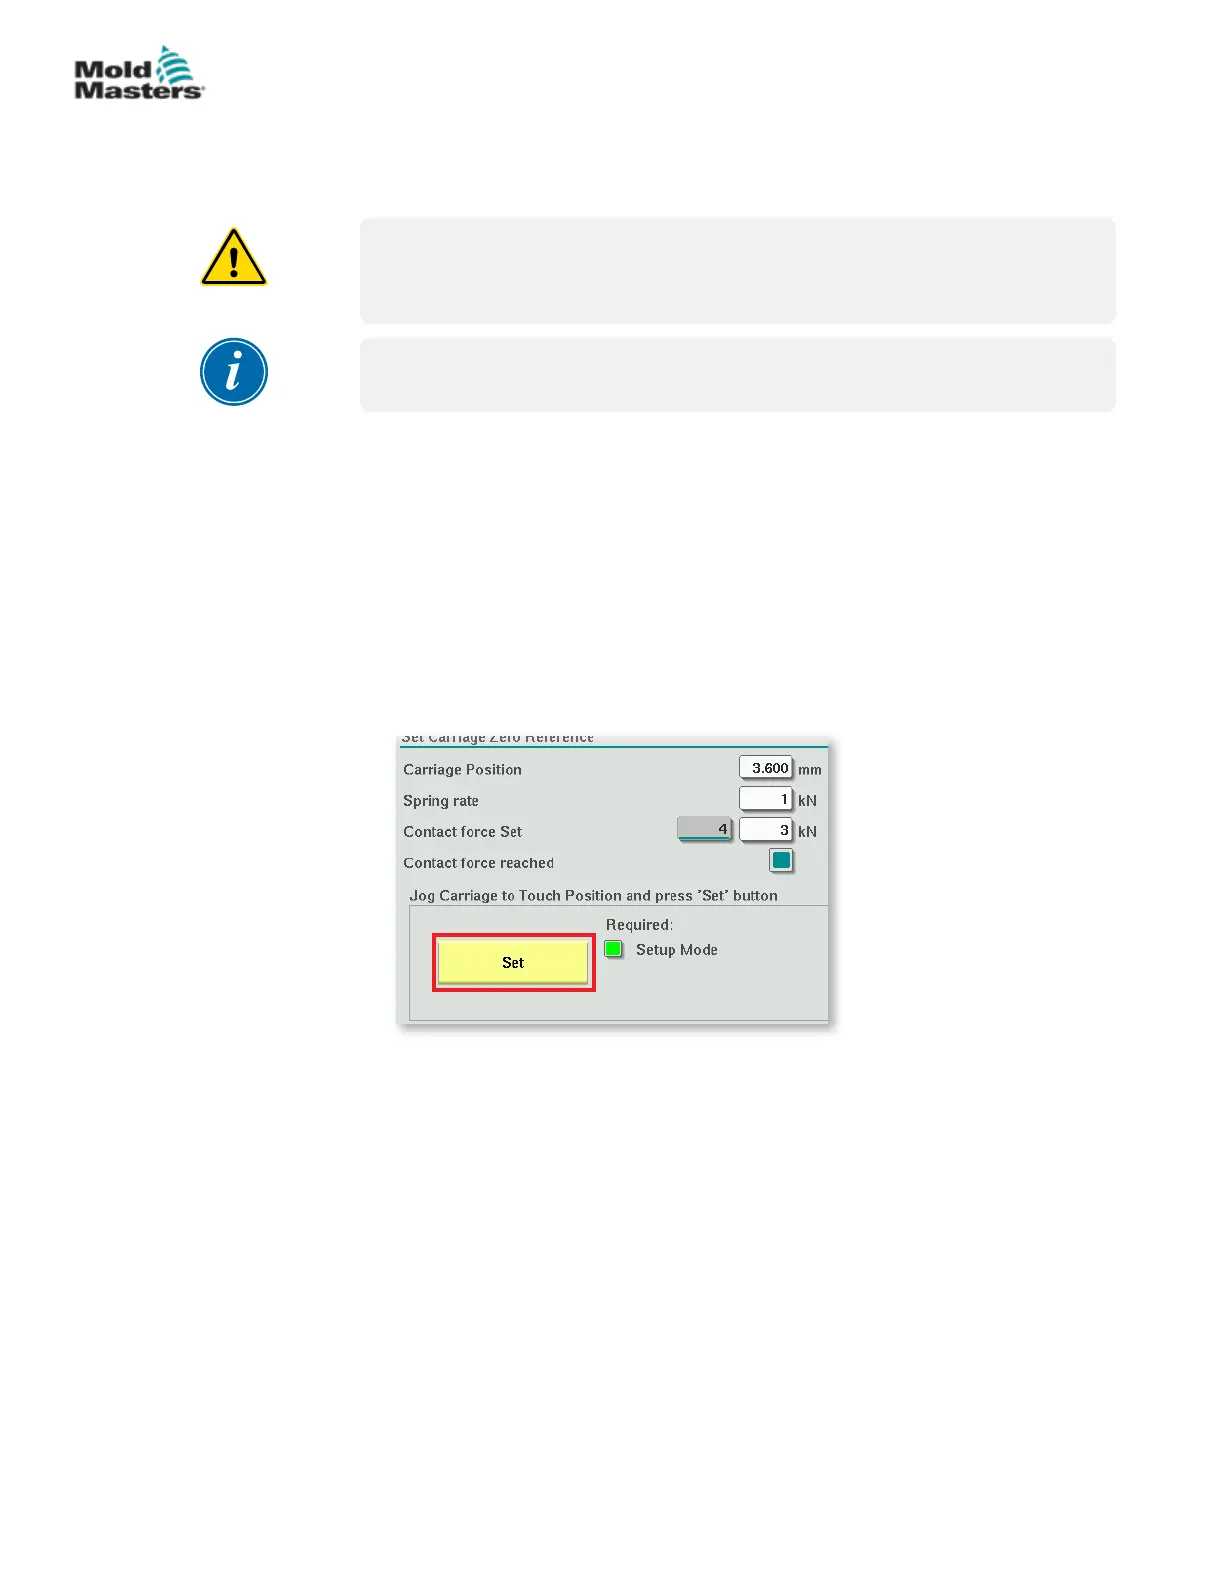
8.4.2 Manual Calibration
1. Put the E-Multi into setup mode.
2. Navigate to the Reference Settings page.
3. Move the carriage forward until the nozzle is just touching the manifold
inlet.
4. Choose Set on the screen.
5. Press the [F4] button on the controller to increase nozzle contact force.
Continue pressing until the motor stops moving and the Contact force
Set display eld stops increasing. The value in the display eld is the
maximum contact force that can be generated with the current setup.
6. Tap the Contact force set entry eld (the eld to the right) to set the
desired nozzle contact force.
A typical setting is 25-50% of the maximum observed in the previous step.
7. Put the controller in Manual mode.
8. Use the [F3] button to move the nozzle away from the mold until there is a
gap.
9. Press and hold the [F4] button to move the nozzle towards the mold until
it stops.
Verify that the contact force is equal to or slightly greater than the set
point chosen in step 6.
8-3
© 2020 Mold-Masters (2007) Limited. All Rights Reserved.
MAINTENANCE
E-Multi Controller User Manual