Printing in the Windows Environment 2-143
2.8 Appendix: Manual Installation Process of the Printer Driver
2
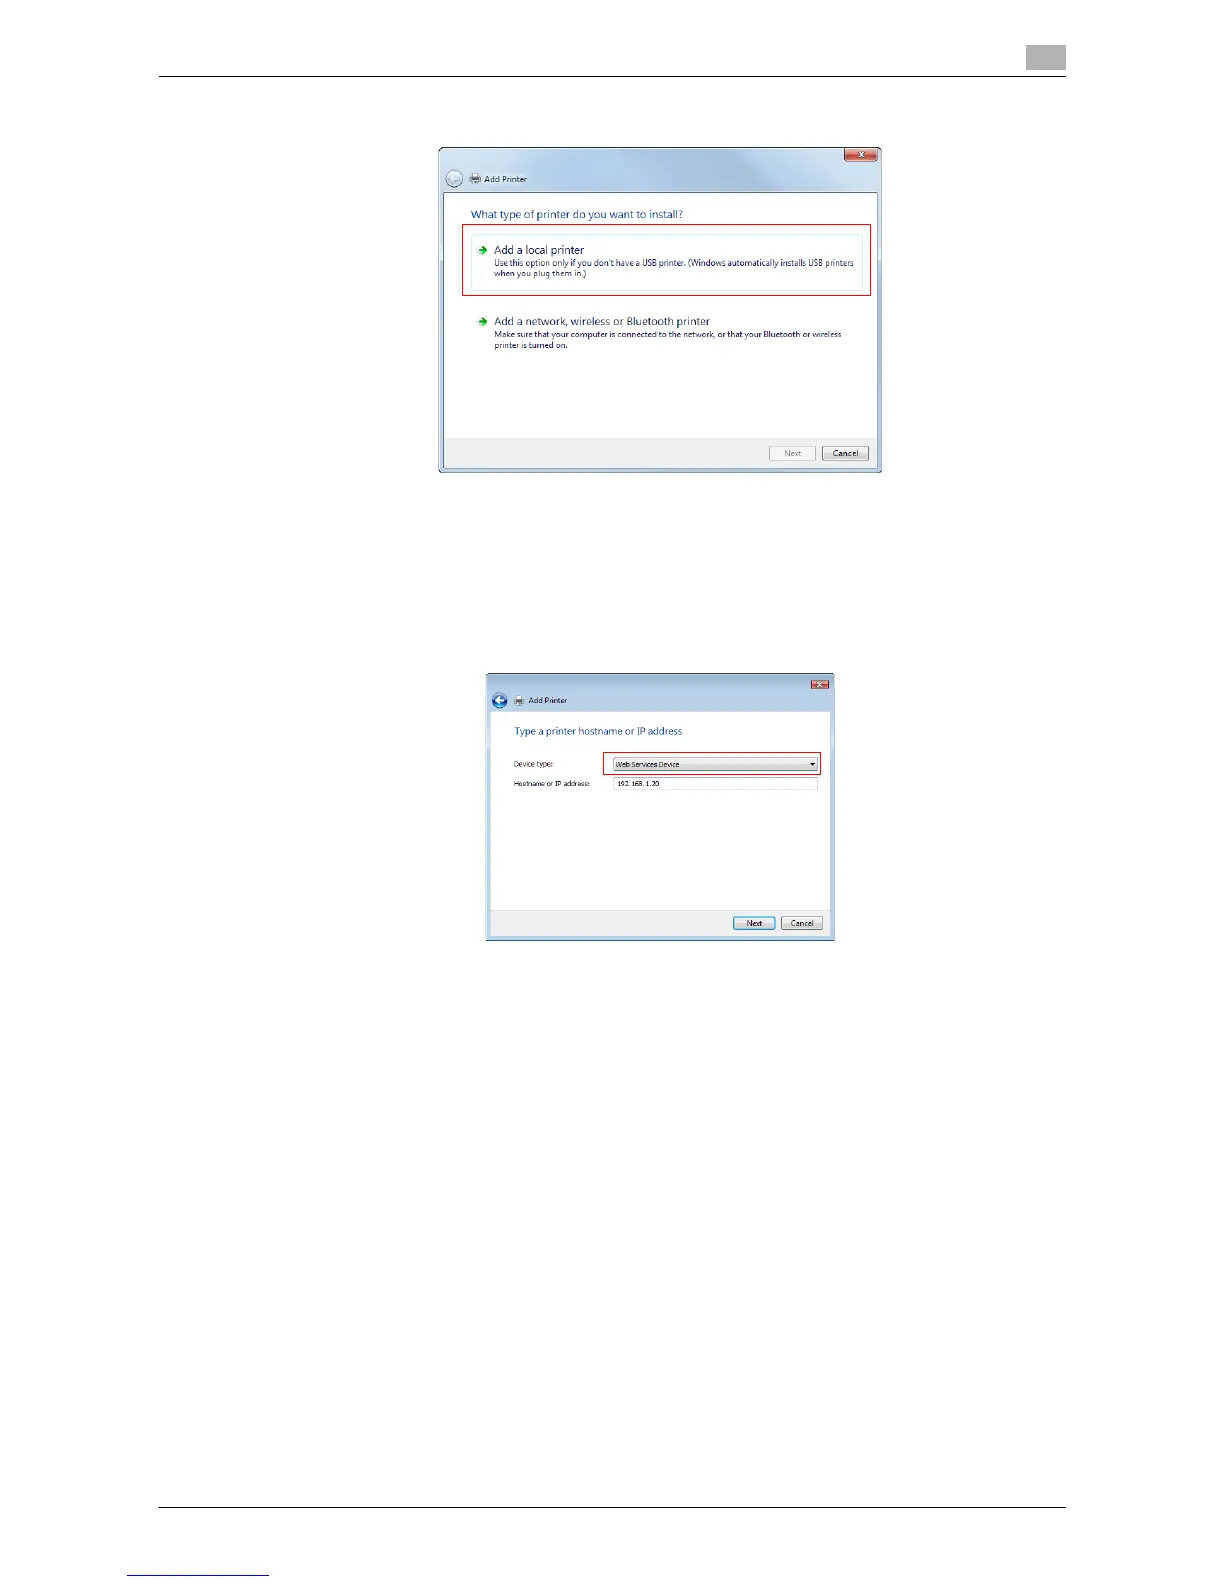
7 Click [Add a local printer].
The page for [Choose a printer port] appears.
8 Click [Create a new port:], then select [Standard TCP/IP Port].
9 Click [Next].
10 Select [Web Services Device], enter the IP address, and click [Next].
A printer of the entered IP address is located, then the [Found New Hardware] dialog box appears.
11 Click [Locate and install driver software (recommended)].
12 If a dialog box to confirm whether to search online appears, click [Don't search online].
13 Click [Browse my computer for driver software (advanced)].
14 Click [Browse...].
15 Select the folder on the CD-ROM containing the desired printer driver, then click [OK].
% Select the folder according to the printer driver, operating system, and language to be used.
Selectable printer drivers: PCL driver, PS driver, and XPS driver
16 Click [Next].
17 Click [Close].
18 Follow the instructions on the pages that follow.
19 After finishing the installation, make sure that the icon for the installed printer is displayed in the [Print-
ers] window.

 Loading...


