6 Functions Common to More Than One Operating Mode
78 SRM-3006 Narda
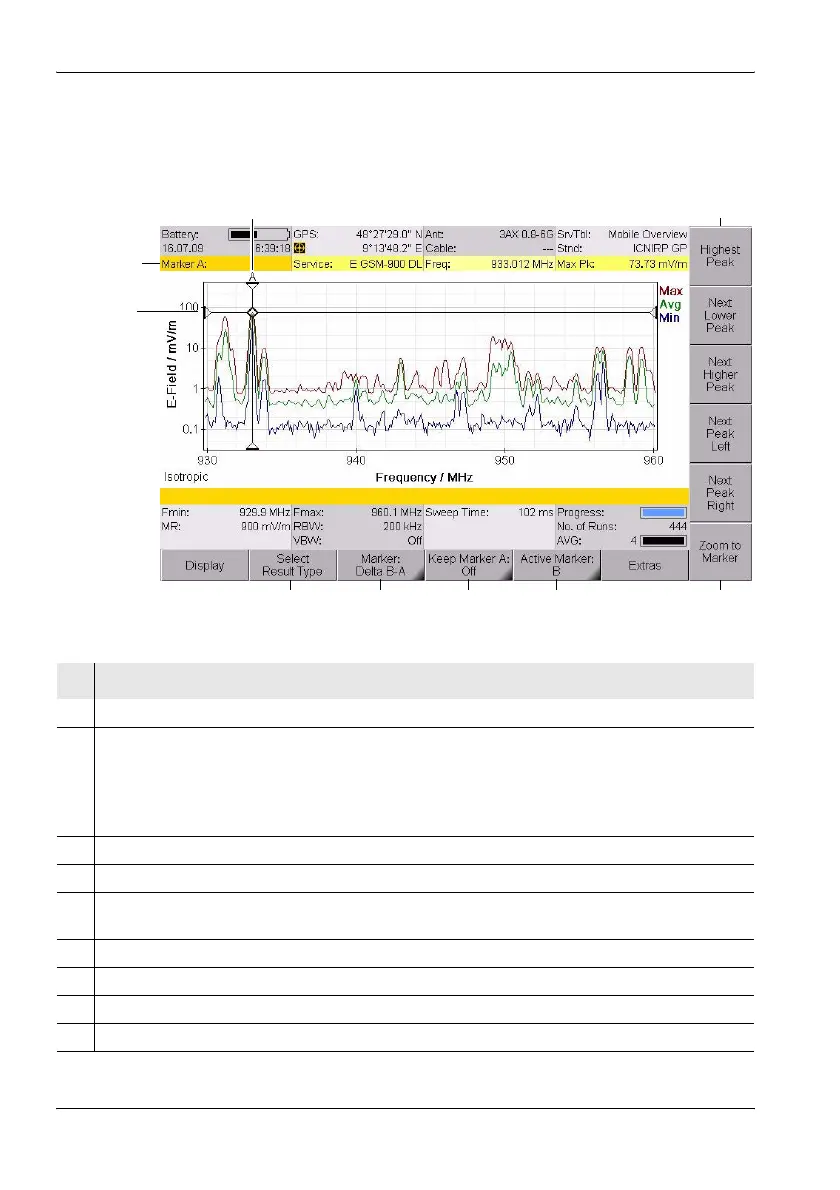
6.5.1 Using the markers separately
The two markers A and B can be displayed separately and set
independently of each other by using the Single marker function.
Figure 17: Single marker display
58
1
2
3
6
4
7
9
No. Function / Description
1 Graphical display of the measurement value at the marker position.
2 Marker information:
• Marker A: Marker A is active.
• Service: Selected service.
• Freq: Frequency at the marker position.
• Max. Pk: Selected result type and measured value.
3 Graphical display of the marker position (for result type Max in the example).
4 Marker functions for peak value selection (see Table 21 on page 79).
5 Zoom function: Sets the marker to the center frequency and enlarges the display around the
marker (reduces the span).
6 Active marker (Marker A is active in the example).
7 Marker display on the measurement screen (Marker A is shown in the example).
8 Display type (Single is selected in the example).
9 Result type selection for the active marker.