Shows the selected Sample with a couple of spread vertical lines in the waveform: this is
where the Slices are going to be applied (i.e. cut).
▪ Hover a Slice with the mouse to select it (it is highlighted). Little “S” and “E” markers ap-
pear at the bottom of the Slice borders to indicate the start and end point of that Slice,
respectively.
▪ Use the scroll wheel of your mouse to zoom in/out. You can also use the zooming scroll bar
(2).
▪ When the entire Sample or a particular Slice is played back, a playhead indicator (white ver-
tical line) shows you the current play position within the waveform.
▪ Context menu: Right-click (macOS: [Ctrl]-click) anywhere in a Slice to open a context menu
with the following commands:
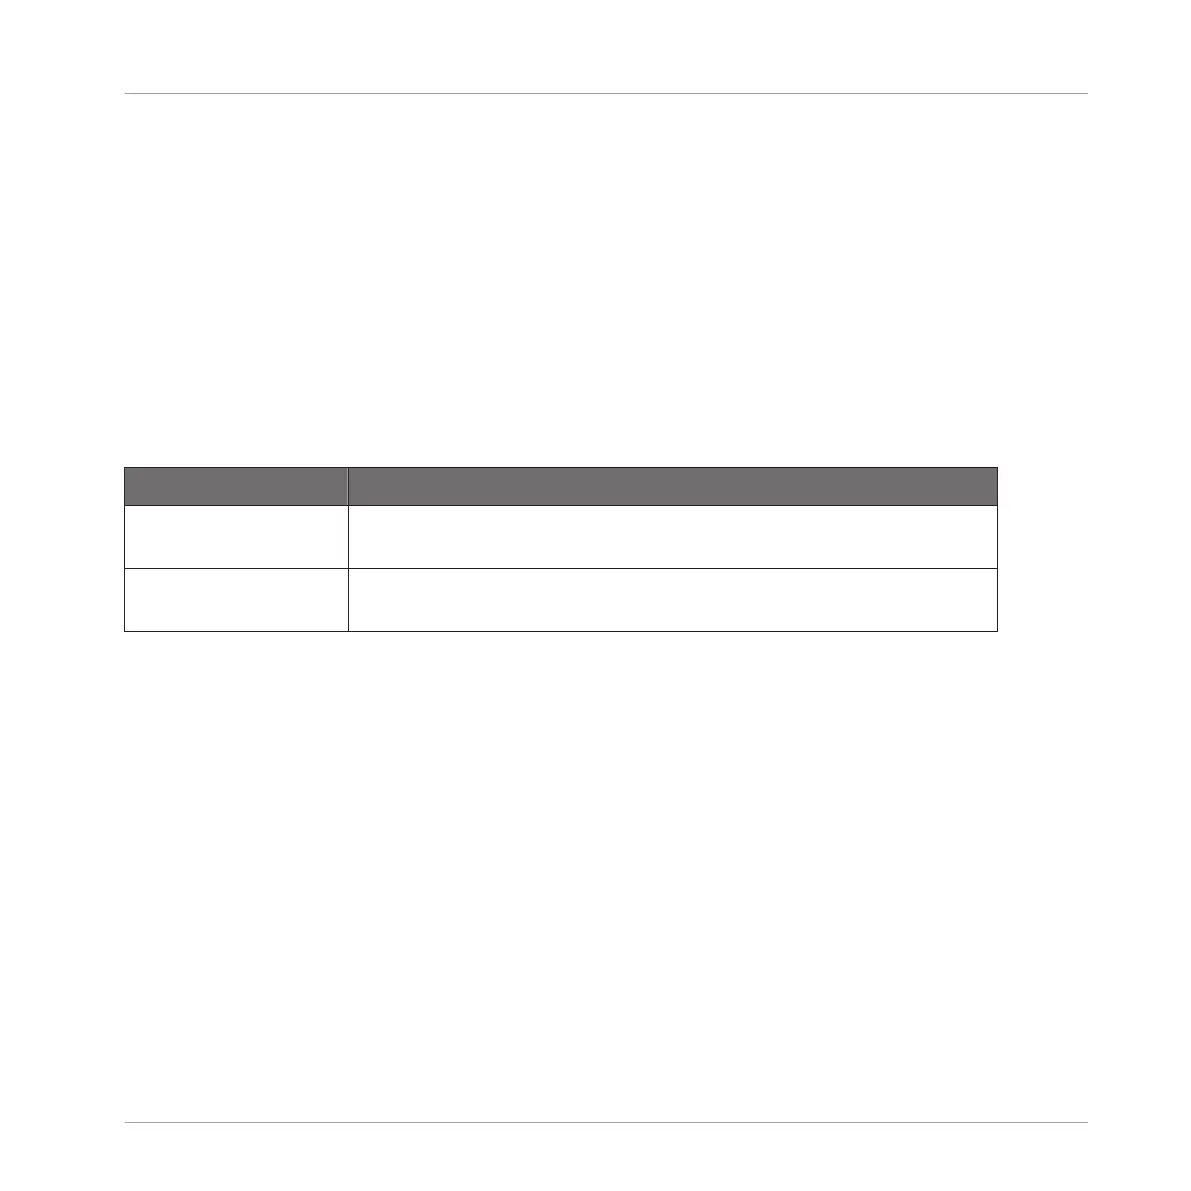
Command
Description
Open containing folder Opens the folder on your hard disk containing the Sample, providing
quick access to the original file.
Save Sample As… Opens a Save Sample As dialog allowing to save the Slice under as a
distinct file on your computer.
By default, you can adjust Slices with your mouse as follows:
▪ Click inside a Slice (i.e. anywhere between its borders) to play it back on the Cue bus (see
section ↑12.2.6, Using the Cue Bus for more information).
▪ Drag the borders of a Slice to adjust them. You have two possibilities:
◦ If the end point of the previous Slice and the start point of the next Slice are joined,
drag the border’s vertical line to move both the end point of the previous Slice and the
start point of the next Slice together, so that both Slices stay joined.
◦ Drag the little “S” (or “E”) marker at the bottom of the vertical line to move the start
(or end) point of a Slice independently of the end (or start) point of the previous (or
next) Slice. If you want this border to stick again with that of the previous (or next)
Slice, drag the vertical line (instead of the “S”/“E” marker) toward that of the previ-
ous (or next) Slice.
Sampling and Sample Mapping
Slicing a Sample
MASCHINE - Manual - 847