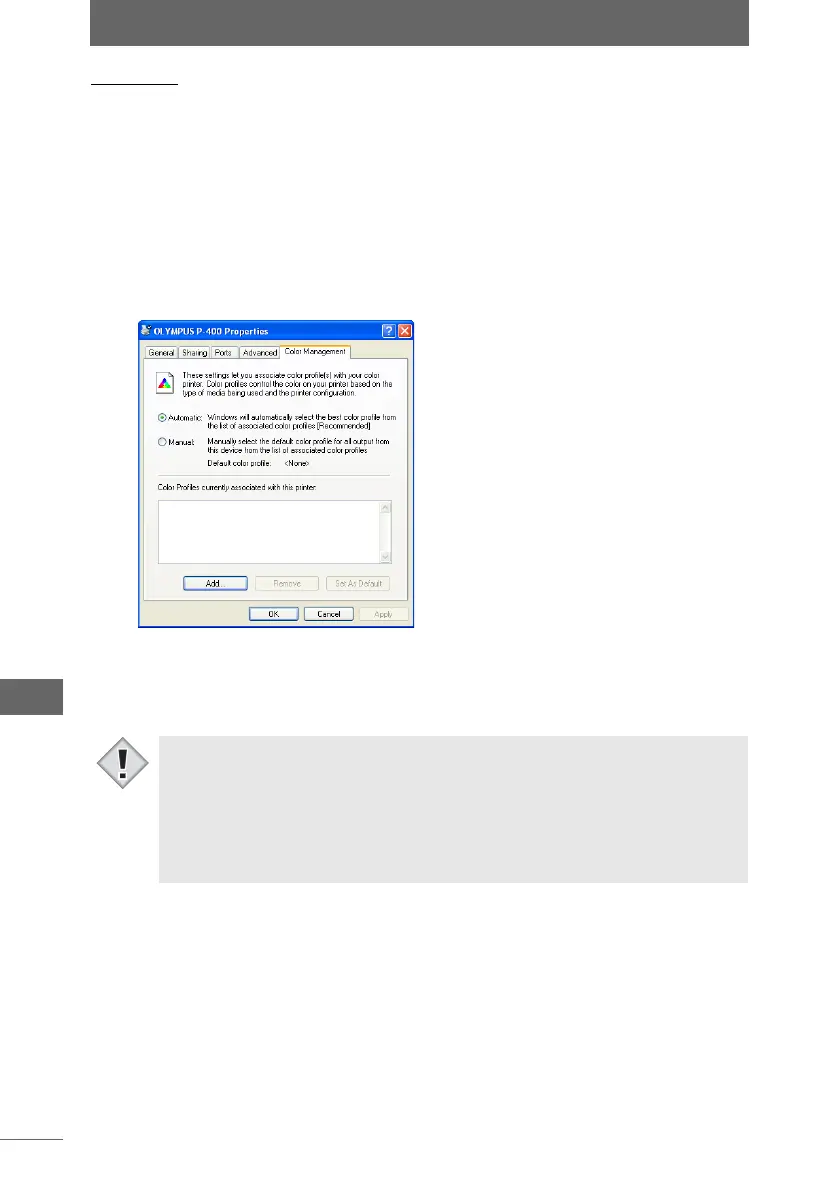
Setting the [Color Management] tab
270
OLYMPUS Studio Preferences
Windows
1 Select [Settings > Control Panel > Printers] from the [Start] menu
on the taskbar to display a list of printers.
2 Select the printer in use, and right-click to select [Properties].
The property settings dialog box for the printer in use appears.
3 Select the [Color Management] tab in this dialog box.
The name of the dialog box displayed depends on the monitor in use.
4 Check the color profile setting.
When you have finished checking the setting, click the [Cancel] button to close the
property settings dialog box for the printer.
[Color Management] tab page
• The methods of checking the colors displayed on the monitor and the printed
colors may differ depending on the version of the OS in use.
• For details on setting the profile of your monitor or printer, refer to the operation
manual provided with the monitor or printer.
• When enabling the multi monitor settings in Windows and using this function,
set the profile that matches the monitor you will be using to display most of the
images.
Note