2 Basic repair procedures Chapter E: Basic repair procedures
122 Planmeca PlanMill 40 Technical manual
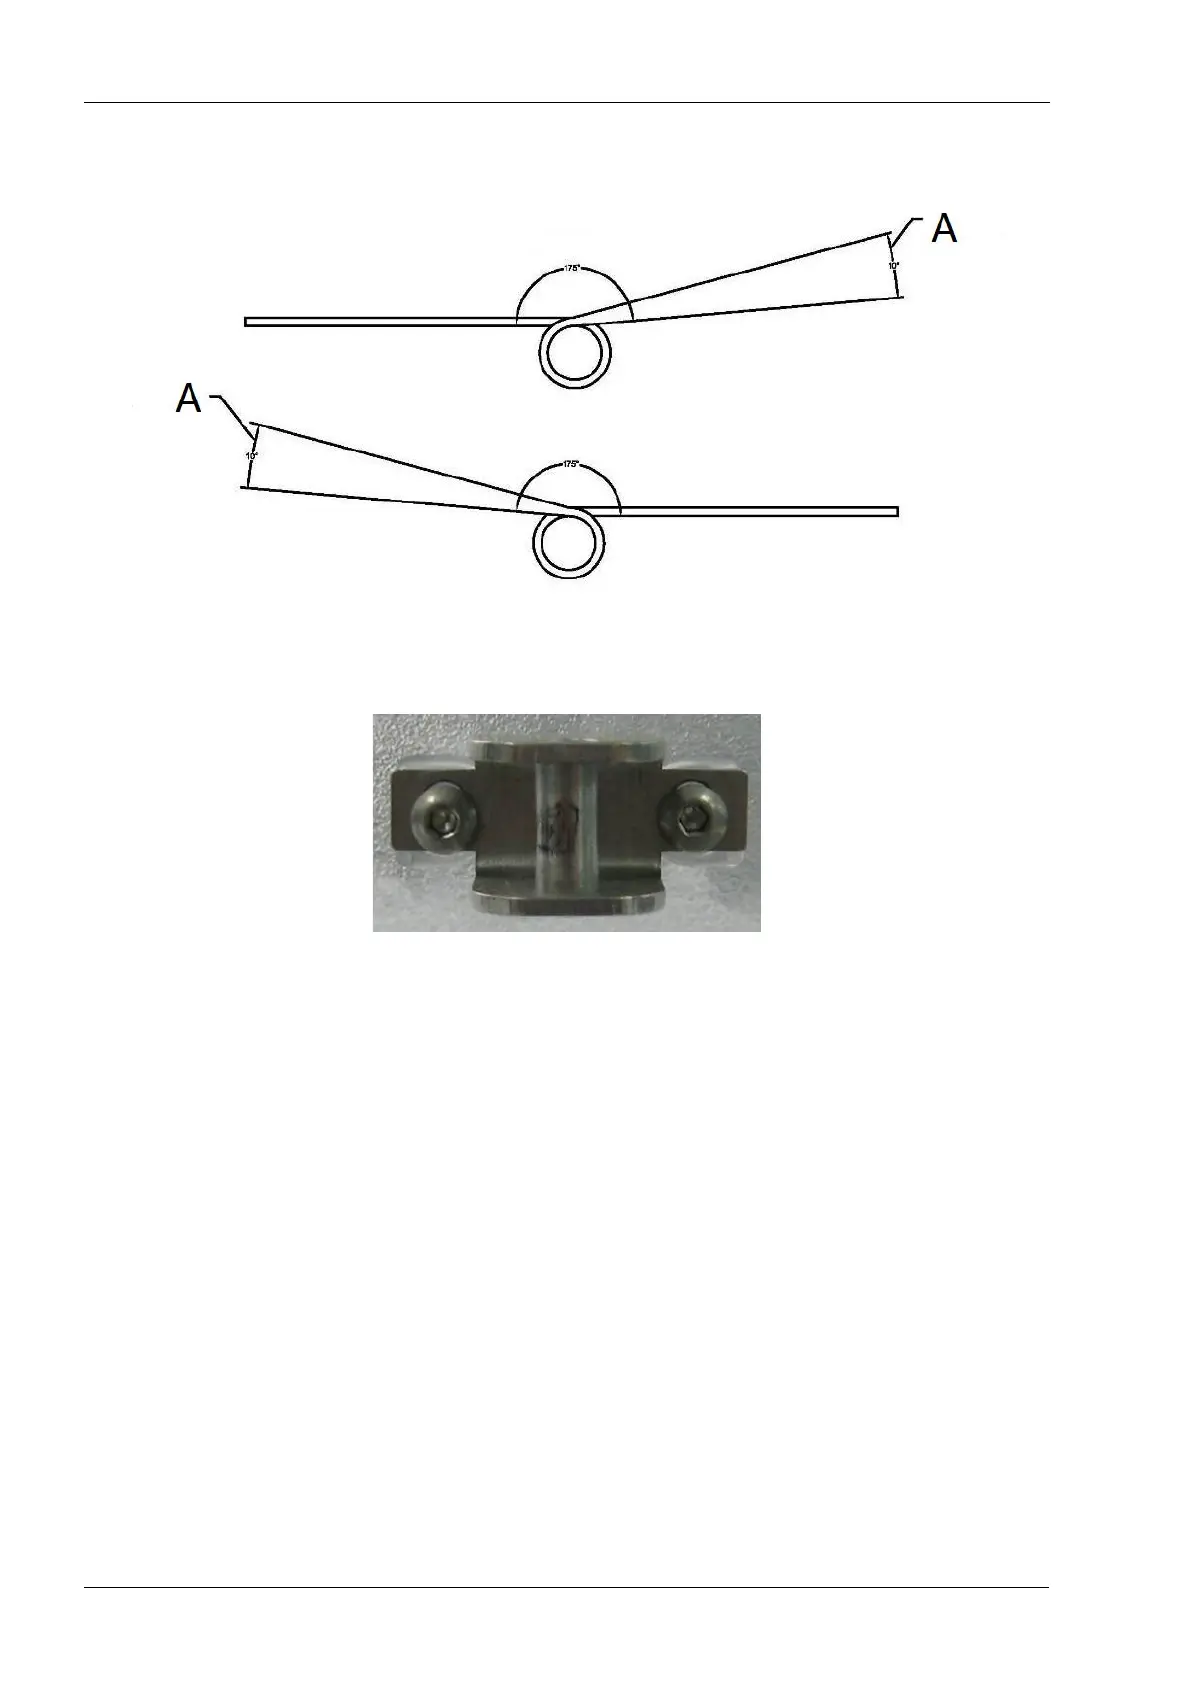
Figure 113: Verify preload of torsion springs (A=acceptable range for free end position of
spring)
9. Remove the (2) M3 button-head screws securing the latch pin bracket on the front of
the lid using the 2 mm Allen key.
Figure 114: Latch pin bracket
Install
1. Reinstall the hardware on the new lid using the screws removed previously. Use a
small amount of blue paste thread locker on each of the screws to ensure they do not
back out. Torque the screws to 0.5 nm and no more.
Do not use an excessive amount of thread locker or liquid thread locker as contact
with the clear plastic lid material can result in premature failure.
2. Insert the spring bushings inside the coil of the torsion spring and hold in place to
align the lid over the adapter assembly. Simultaneously, position the free end of each
of the torsion springs into the gap on the adapter assembly.
3. Once aligned slide the hinge pin in from the left all the way through.
4. Reinstall the clip ring on to the hinge pin shaft.
5. Reconnect the air cylinder knuckle to the hinge bracket and secure with the clip-ring.
6. Verify proper operation by accessing the Open Lid tools in the software or by using
the manual override button on the lid open solenoid.
Make sure the lid operates freely and smoothly with no rubbing on the adapter. Also verify
the latch engages easily and fully.