Chapter E: Basic repair procedures 2 Basic repair procedures
Technical manual Planmeca PlanMill 40 121
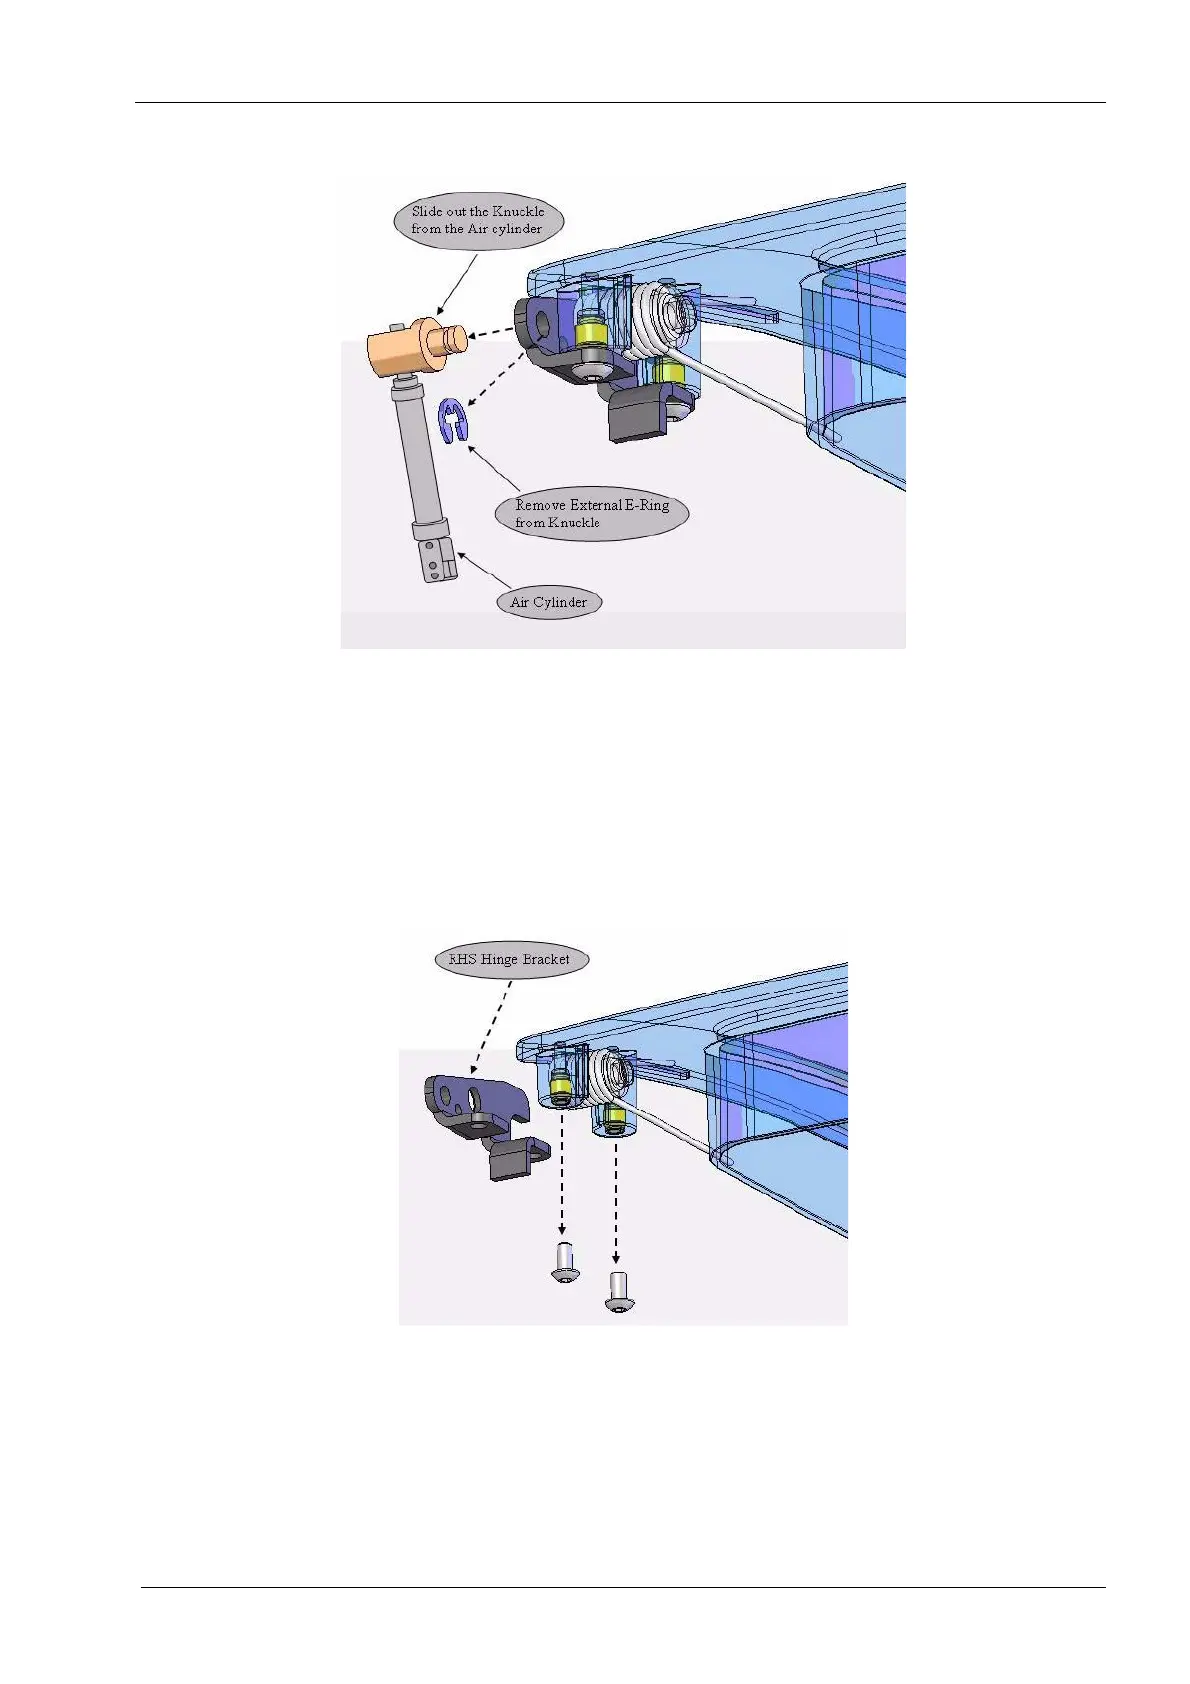
Figure 126: Disconnecting air cylinder knuckle
6. Lift the lid free of the machine.
Observe the location and orientation of all components prior to next step for reference
during reassembly.
7. To reuse the hardware from the old lid, simply remove the (2) M3 button head screws
securing the hinge bracket to the lid assembly using a 2 mm Allen key and remove the
brackets, torsion springs and bushings.
Figure 112: Removing hinge bracket
8. The torsion springs need to be checked and possibly tweaked or bent in order to
ensure enough preloaded tension in the springs to open the lid fully. The following
diagram is to be used as a template to check the springs and tweak or bend them as
needed to achieve the desired preload.