Chapter E: Basic repair procedures 2 Basic repair procedures
Technical manual Planmeca PlanMill 40 151
3. Disconnect the copper tubing line from the pump discharge 90 ell located on the top of
the pump.
This compression fitting connection is reusable without replacing the ferrule.
Loosen the connection using the two keys, using the second key to back up the
torque applied to the fitting so as to minimize or eliminate the stress imposed on the
pump housing.
4. Use clip-ring pliers to release the clip-ring and slide up the tube off the hose barb
fitting.
5. Slide the suction line tubing off the 90 degree plastic hose barb fitting until free.
6. Locate and remove the two mounting screws and washers securing the pump to the
Pump Stand. They are located on top of the pump and can be removed using a 3 mm
Allen key.
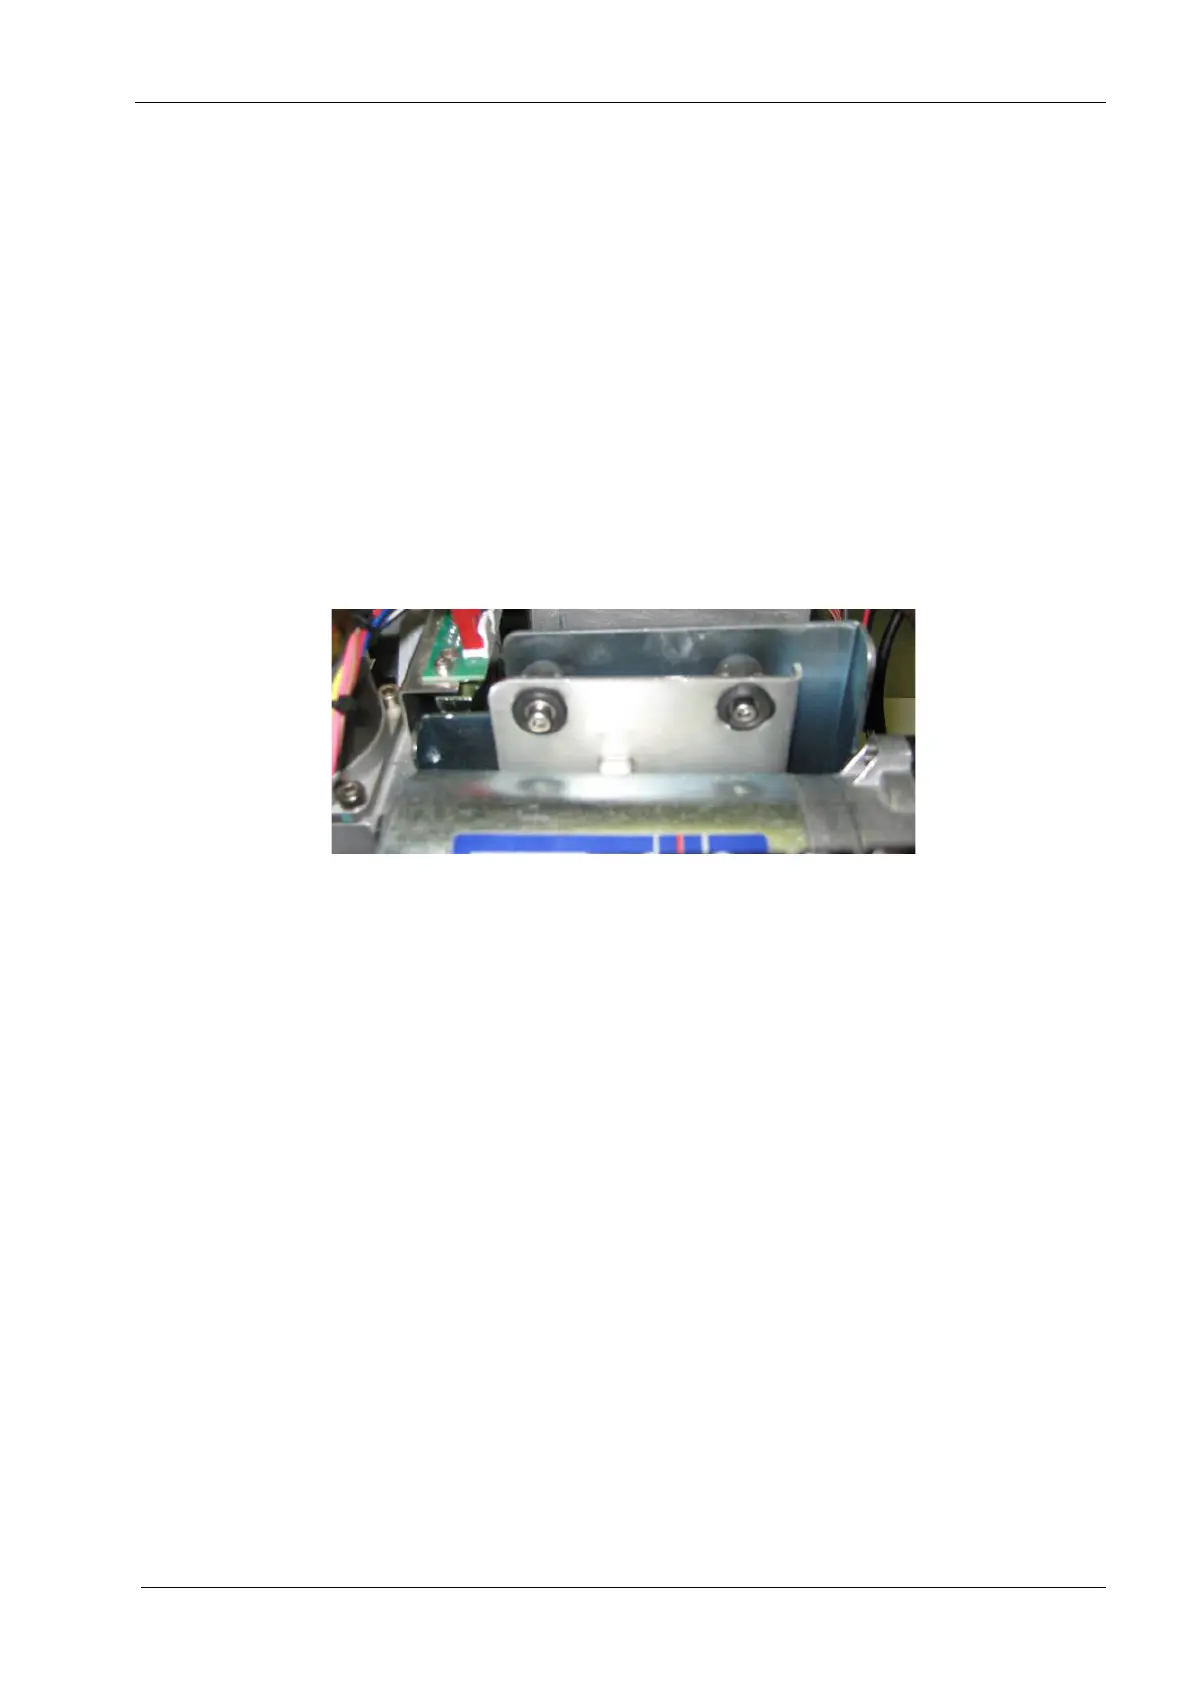
Figure 161: Circulation pump mounting screws (viewed from back of PlanMill 40)
7. Lift the pump up and out of the machine taking care not to damage the solenoid valve
assembly behind the pump. You may find it easier to slide the pump out the right side
of the machine.
8. Note depth of engagement and orientation of fittings relative to pump, and then
remove both the suction and discharge fittings for re-use.
Install
1. Reinstall the suction and discharge fittings onto the new pump such that the depth of
thread engagement and final orientation are the same as when removed from original
pump.
No Teflon tape or paste is required when one of the two fittings is made of plastic as is the
case here.
2. Position the lower rubber mounts of the pump base into the flange pocket on the
pump stand and align the upper rubber mounts to the tapped holes on the pump
stand.
3. Insert the securing screws and washers through the upper rubber mounts and thread
into the Pump Stand.
Use blue thread locker on mounting screws.