Web Utility
QL-300 User Guide 447
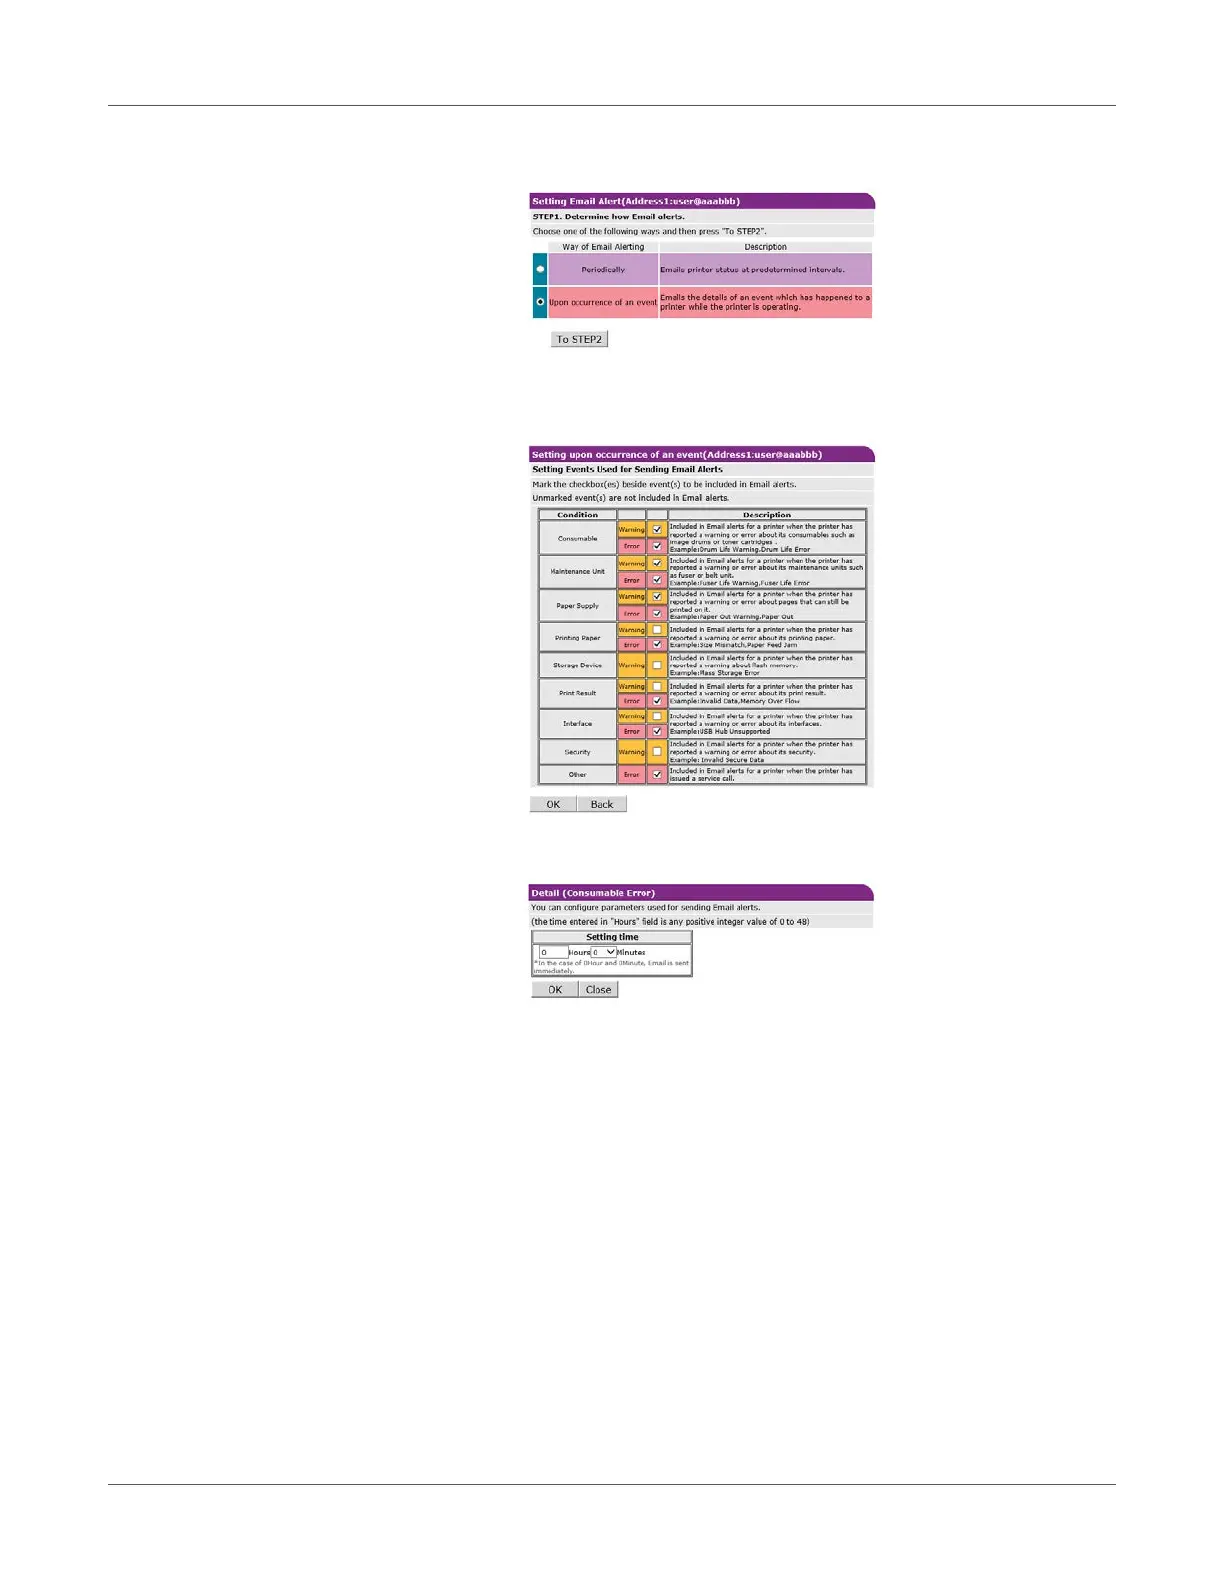
4 Select the Upon occurrence of an event check box, and then click To STEP2.
5 Under Setting Events Used for Sending Email Alerts, select the check boxes of the error
types for you to be notified of.
6 Specify the delay after an error occurs until the message is sent, and then click OK.
• Setting a delay time makes it possible to send notifications only of errors that are
generated only over a long period of time.
• Setting “0 hours, 0 minutes” for the delay time causes the message to be sent
immediately after an error occurs.
7 Click OK.
8 Check the configuration of the malfunction notification conditions.
• To display as a list, click Show current settings table. Check the configuration, and
then close the window.
• To compare the setting conditions of two recipients, use the list box to select each of
the recipients you want to compare. Check the displayed configuration.
You can change notification condition settings by clicking inside the setting condition
comparison table.