Developer and Toner Bottles
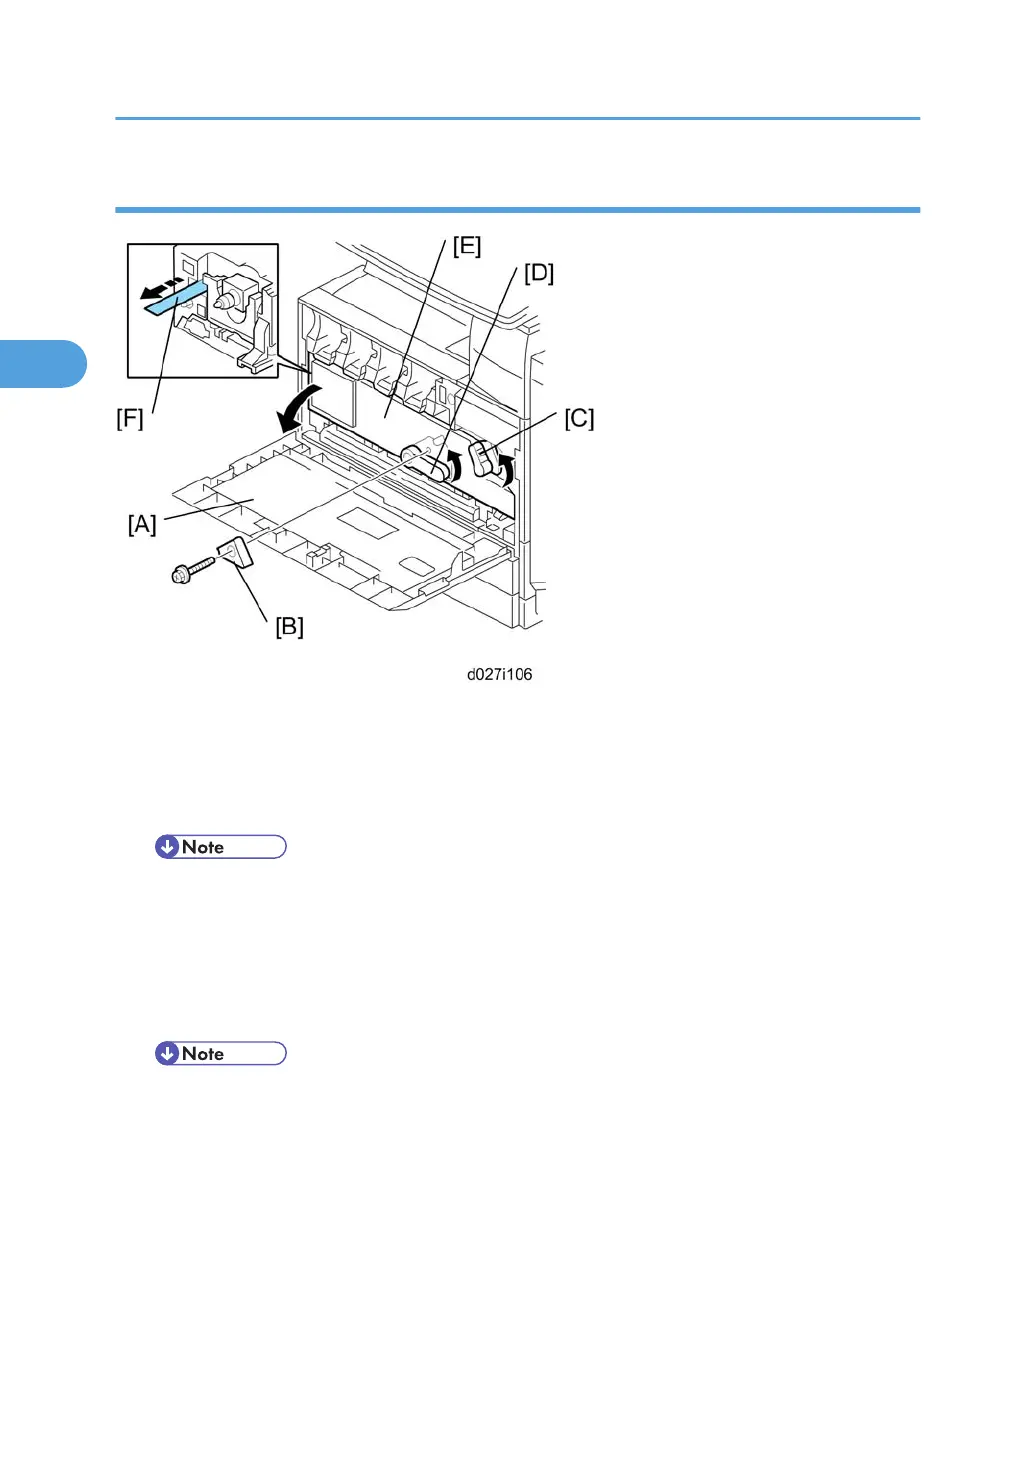
1. Open the front door [A].
• GSA model (-57) and EU models (-27) do not require steps from 2 to 7. Skip to step 8 if you
install these models.
2. Remove the stopper [B] ( x 1).
• This stopper locks the drum positioning plate lever.
3. Release the image transfer unit lock lever [C], and turn the drum positioning plate lever [D]
counterclockwise.
4. Open the drum positioning plate [E].
5. Remove all tapes [F] from the four development units.
• When you remove the tape from the development unit, hold the development unit with your
hand, and then pull the tape.
6. Close the drum positioning plate. Then lock the image transfer unit lock and turn the drum positioning
plate lever clockwise.
7. Lock the drum positioning plate lever with the stopper [B] ( x 1).
8. Shake each toner bottle five or six times.
2. Installation
32
 Loading...