9. Insert two more scanner positioning pins through the holes in the rear rail.
10. Screw the drive pulley to the shaft [G].
11. Screw the scanner wire bracket to the front rail [H].
12. Install the scanner wire clamp [I].
13. Pull out the positioning pins.
• Make sure the 1st and 2nd carriages move smoothly after you remove the positioning pins. Do
steps 8 through 13 again if they do not.
Rear Scanner Wire
1. Exposure glass (* p.175 "Exposure Glass")
2. Scanner left stay (* p.183 "Front Scanner Wire")
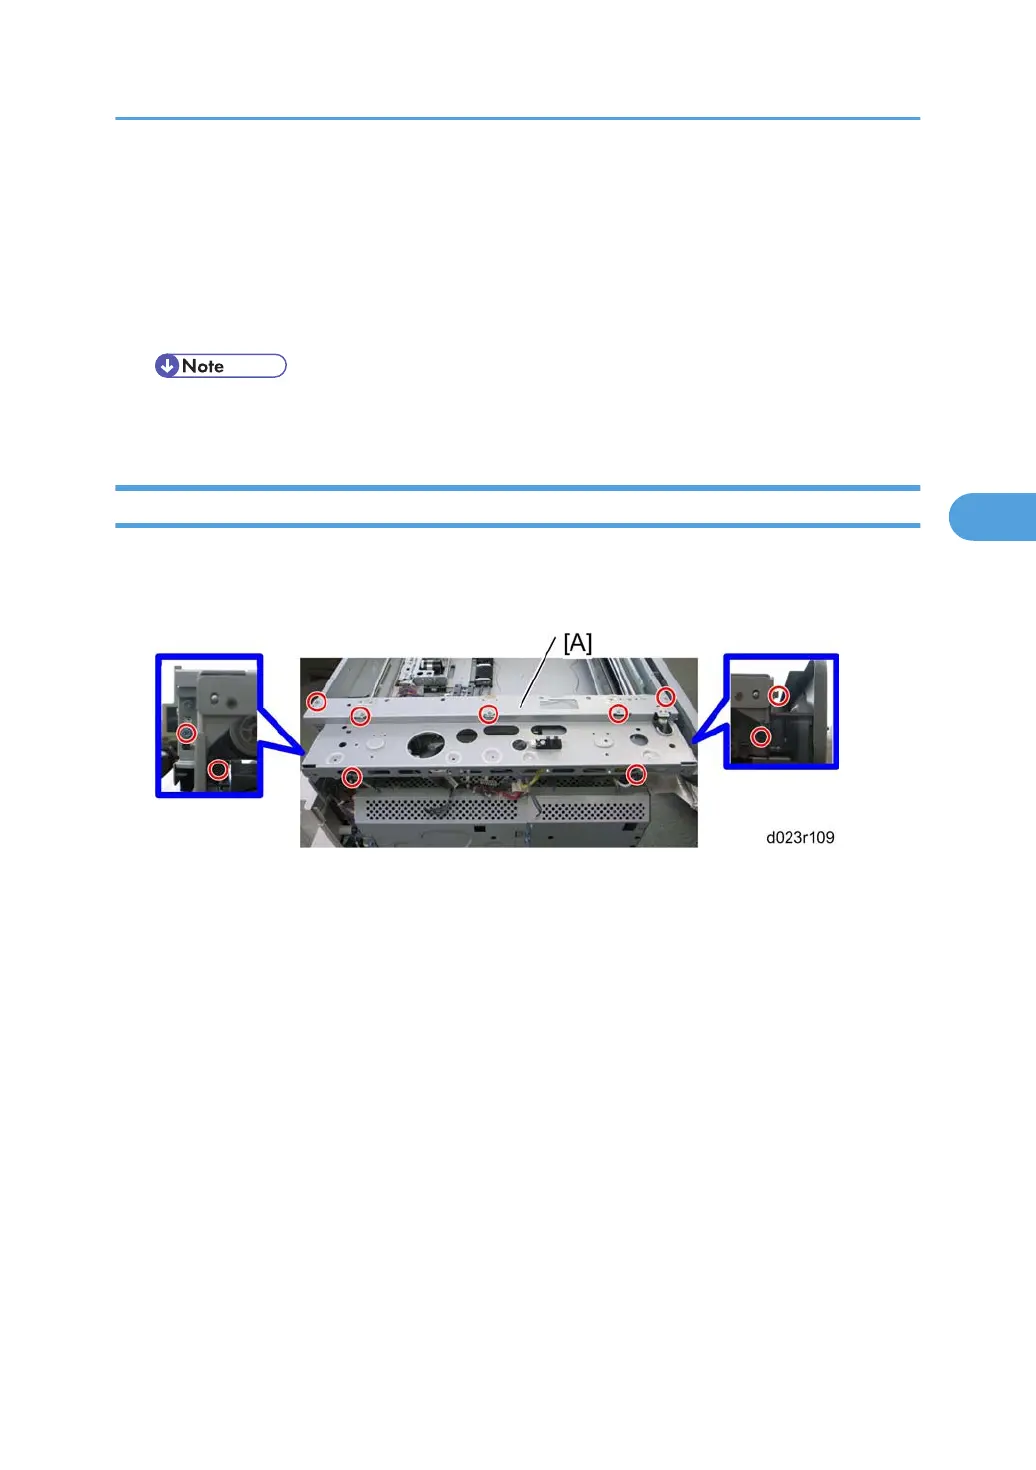
3. Scanner rear frame [A] ( x 9, ground screw x 2, x All)
4. Follow the steps 3 through 5 in the “” Section. You can remove the rear scanner wire with the same
manner for replacing the front scanner wire.
Scanner Unit
187
 Loading...