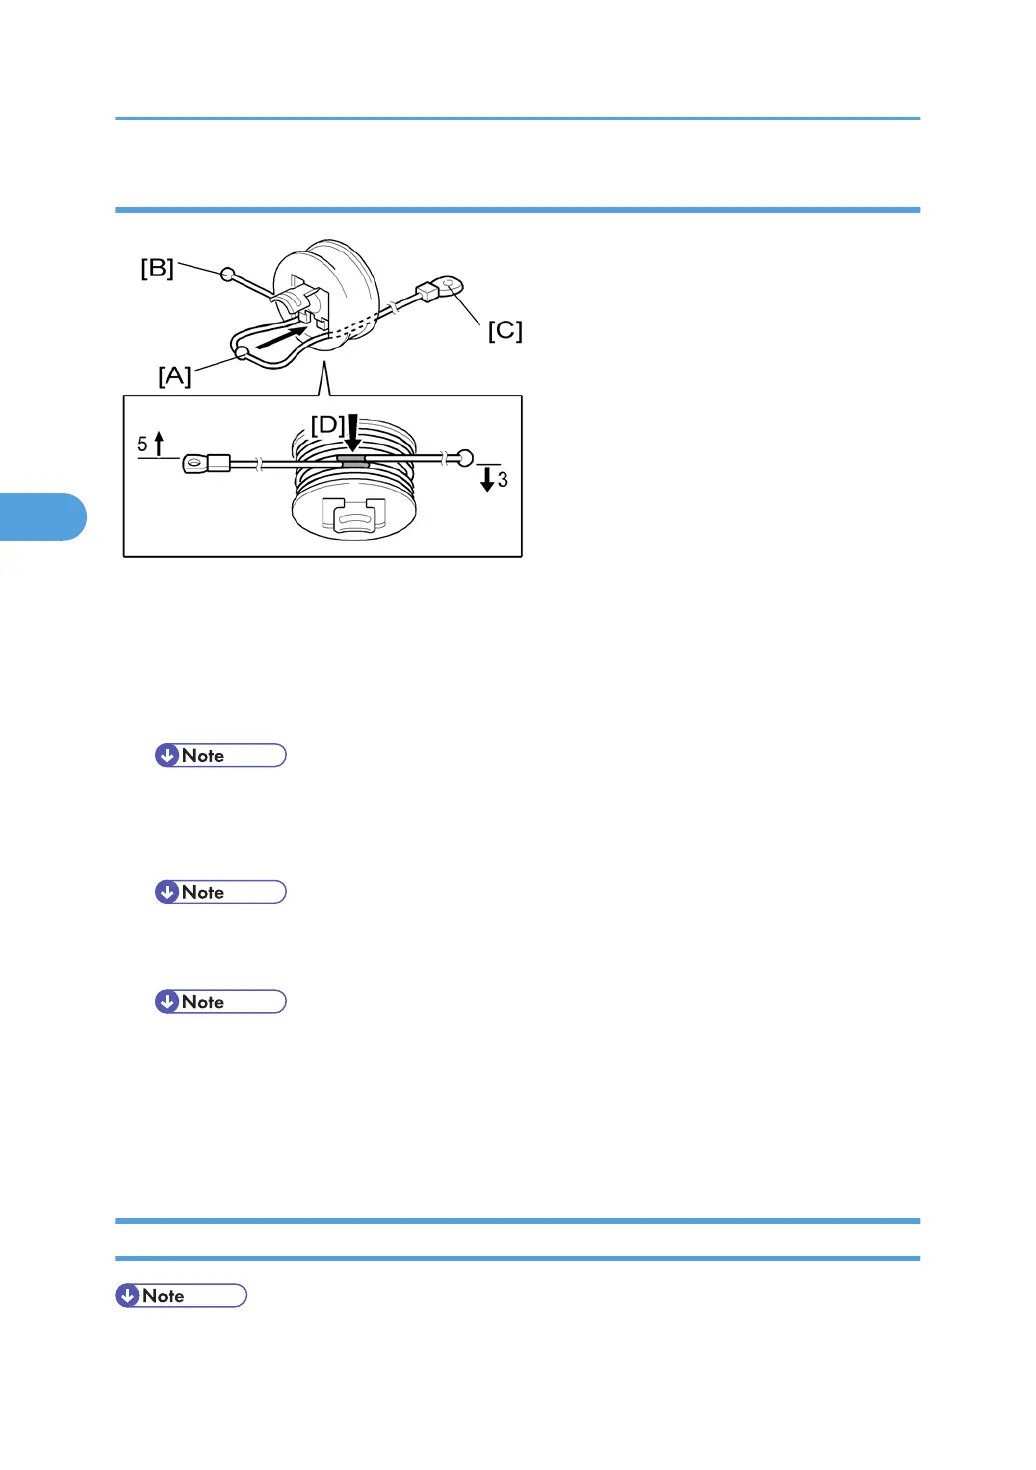
Reinstalling the Rear Scanner Wire
1. Position the center ball [A] in the middle of the forked holder.
2. Pass the left end (with the ball) [B] through the drive pulley notch. Pass the right end (with the ring) [C]
through the drive pulley hole.
3. Wind the left end [B] clockwise (shown from the machine’s front) five times. Wind the right end [C]
counterclockwise three times.
• The two red marks [D] come together when you do this. Attach the wire to the pulley with tape.
This lets you easily handle the assembly at the time of installation.
4. Install the drive pulley on the shaft.
• Do not attach the pulley on the shaft with the screw at this time.
5. Install the wire.
• The winding of the wire on the three pulleys at the rear of the scanner should be the same as the
winding on the three pulleys at the front. This must show as a mirror image.
Example: At the front of the machine, the side of the drive pulley with the three windings must face the
front of the machine. At the rear of the machine, it must face the rear.
6. Do steps 7 through 13 again in the “” Section.
Touch Panel Position Adjustment
• It is necessary to calibrate touch panel at the following times:
4. Replacement and Adjustment
188
 Loading...