118
1. Retrieve the documentation supplied with the fi eld replacement hypoxic
block assembly and verify the O2 and N2O step down values.
2. Ensure the ON/OFF switch is in the “OFF” position.
3. Ensure all fl ow control valves are closed.
4. Connect a supply to the O2/N2O/AIR pipeline inlets.
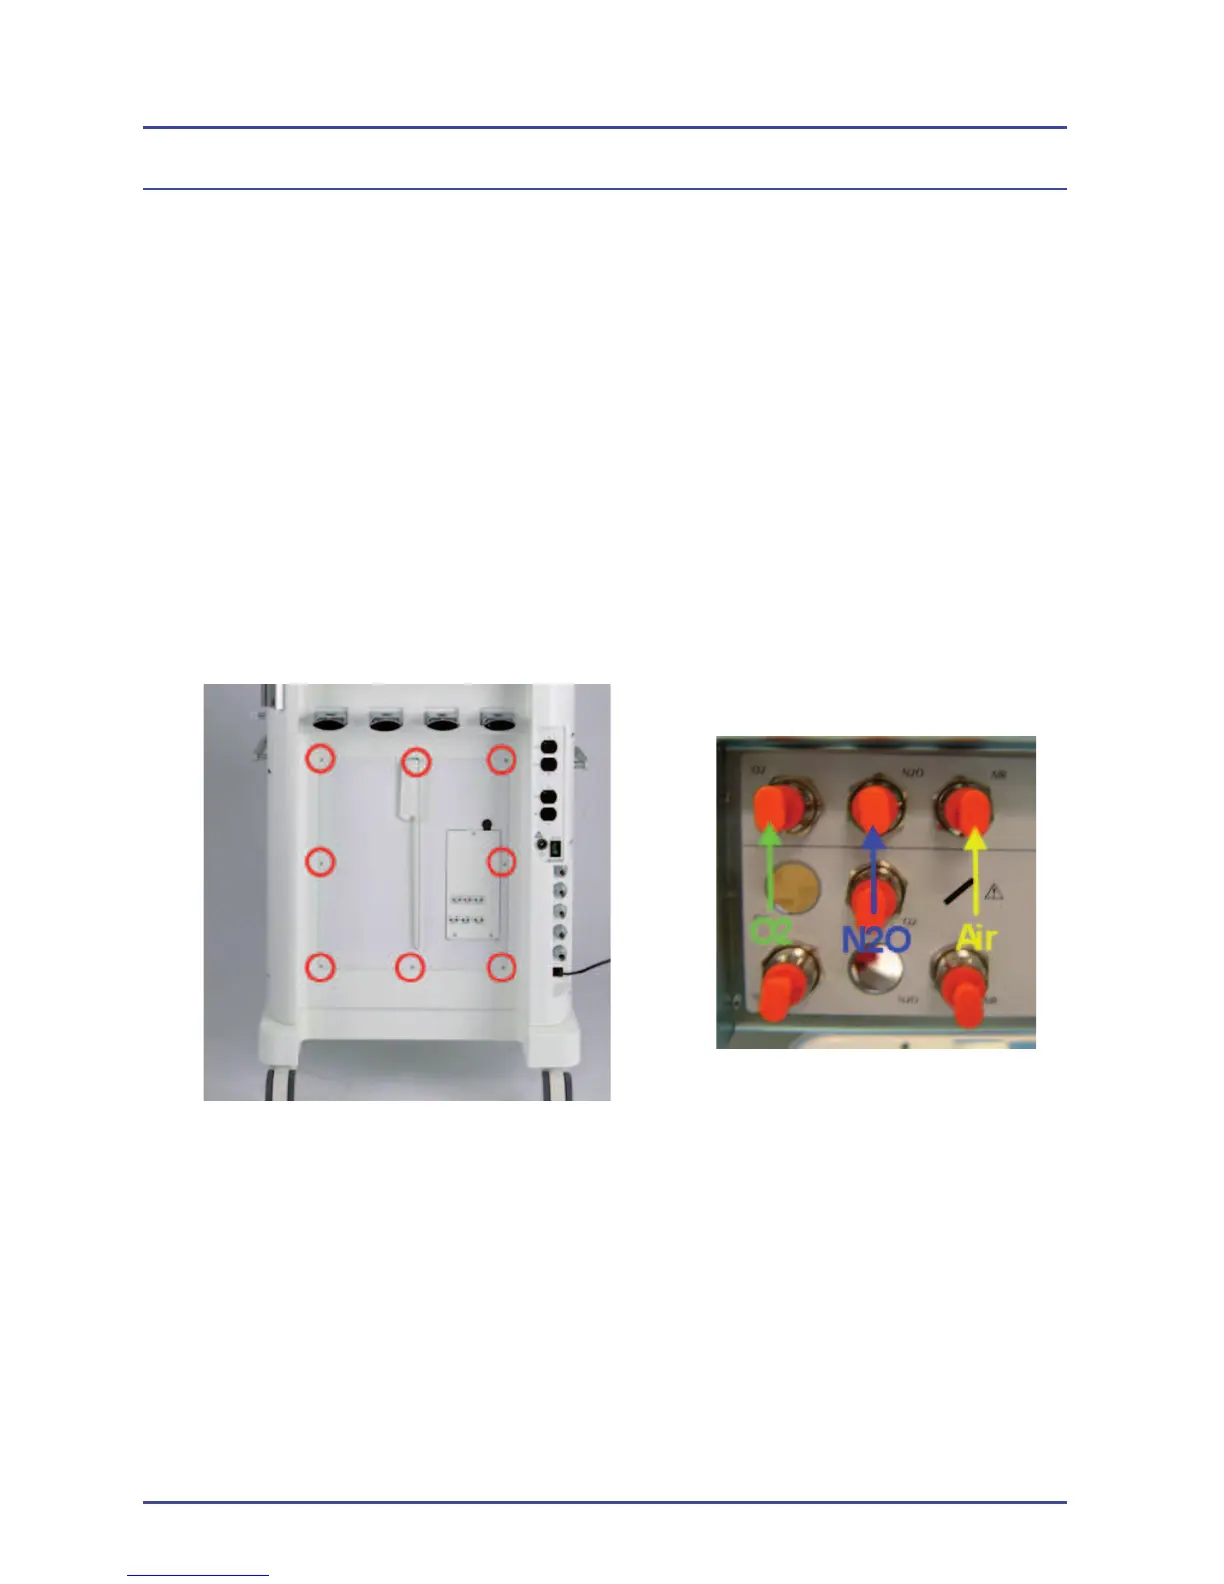
5. Remove the rear cover. (see rear cover removal for instructions)
6. Remove the (8) screws (Figure 66), using a 2.5mm Allen key, then
remove the large rear panel.
Secondary Regulator Adjustment
Figure 66 - Rear Panel Screw Locations (8)
Detailed Repair Procedures
7. Locate the secondary regulator test points and gas locations (Figure 67).
Figure 67 - Secondary Gas Test
Point Locations
 Loading...