136
Detailed Repair Procedures
5.10.3 A.C.G.O. Replacement
1. Remove the top drawer.
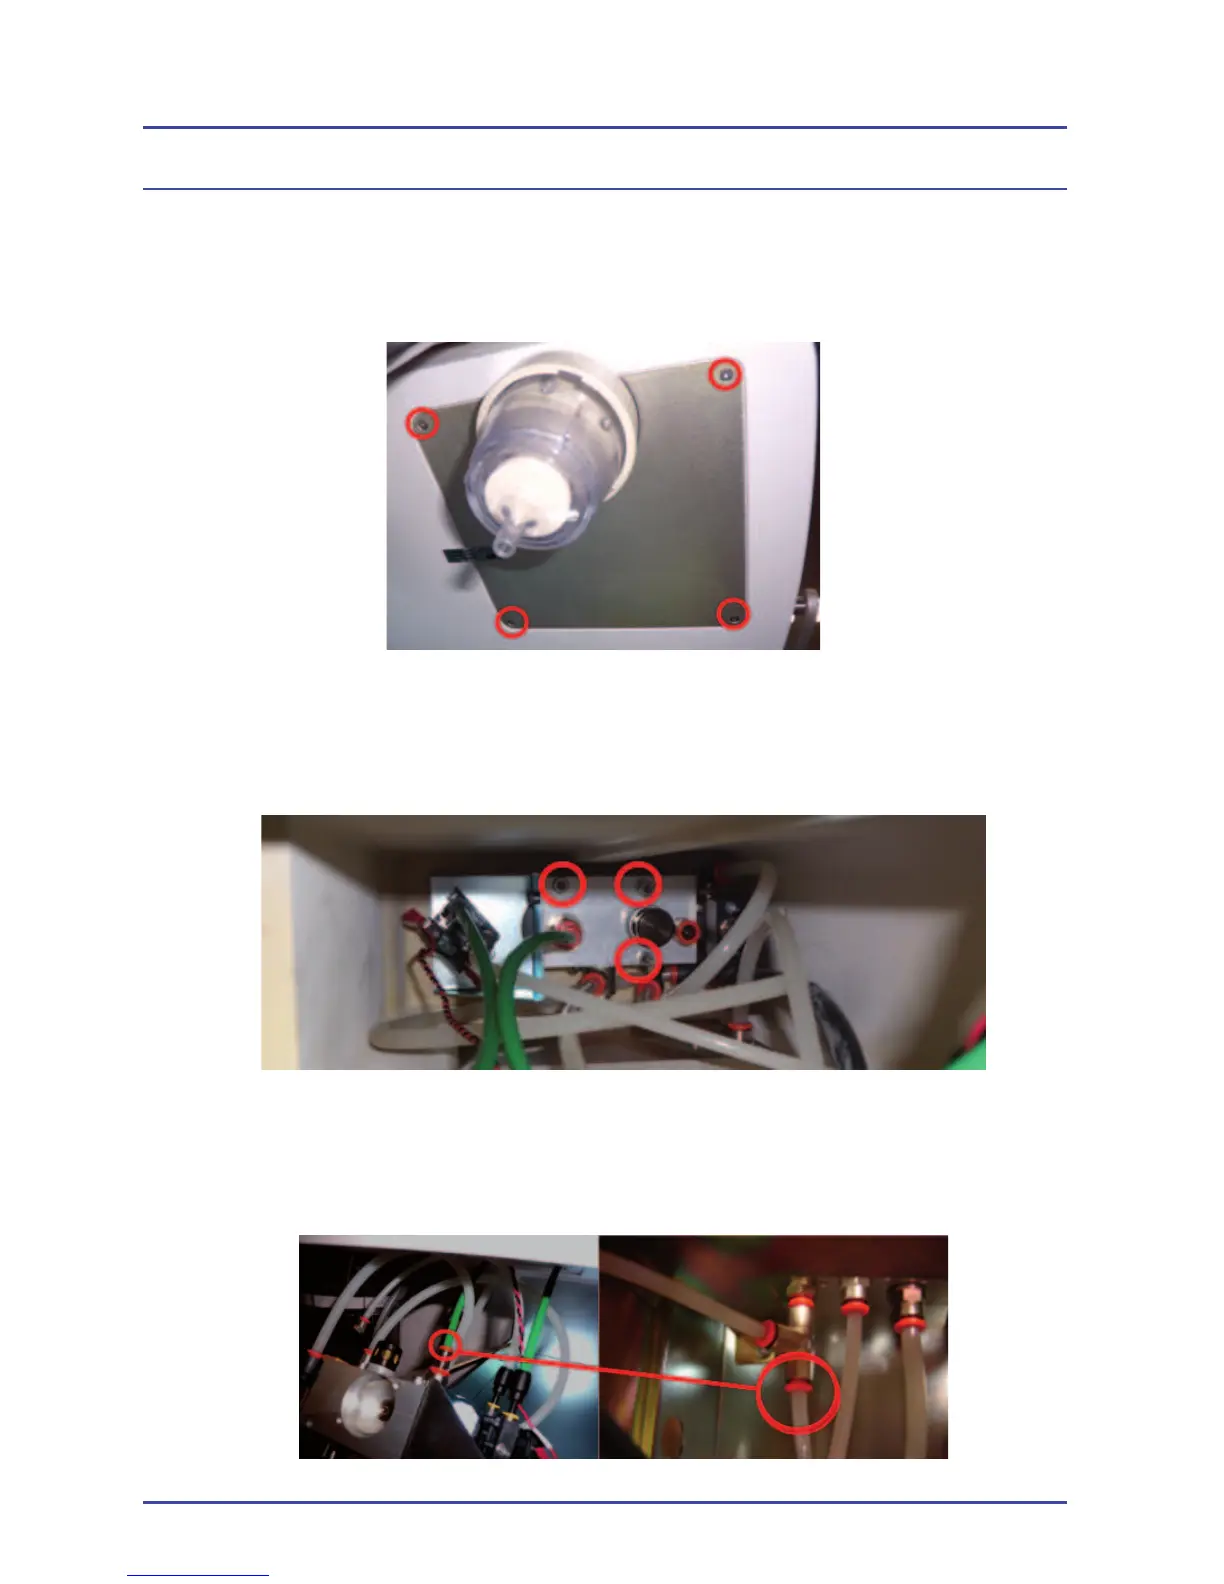
2. Remove the (4) screws and washers from the suction plate assembly.
Figure 91 - Location of (4) Suction Plate Screws
3. Remove the (3) screws where indicated to remove the ACGO assembly.
Figure 92 - Location of (3) ACGO Assembly Screws
4. Remove the 6 mm tubing where indicated in Figure 93. The tubing is
routed to the 6 mm tee that is fi tted to the pneumatic block.
Figure 93 - Location of 6 mm Tubing