132
5.9.2 On units Manufactured After Feb 2009Feb 2009 onwards)
1. Remove rear cover (see section 5.1)
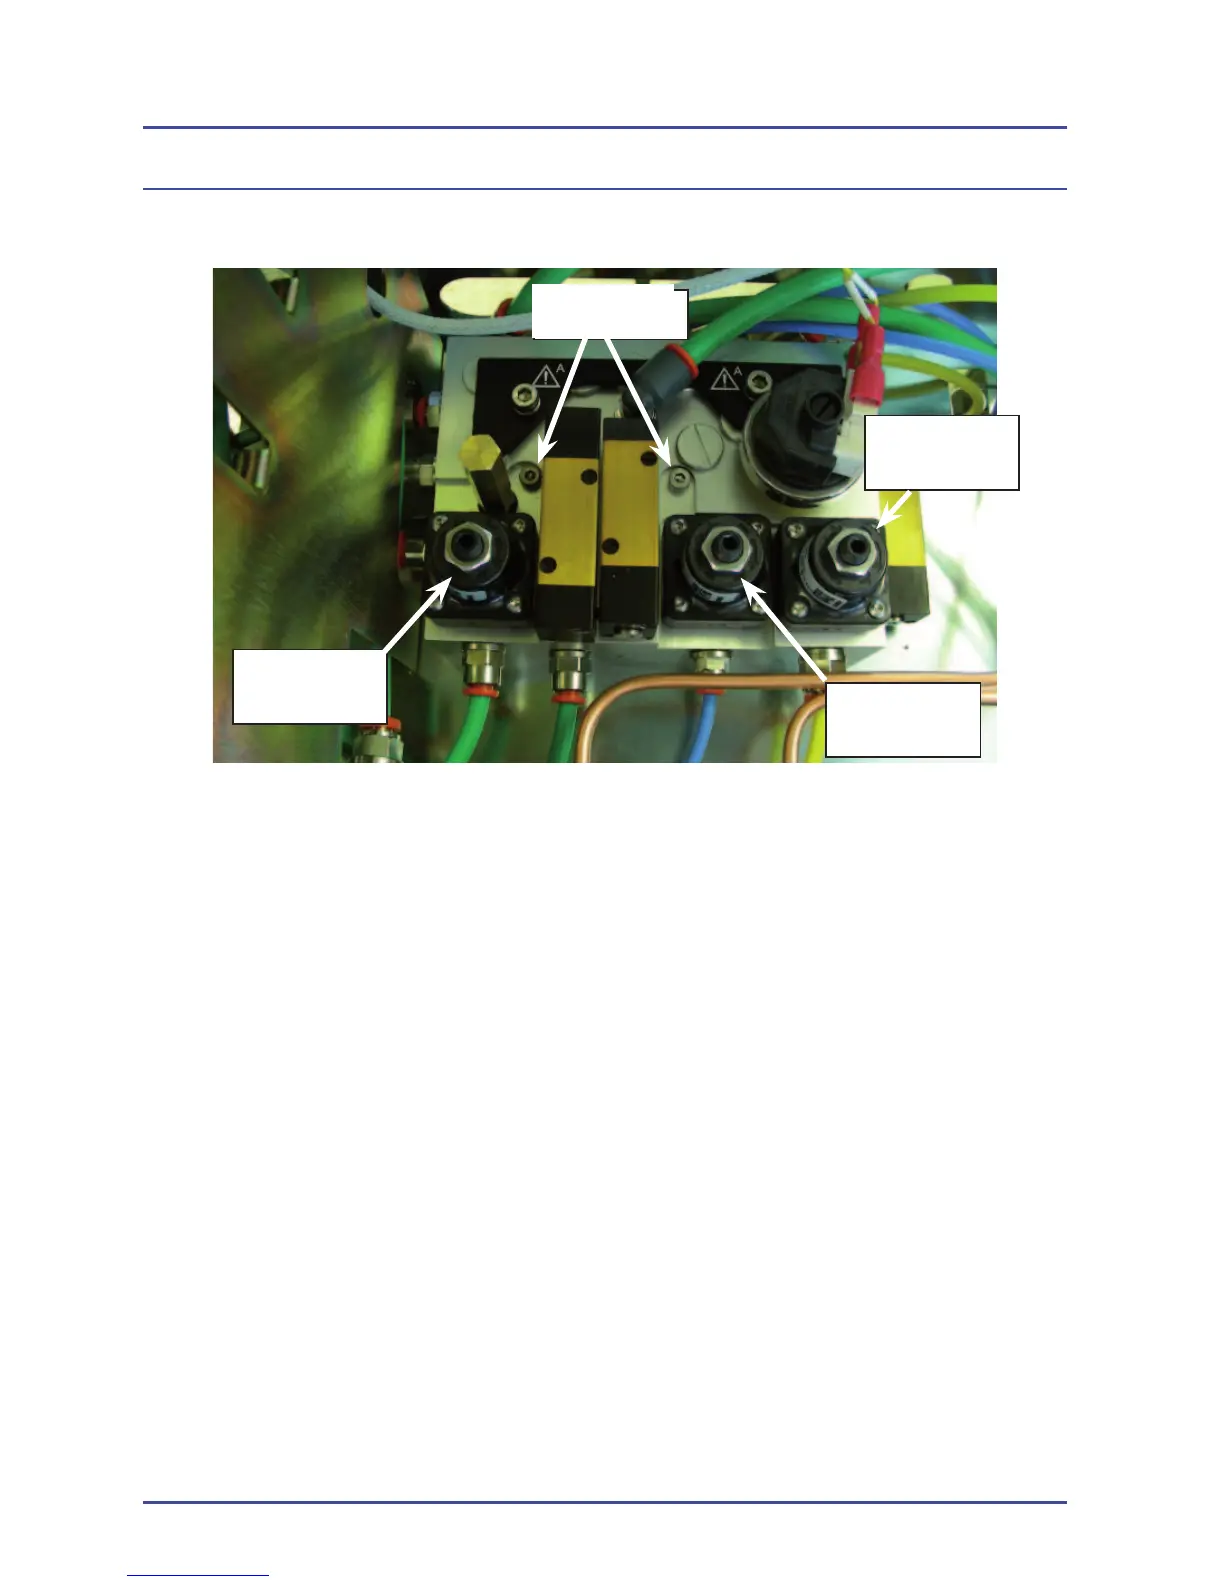
2. Remove the two M4 fi xing screws from the alarm block.
3. Mark the position of each pipe entering the block clearly on each fi tting
and the relevant pipe. These will be different for differing build standards,
such as two gas or three gas systems and country specifi cations. The
removal of the fi xing screws will allow the block to be moved for access
to some of the pipes. Once all pipes and connections are clearly marked,
disconnect the pipes and remove the block.
4. The replacement block will require the transfer of the fi ttings and blanking
plugs from the old block to the same positions on the new block, this
should be done one item at a time and their positions checked carefully.
Once the fi ttings have been transferred, you can reconnect the block and
replace the fi xing screws.
5. With this new design, the secondary regulators are integrated into the
block. These will need to be reset to the original pressures to ensure the
hypoxic guard performs correctly.
6. Perform the function test on alarm block.
7. Perform the Hypoxic Guard test (See Chapter 4.)
Figure 87 - Alarm Block Removal (Feb 2009 onwards)
Air
Regulator
N
2
O
Regulator
O
2
Regulator
Fixing
Screws
Detailed Repair Procedures


 To Next Page