50
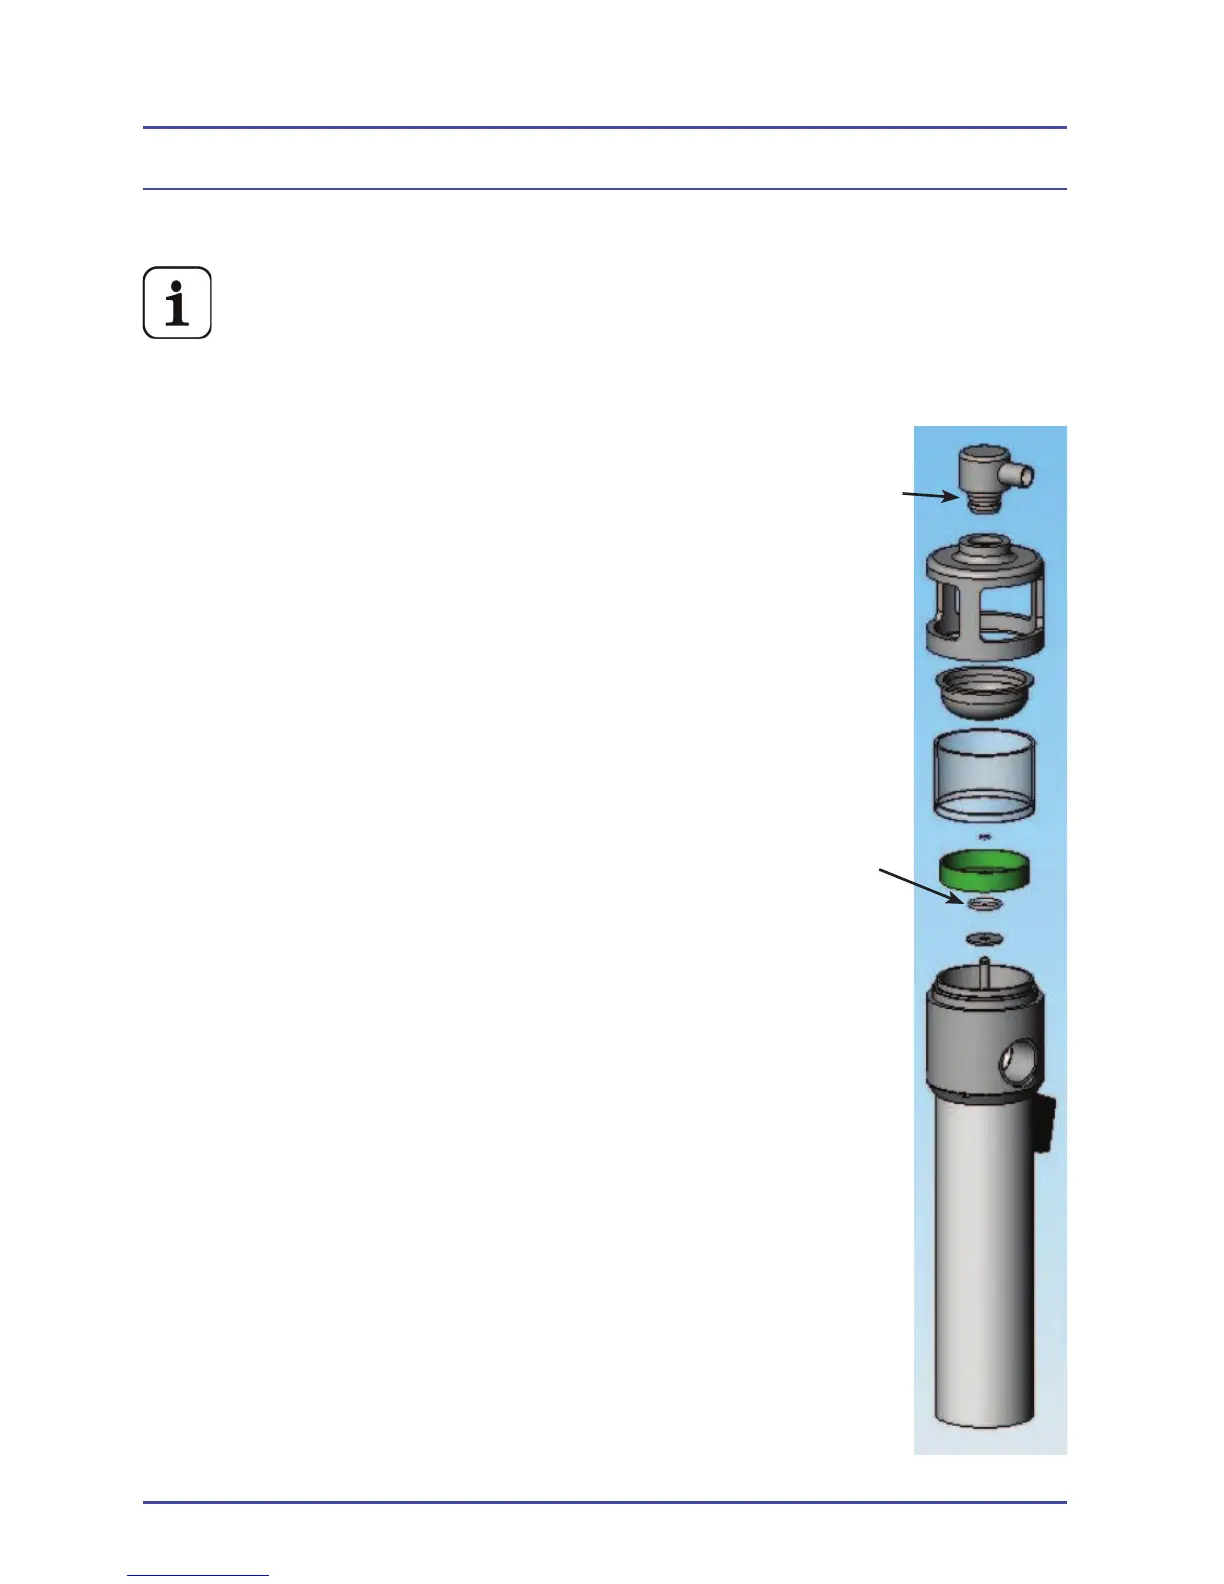
3.3 AGSS Probe and Float for Spacelabs AGSS
PN 14200018, (if Fitted)
The AGSS is not available in the U. S.)
1. Disconnect electrical supply to BleaseSirius
2. Remove the bellows assembly by sliding the absorber forward until
the bellows connections become free, then
remove the two thumb wheels at the front of
the bellows. The bellows assembly can now
be lifted clear of the locating pins at the rear of
the bellows assembly.
3. Working through the apparatus below the
bellows assembly.
4. The AGSS probe can be pulled out of the top of
the AGSS unit.
5. Remove the ‘O’ Ring and replace with the new
part.
6. Disconnect the 30mm connector from the
side of the AGSS unit, (located approximately
100mm down the AGSS unit).
7. The AGSS unit will now pull off its V mounting
bracket and can be removed through the
apparatus.
8. Hold the lower black part of the body (where
the 30mm connector is) and unscrew the top
black part (with the windows).
9. Clean the fi lter.
10. Remove the top ‘O’ Ring slide the green fl oat
off the central stem and remove the bottom
‘O’ Ring.
11. Replace the bottom ‘O’ Ring.
12. Refi t the fl oat (make sure it is the correct way
up) then replace the top ‘O’ Ring.
13. Reassemble the fi tted/window on top, screw
onto the lower sections.
14. Place the AGSS unit back onto its V bracket.
15. Refi t the 30mm connector and the AGSS probe.
Figure 10 - AGSS
Planned Maintenance
“O’ Ring
“O’ Ring