5-16 Sysmex XP-300
Initial Operation
Revised July 2012
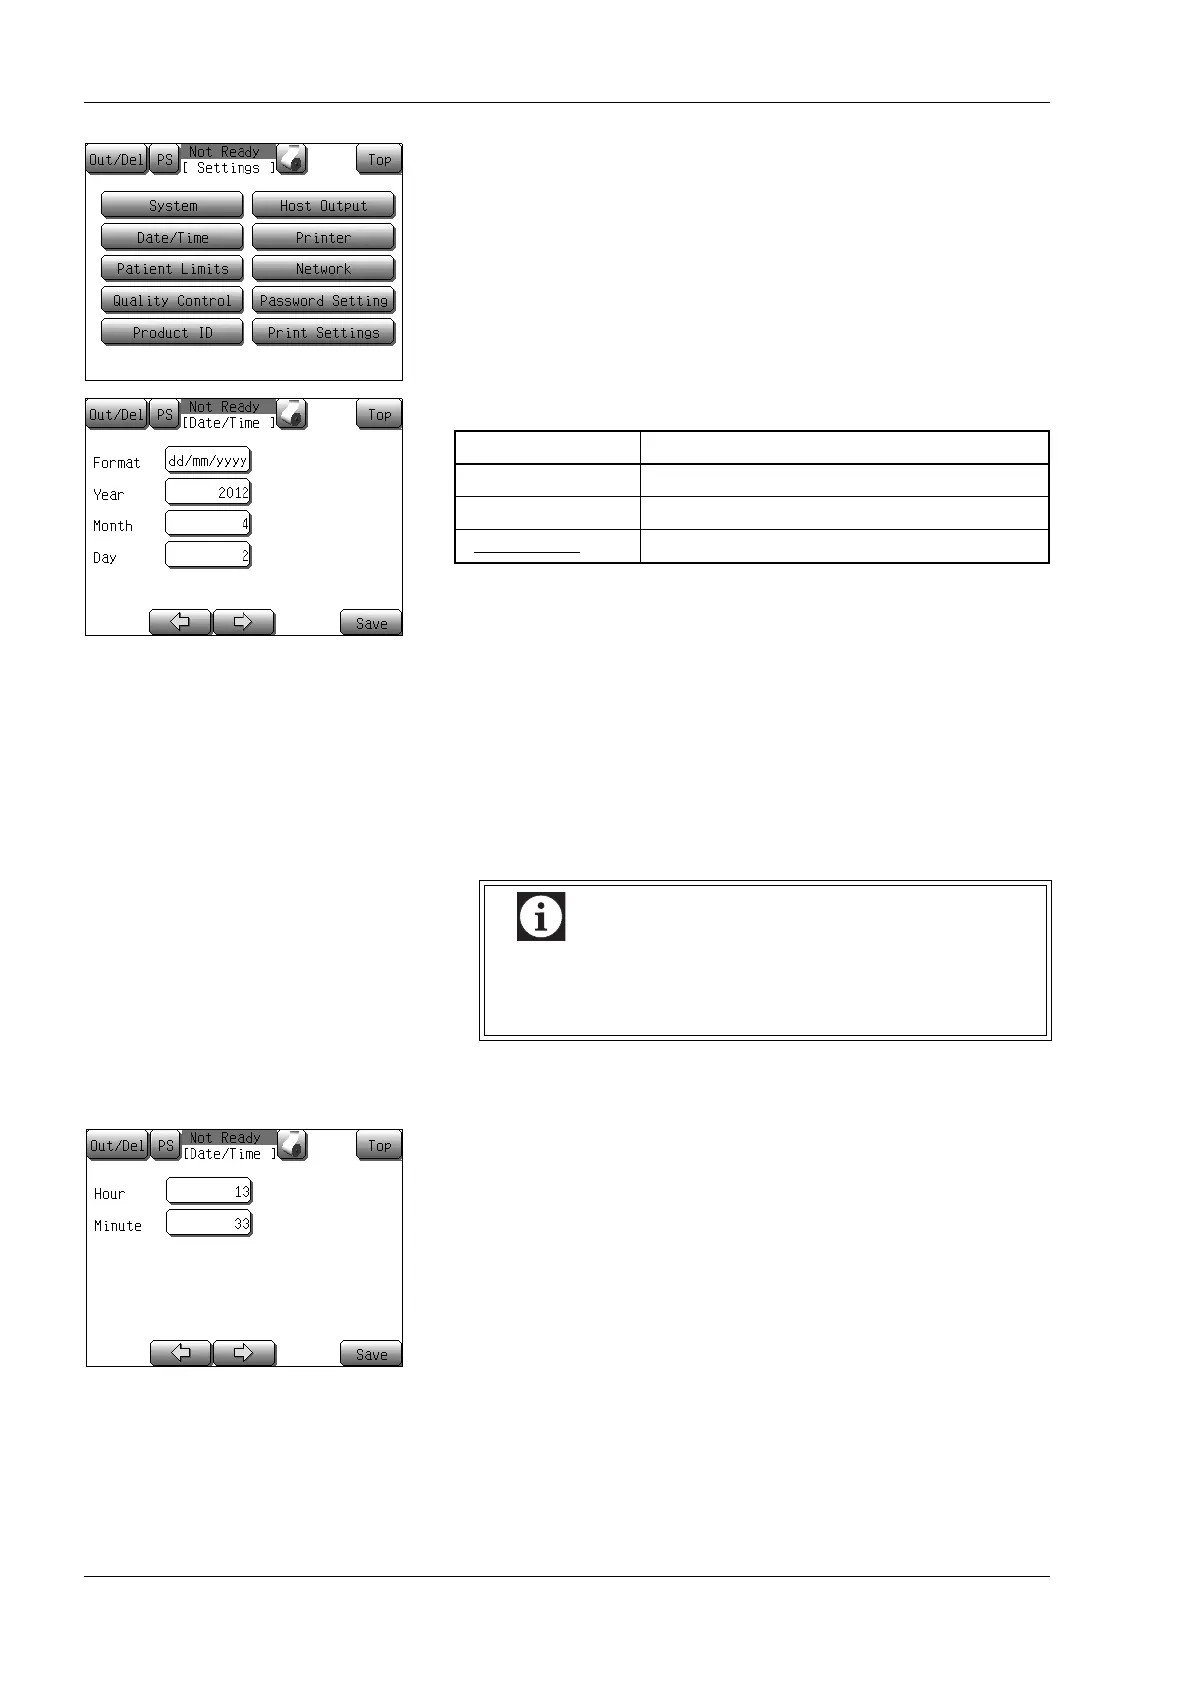
(3) Press the [Date/Time] button.
The initial Date/Time setting screen will appear.
(4) Press the Format display column to select a date display format.
The underlined format is the initial setting.
(5) Press the Year display column.
The date input dialog will appear.
(For details about the numerical keys dialog, see “Numerical
keys dialog” in “6.1 Screen display”.)
(6) Enter the year, and press the [Ent.] button.
If an incorrect value was entered, press the [C] button and enter
the correct value again.
(7) Enter the month and day in the same way as when entering the
year.
(8) Press the [→] button to bring up the second Date/Time setting
screen.
(9) Enter the hour and minute in the same way as when entering the
year.
(10) Press the [Save] button to update the settings.
The setting update confirmation dialog will appear.
• Press the [OK] button to update the changed settings.
• Press the [Cancel] button to close the dialog, and setting can
be continued.
*Press the [Top] button on the setting screen. The setting stop
confirmation dialog will appear.
Press the [OK] button to return to the Main screen without
changing the settings. Press the [Cancel] button to close the
dialog and continue to change settings.
For details about confirmation dialogs, see “Dialog screen”
in “6.1 Screen display”.
Display format Example of display (for February 3, 2012)
[yyyy/mm/dd] 2012/02/03
[mm/dd/yyyy] 02/03/2012
[dd/mm/yyyy
] 03/02/2012
If an incorrect date was entered (e.g. 4/31 or 2/29 in a
year which is not a leap year), a beep sounds.
Reenter the correct date.