175
COMPARING ANALYSIS RESULTS
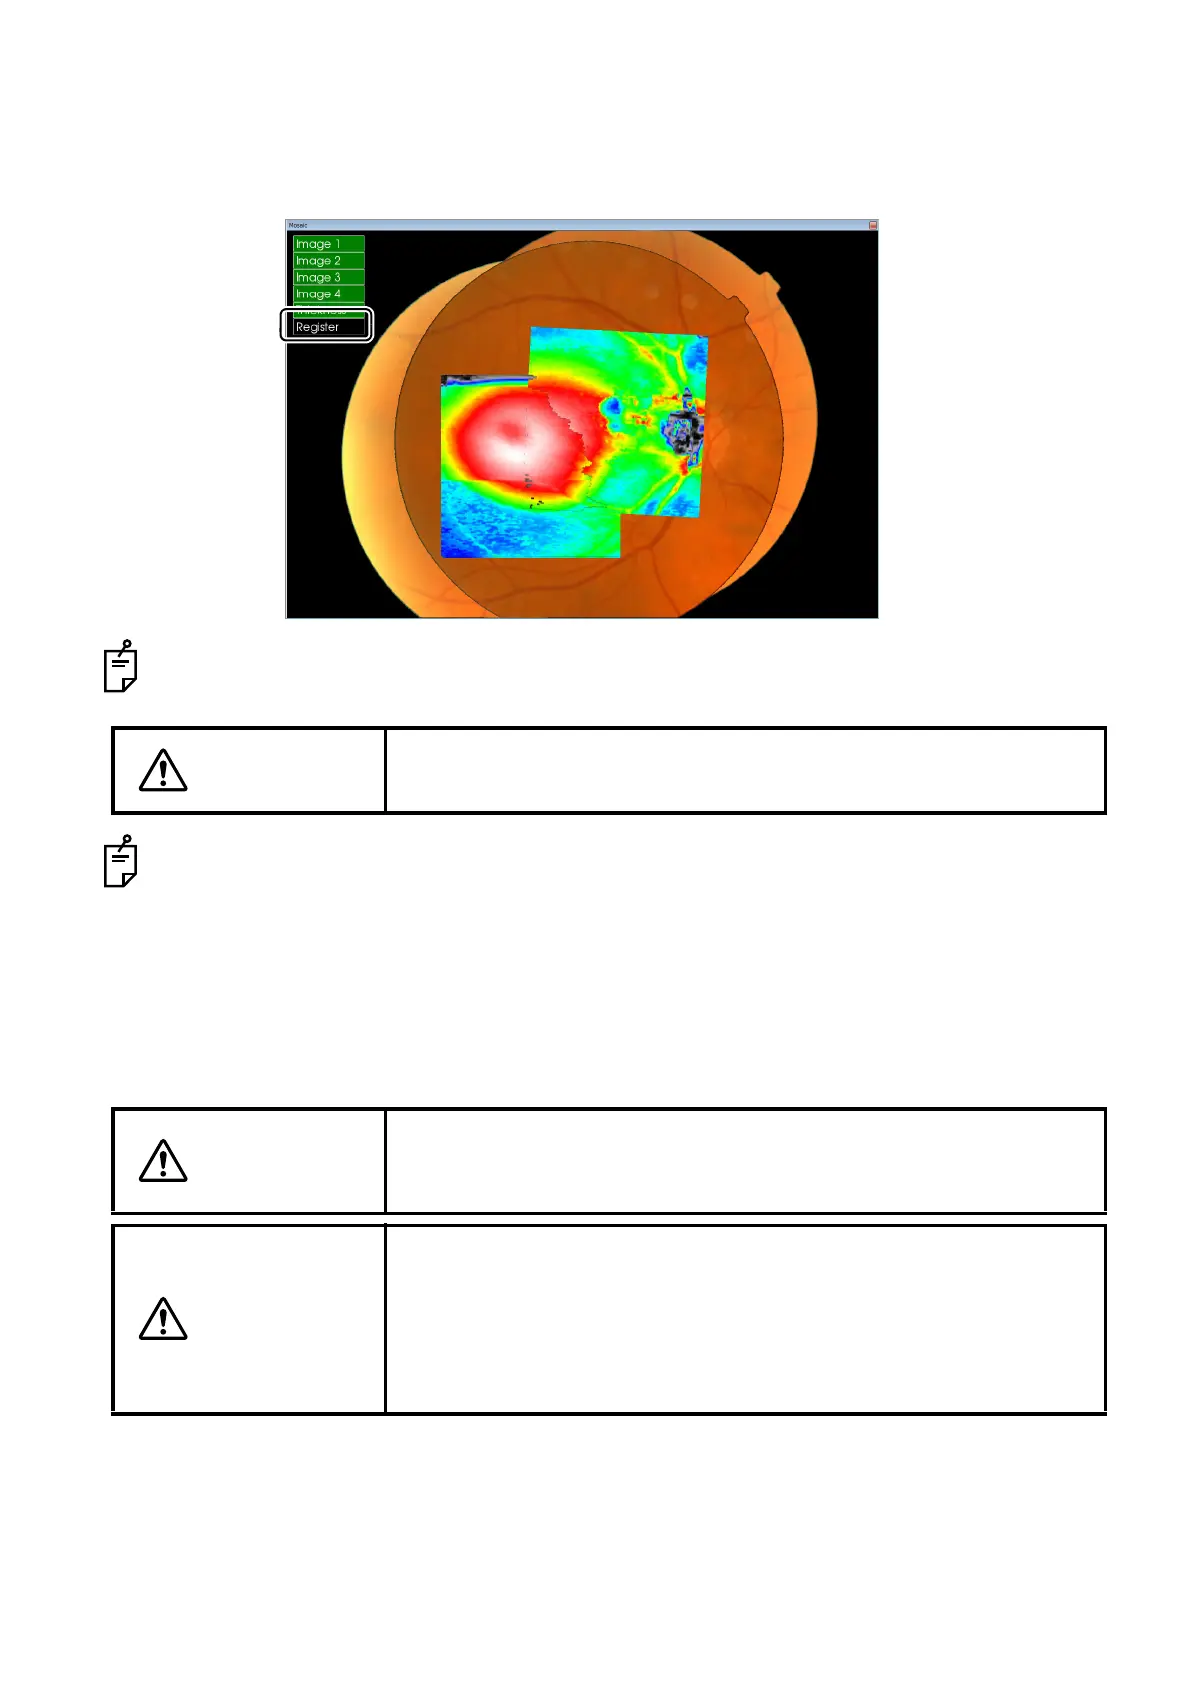
3 Click [Run] in the "Register" menu.
The color fundus images are automatically positioned and are stitched together to form a mosaic
image. It is possible to select up to ten tomograms.
You can advance Thickness Map in order with the mouse wheel button. You can use "Reposition"
for Thickness Map of others except "Image 1".
If the picture position is too far from the instrument or if the fundus image is blurred or dark, you
may fail in "3D Mosaic Comparison". In this case, use "Reposition".
Carry out "Reposition" for "Image 2" first and then other Images in turn. When "Reposition" is per-
formed for one Image, others that will be processed in the same way should be hidden on the
screen. So, you can perform "Reposition" easily. (For example, when you perform "3D Mosaic
Comparison" for four data, carry out "Reposition" for "Image 2" first in the condition that "Image 3"
and "Image 4" are hidden. Next, display "Image 3" and perform "Reposition" for it and finally per-
form "Reposition" for "Image 4".)
CAUTION
The insufficient memory error may occur when selecting ten tomograms
depending on the environment.
CAUTION
After clicking [Run] in the "Register" menu, Thickness Map is not dis-
played from time to time. In this case, click [On/Off] in the "Thickness"
menu.
CAUTION
To display Thickness Map, the same layers in the selected image as
those in "Image 1" must be analyzed. If the different layer has been
analyzed, click the layer detection display selector buttons properly
(refer to "A-2: Image Processing Controls area" on P.83) and analyze
the necessary layer. Then, try the operation again to display Thickness
Map.