170
COMPARING ANALYSIS RESULTS
5.4. Comparison: Advanced
5.4.1. Comparison
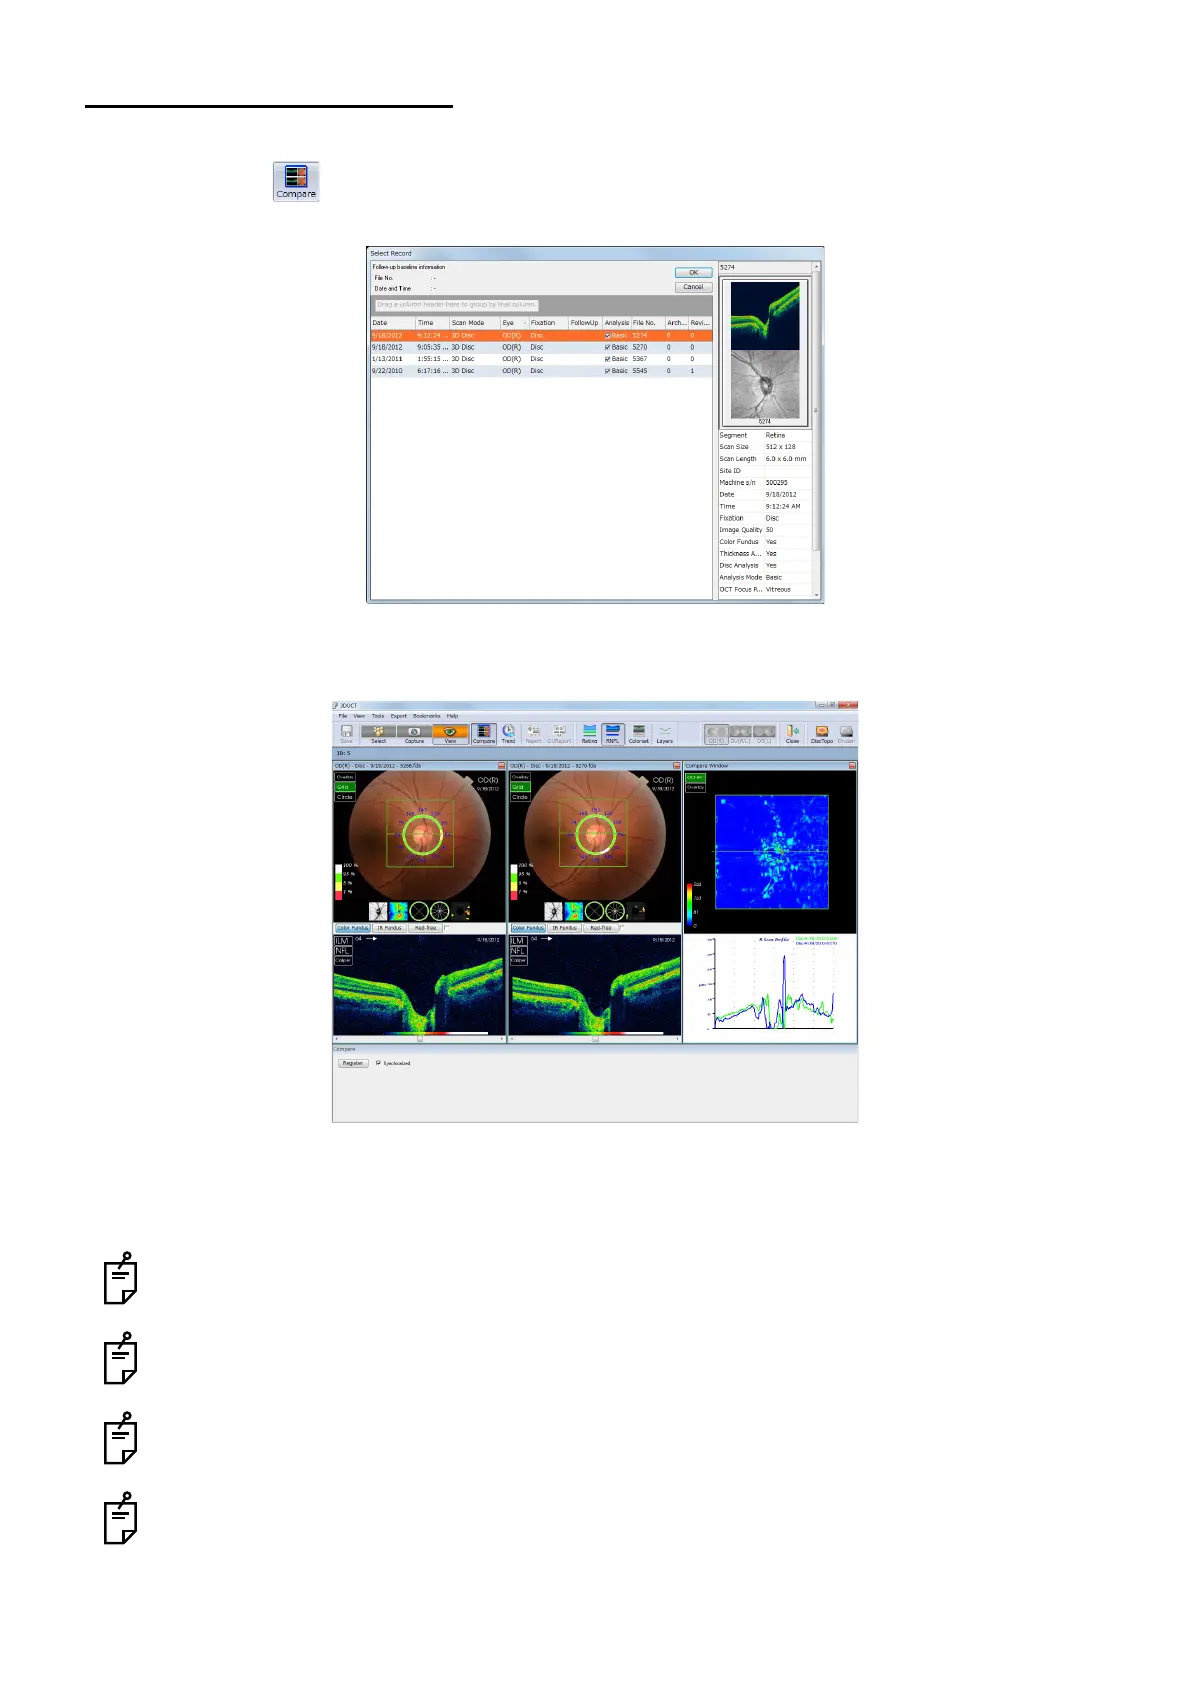
1 Press the button on condition that 3D-scan one eye data is displayed. The measurement
data selection screen appears.
2 Select two 3D scan data of same conditions and press the [Compare] button. The detailed com-
parison images are displayed.
3 Place a check mark for "Synchronized" at the lower left. The green line and the "Pin-point Regis-
tration™" function are synchronized on the two fundus images and the image of "Compare Win-
dow".
You can use the menu of the fundus/anterior segment display area for the comparison images.
For details, refer to "How to use the menu" on P.87.
When "Comparison: Advanced" is performed for the "3D: Disc" data and "Grid" is set to "RNFL-4",
"RNFL-6" or "RNFL-12", "Pin-Point Registration" is not valid.
When "Off" is set for "Map On/Off" of the "Overlay" menu on "Compare Window", "Pin-point Regis-
tration" cannot be performed on "Compare Window".
"Comparison: Advanced" can be executed only for the data of the scan mode of "3D: Macula" or
"3D: Optic disc".