138
ANALYZING TOMOGRAMS
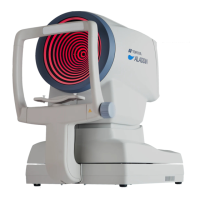
3 Using "Disc Modify" displayed when selecting "Disc Segmentation", you can modify the analysis
result.
1. Select "Modify (Point7)" or "Modify (Point18)" from the "Disc Modify" menu. Click the yellow
closed curve, and the seven or eighteen green circles (modification points) are displayed.
2. Carry out the following operations to edit the "Disc" shape.
• To adjust the closed curve position, drag the curve as pressing the left mouse button.
• To adjust the closed curve size, drag the curve as pressing the right mouse button.
• To modify the closed curve shape, drag the modification point as pressing the left mouse
button.
3. To cancel the modification, press "Cancel". To complete the modification, press "Exit Modify".
When the analysis result is modified, the optic disc analysis parameters and the optic disc
center position are calculated again.
When reanalyzing the data with the [ReAnalyze] button, the modified result is deleted and the data
is automatically overwritten by the calculated result.
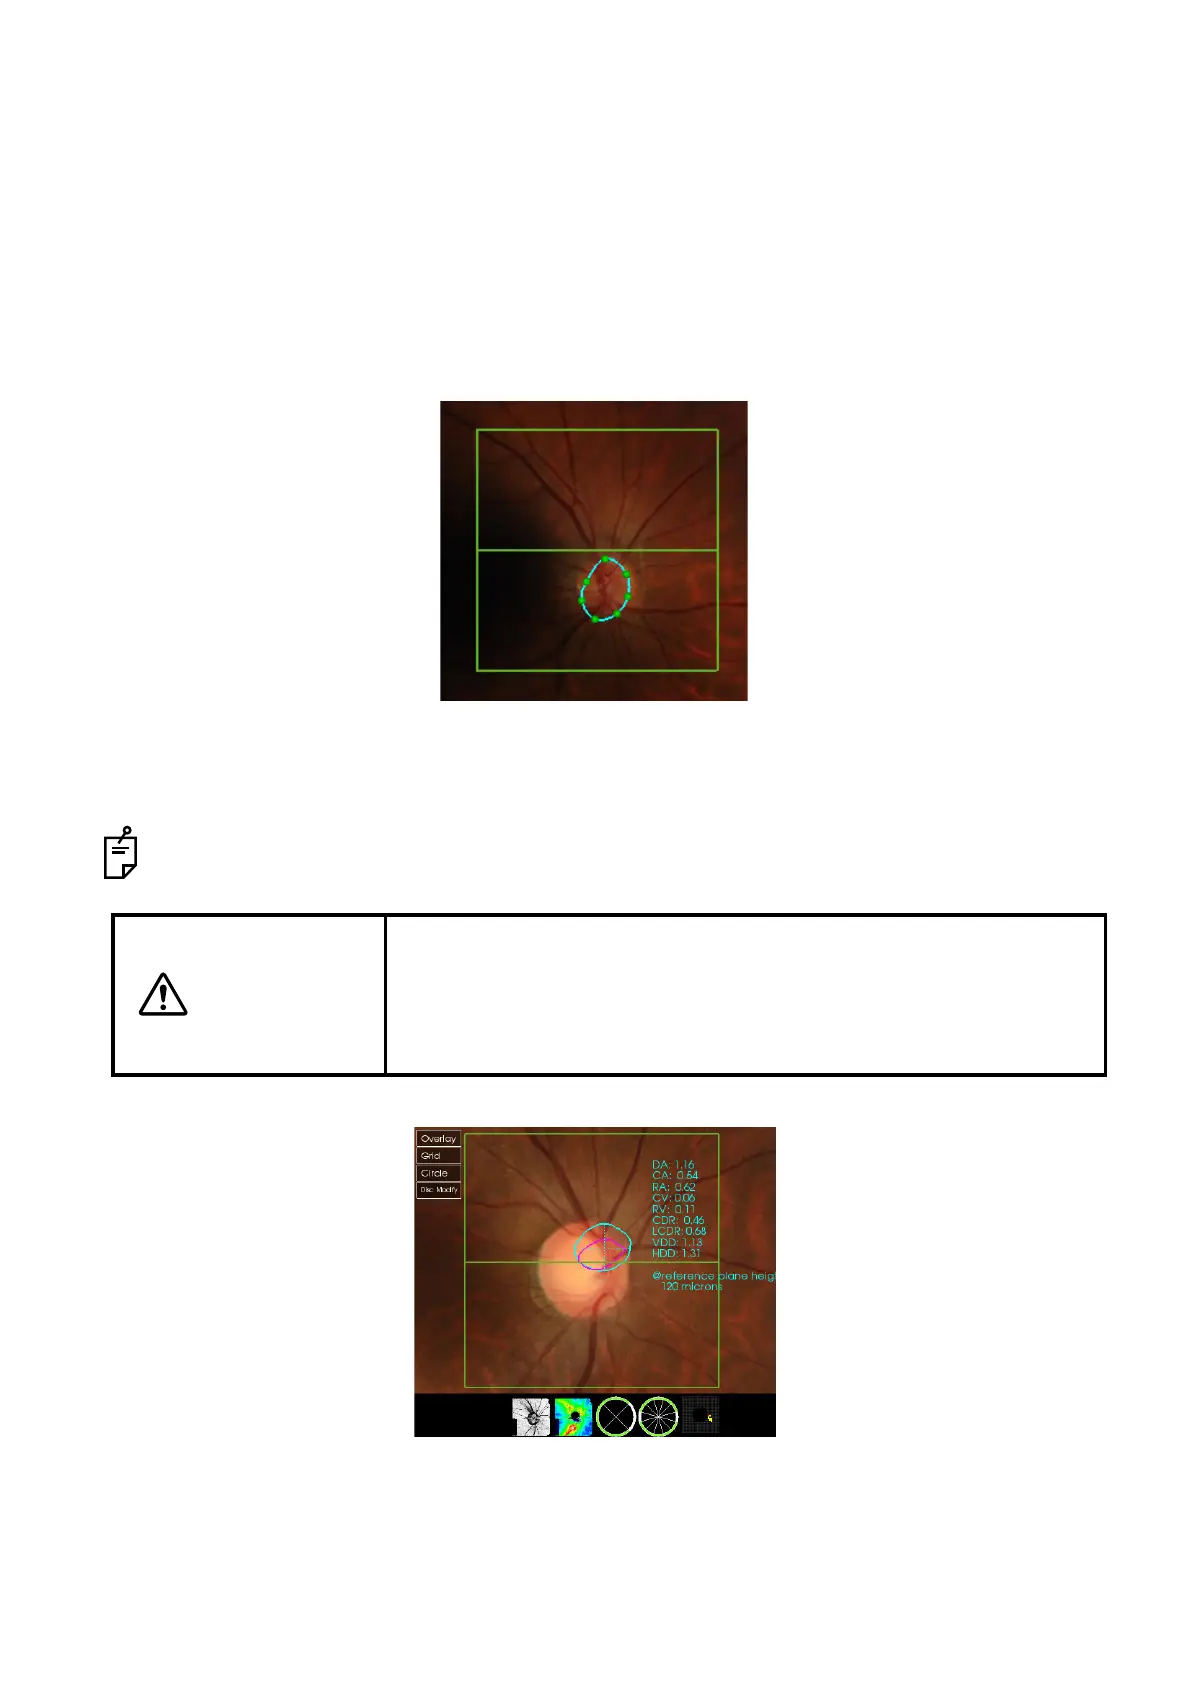
CAUTION
In the automatic optic disc analysis, sometimes errors occur due to the
photographed condition as shown below. In this case, using the menu
"Disc Modify" displayed when selecting "Disc Segmentation", you can
modify the analysis result. Refer to "Disc Modify" on P.95 in addition to
this page.