203
MANAGING DATA
8.4.3. Scan length compensation
Carry out setting as mentioned below when adjusting the scan size of the 3D data that was photo-
graphed by 3D OCT-1000/1000 MARK II from 6.0mm.
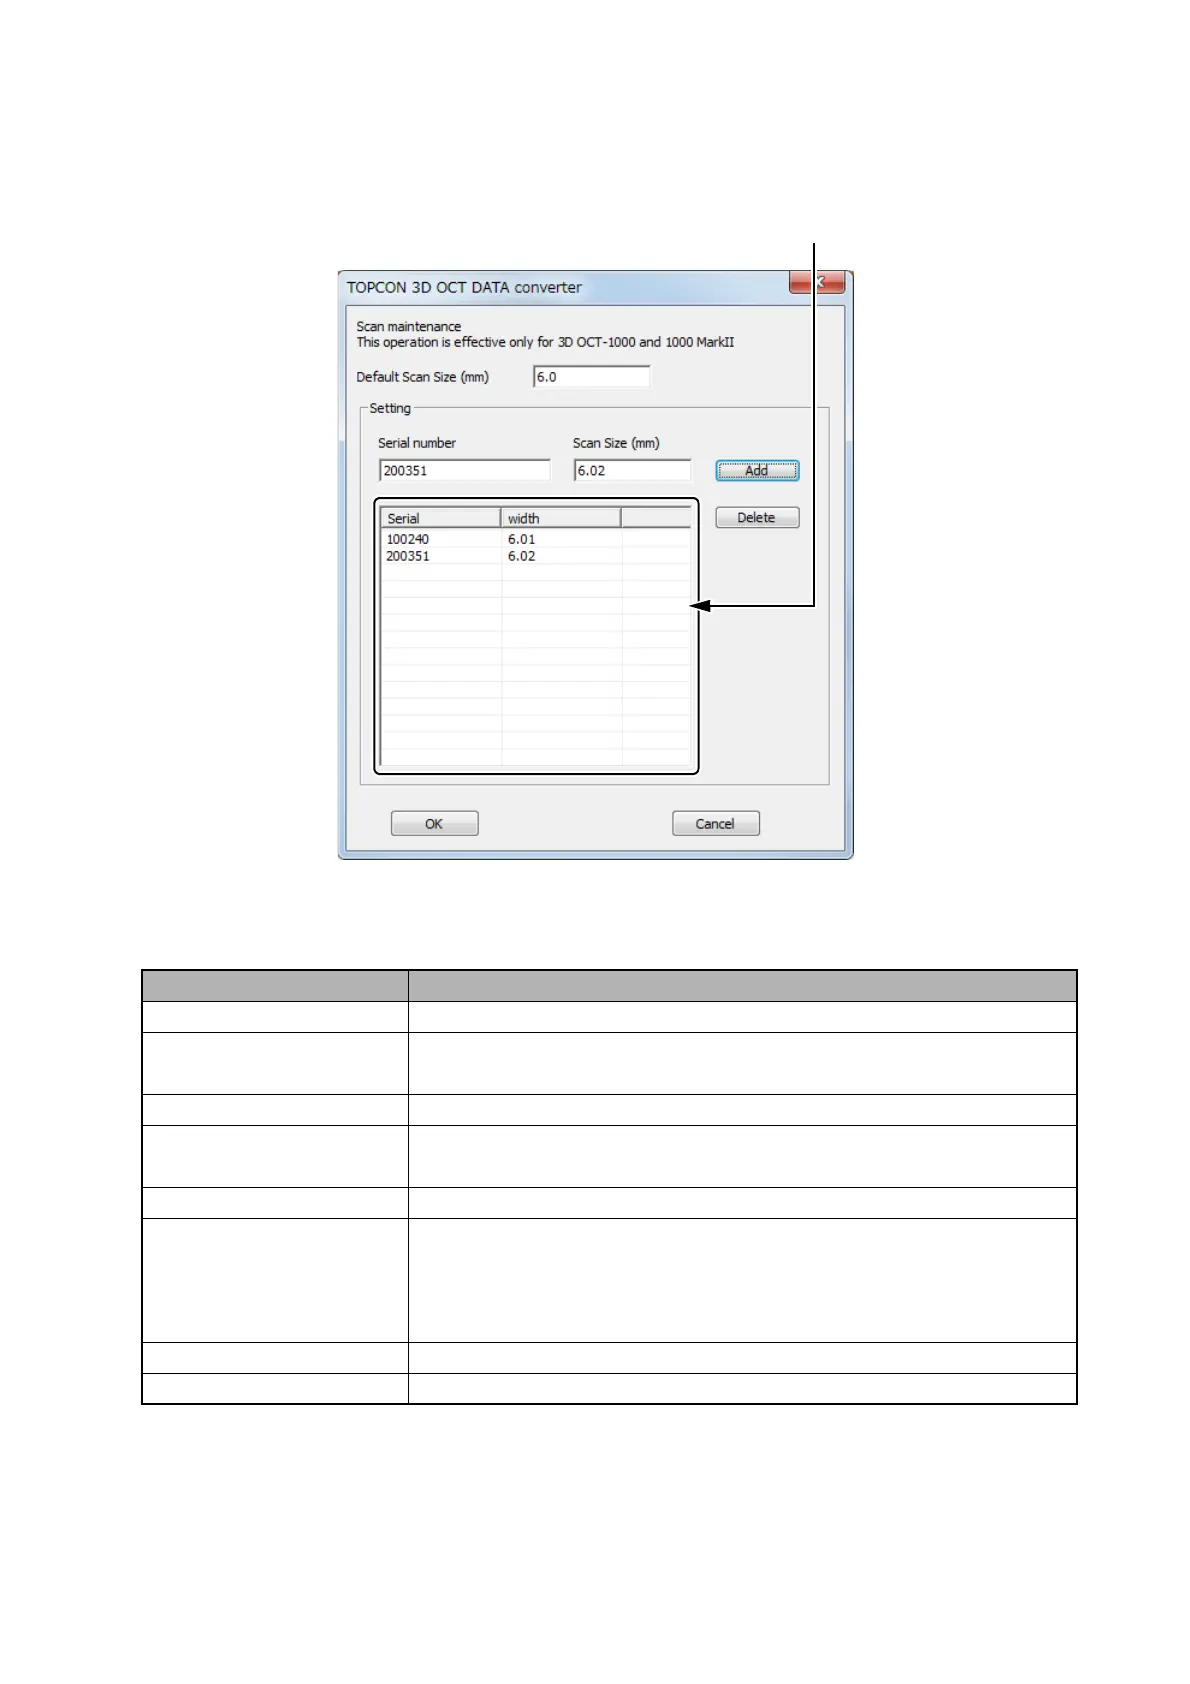
Perform the following setting on the scan size changing screen and press the [OK] button. The set-
ting is saved.
Set item Contents
Default Scan Size(mm) Set the scan size that will be applied equally to all data.
Serial number Enter the 6-digit serial number of the device that is the object of
change.
Scan Size(mm) Specify the scan size after changing.
Add button Add the values, which are input to the text boxes [Serial number]
and [Scan Size (mm)], to the list.
Delete button Delete the serial number and scan size selected on the list.
Display list This list displays the registered serial numbers and scan sizes.
If you want to convert the data that was photographed by the
device whose serial number is displayed here, set the scan size
corresponding to the serial number.
OK Save the setting.
Cancel Closes the scan size changing screen without saving the setting.