Removing and Installing the Seat
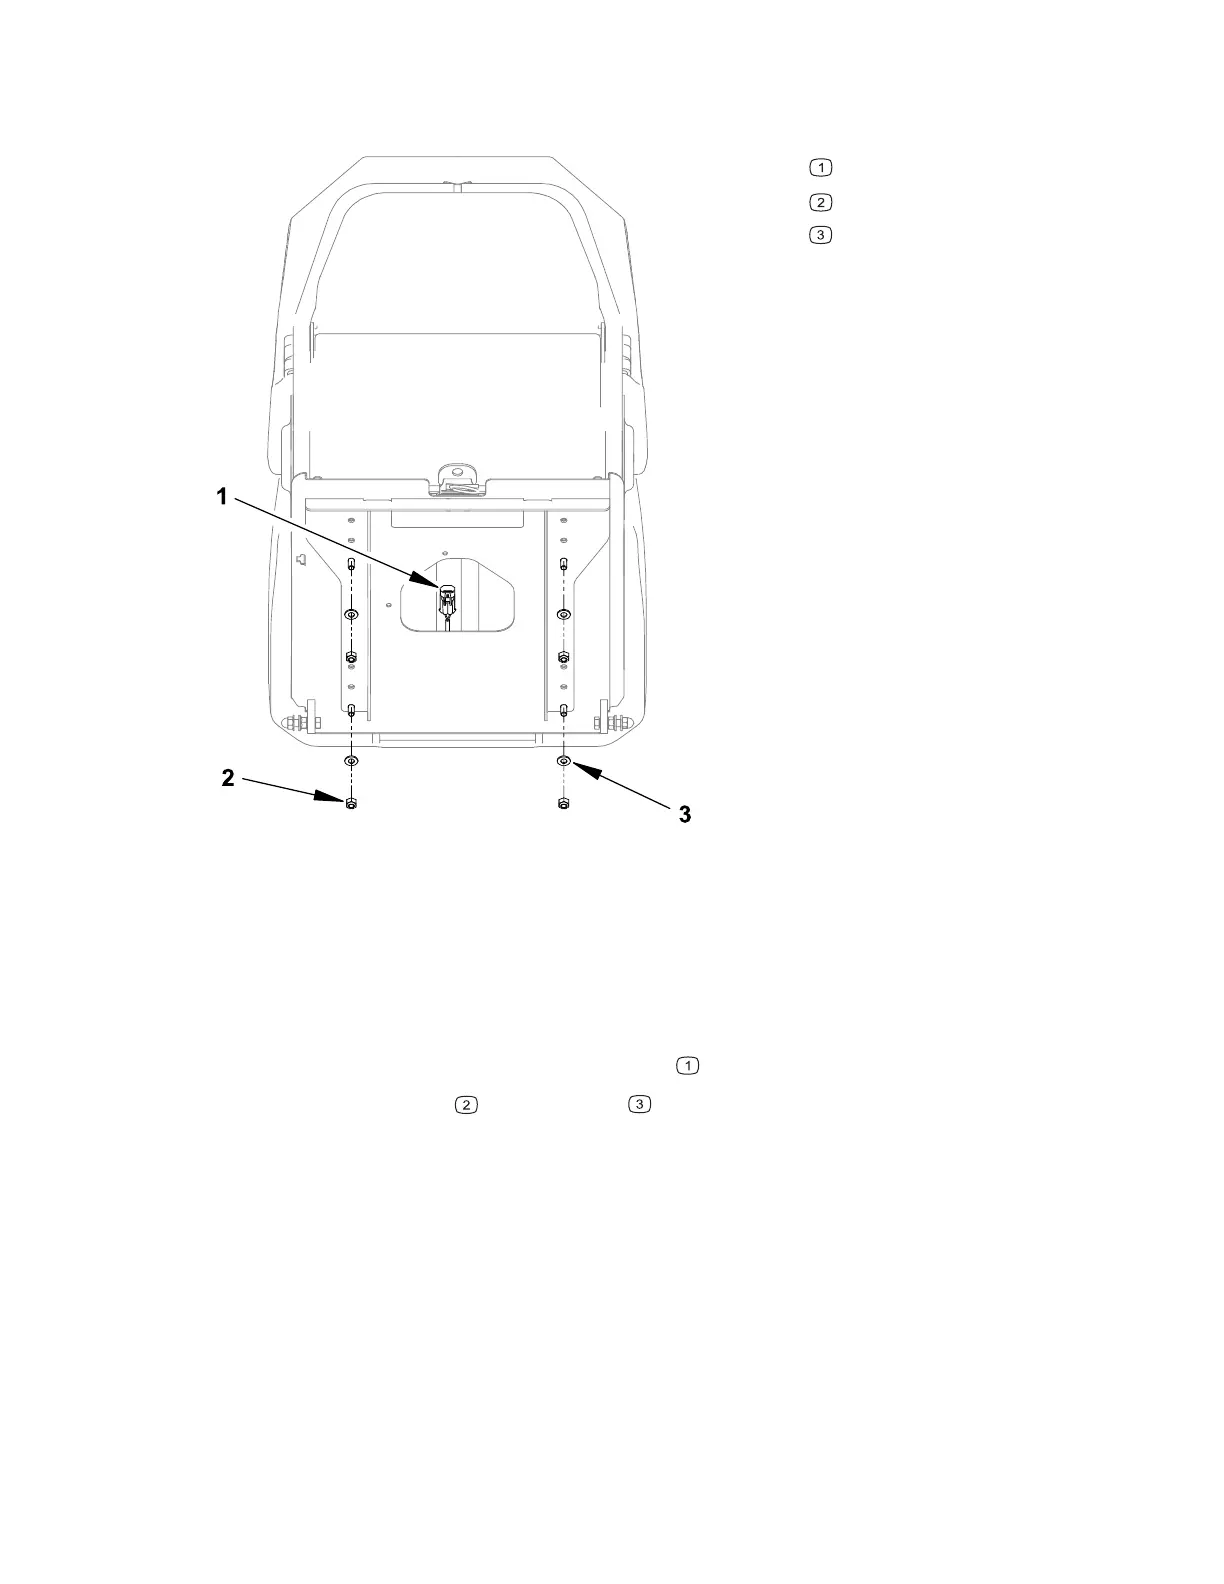
Figure 95
G430837
Electrical connector
Nut
Washer
1. Park the machine on a level surface, lower any attachments to the ground,
engage the parking brake, and remove the key from the ignition.
2. Switch the main circuit breaker to the O
FF position, to de-energize the electrical
system.
3. Tilt the seat forward and secure it in place with the seat prop.
4. Disconnect the seat electrical connector(s)
from the main wiring harness.
5. Remove the four nuts
, and washers from the mounting studs.
6. Return the seat to the operating position.
7. Lift the seat from the seat mount.
8. To install the seat, place the four large washers on the seat mount over the
mounting holes.
9. Position the seat with mounting studs through the washers and seat mount.
10. Carefully tilt the seat forward and secure it with the seat prop.
11. Install the four washers and nuts on the mounting studs.
12. Connect the seat electrical connector(s).
13. Return the seat to the operating position.
Chassis: Service and Repairs Page 7–30 4520P
09.40003Rev 00



 To Next Page