Installing the Weight Transfer Assembly
Figure 103
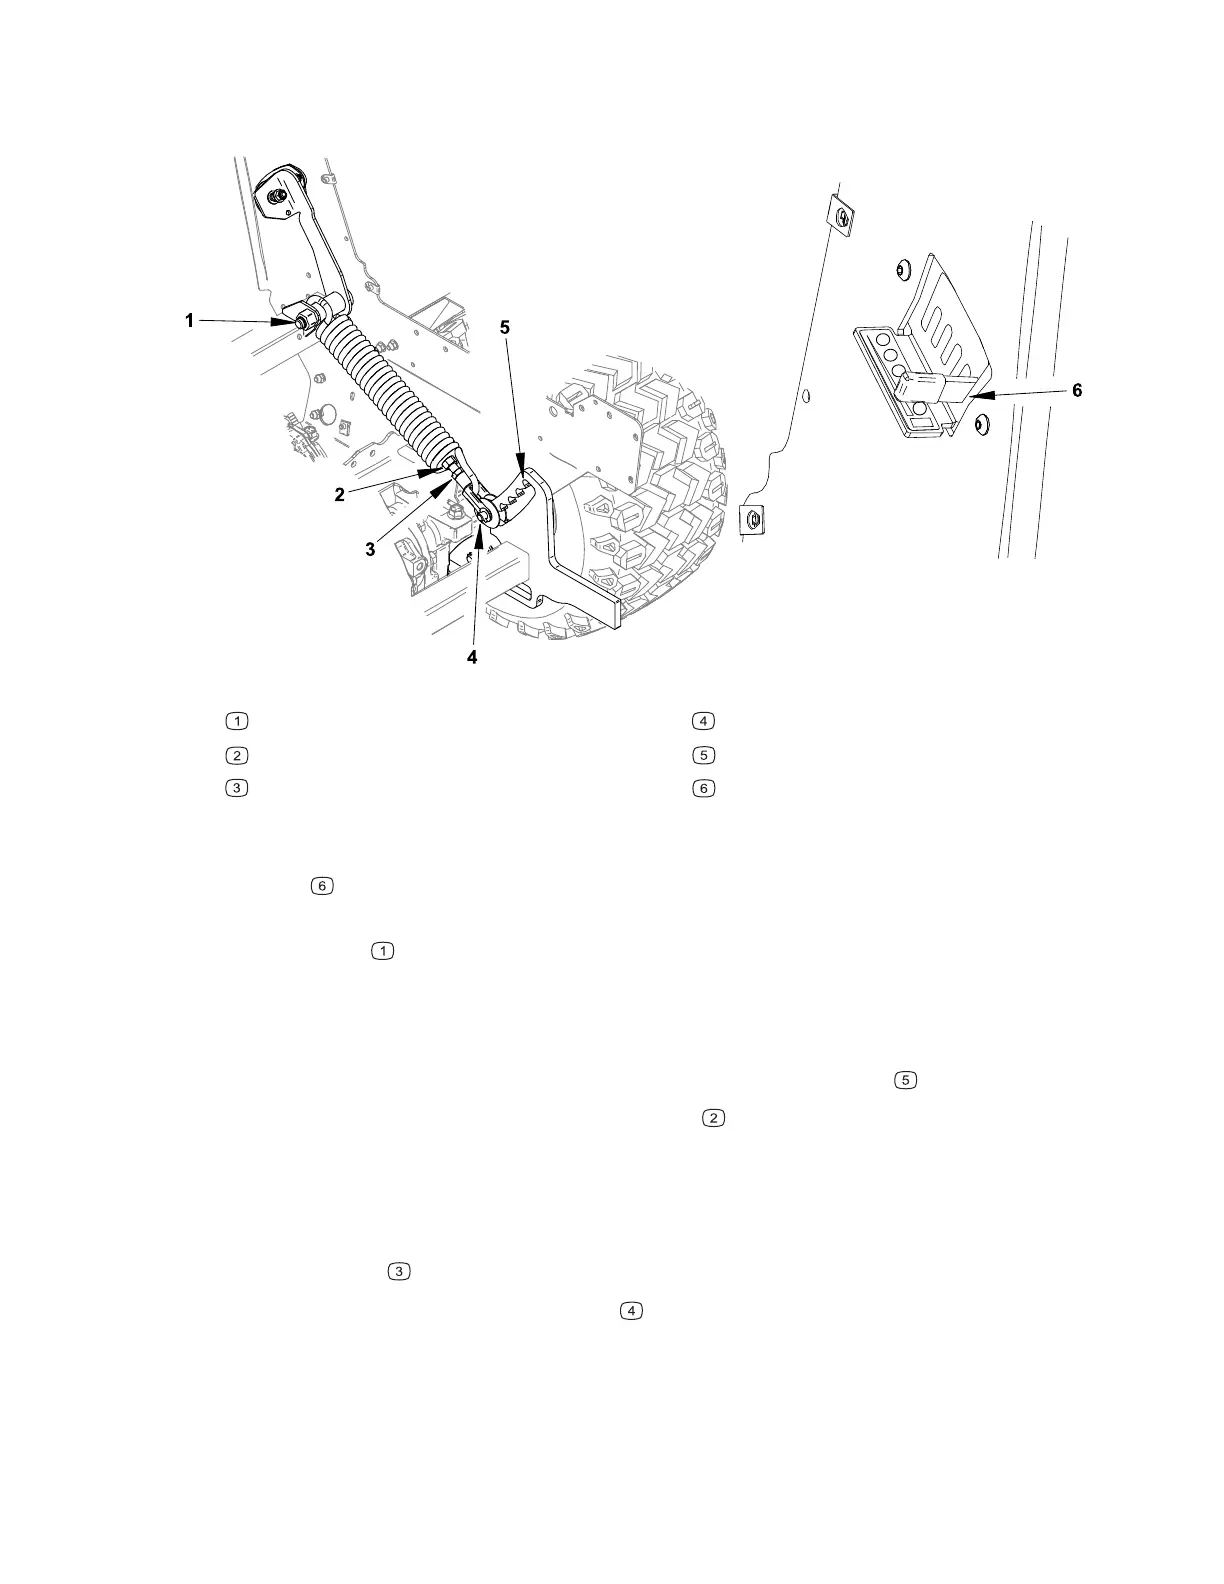
G443501
Mounting bolt
Adjustment nut
Jam nut
Clevis pin
Hitch position 4
Adjustment lever position 4
1. Position the weight transfer assembly in the machine aligning the mounting holes,
ensure that the adjustment lever is through the selector bracket in the setting 4
position
.
2. Install the bushing into the arm, place the washer on the bolt head and install the
mounting bolt
through the frame securing it in place with the lock nut.
3. Ensure that the front hitch is fully in the up position, and the adjustment lever is in
the number 4 setting.
4. Install the clevis pin, do not install the washers at this time, tighten the selector
bracket hardware so that the clevis pin engages hitch position 4
.
5. Adjust the clevis pin using the adjustment nut
so that the pin is approximately
1/8” from the teeth on the hitch when the weight transfer selector lever moves up
and down. The pin should not contact the forward portion of the hitch.
6. Check the operation of the weight transfer in each position. The pin should freely
move into the corresponding slot when the hitch is moved up and down.
7. Secure the jam
nut when all adjustments have been completed.
8. Install the washers onto the clevis pin
, the washers go on either side of the
hitch inside the clevis. Secure the clevis pin in place with a cotter pin.
9. Install the left engine cover and air cleaner.
Chassis: Service and Repairs Page 7–38 4520P
09.40003Rev 00