Installing the Parking Brake Drum (continued)
4. Check the brake function, adjust the parking brake as necessary; refer to
Adjusting the Parking Brake, page 7–6.
5. Install and adjust the speed sensor; refer to Adjusting the Speed Sensor, page 6–
52.
6. Install the engine cover.
Removing the High / Low Shift Cable
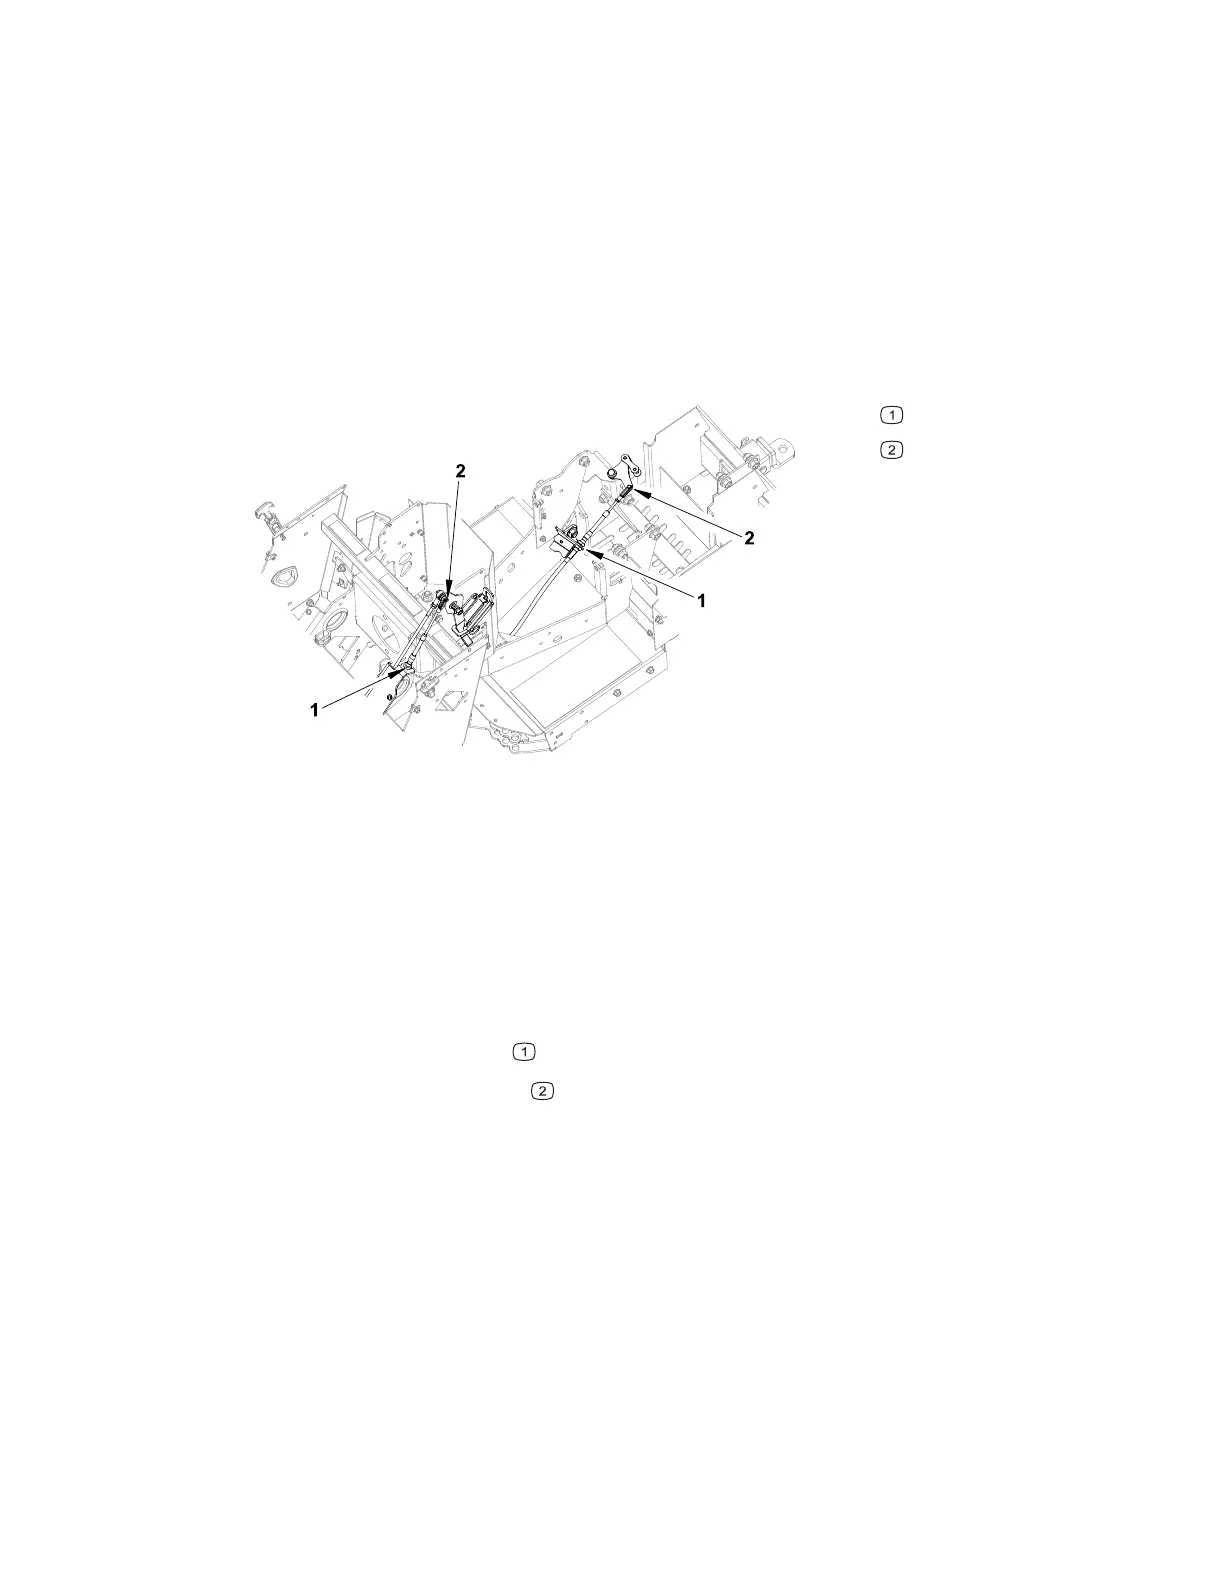
Figure 107
G443645
Jam nuts
Clevis pin
1. Remove any attachments from the machine, park the machine on a level surface,
engage the parking brake, remove the key from the ignition, and switch the main
circuit breaker to the O
FF position.
2. Raise the hood and remove the hydraulic filter access cover; refer to .
3. Remove the lower frame cover; refer to Removing and Installing the Lower
Frame Cover, page 7–18.
4. Place the high-low shifter in the low range position.
5. Loosen the jam nuts
from the front mount and the rear mount.
6. Remove the clevis pin
from the front and rear levers.
7. Remove the cable from the machine.
Installing the High / Low Shift Cable
1. Thread the clevis ends onto the high-low shift cable, ensure that the ends of the
cable are even with the inside of the clevis.
2. Route the cable between the steering cylinder hoses and frame trim, down
through the center pivot and the upper left tunnel section, above the hoses to the
right rear side of the transaxle.
3. Install the front of the cable onto the frame ensure that a star washer is under
each jam nut on each side of the mounting bracket. Secure the jam nuts in place.
4520P Page 7–43 Chassis: Service and Repairs
09.40003Rev 00