Installing the Front Hitch Arms (continued)
3. Connect the front hitch arm latch Figure 113, item 1 securing it in place with a
washer and cotter pin.
4. Install the lift cylinder Figure 113, item 2 onto the hitch arms.
5. Install the weight transfer assembly Figure 113, item 4 onto the hitch arms.
6. Install the right and left engine covers.
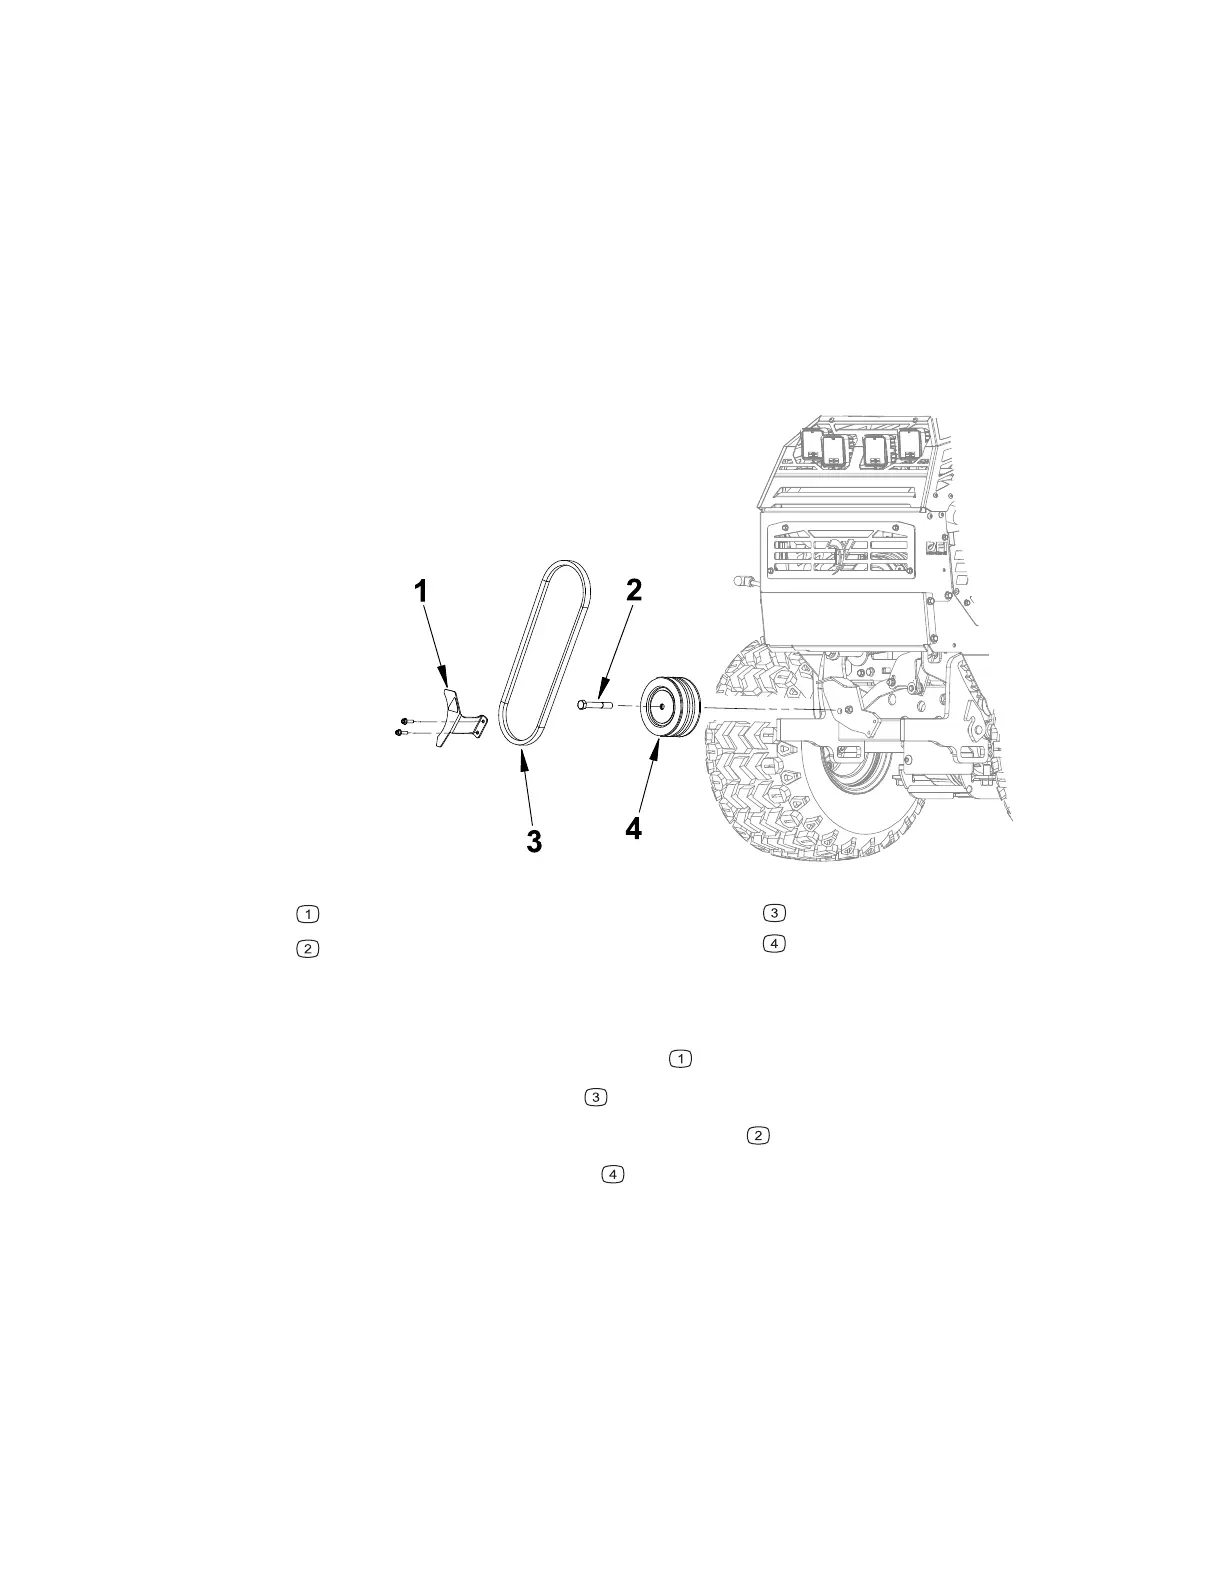
Removing the PTO Idler Pulley
Figure 114
G445391
Pulley guard
Mounting bolt
Belt
PTO idler pulley
1. Remove any attachments from the machine, park the machine on a level surface,
engage the parking brake, and remove the key from the ignition.
2. Remove the PTO idler pulley guard
.
3. Remove the PTO drive belt
.
4. Remove the PTO idler puller mounting bolt
.
5. Remove the PTO idler pulley
from the machine.
Installing the PTO Idler Pulley
1. Position the PTO idler pulley Figure 114, item 4 on the machine aligning the
mounting holes.
2. Install the PTO idler pulley mounting bolt Figure 114, item 2.
3. Install the PTO drive belt Figure 114, item 3.
4520P Page 7–51 Chassis: Service and Repairs
09.40003Rev 00