C H A P T E R 5 – G E T T I N G S T A R T E D
AT5600 User Manual 98-119 issue 14 Page 65
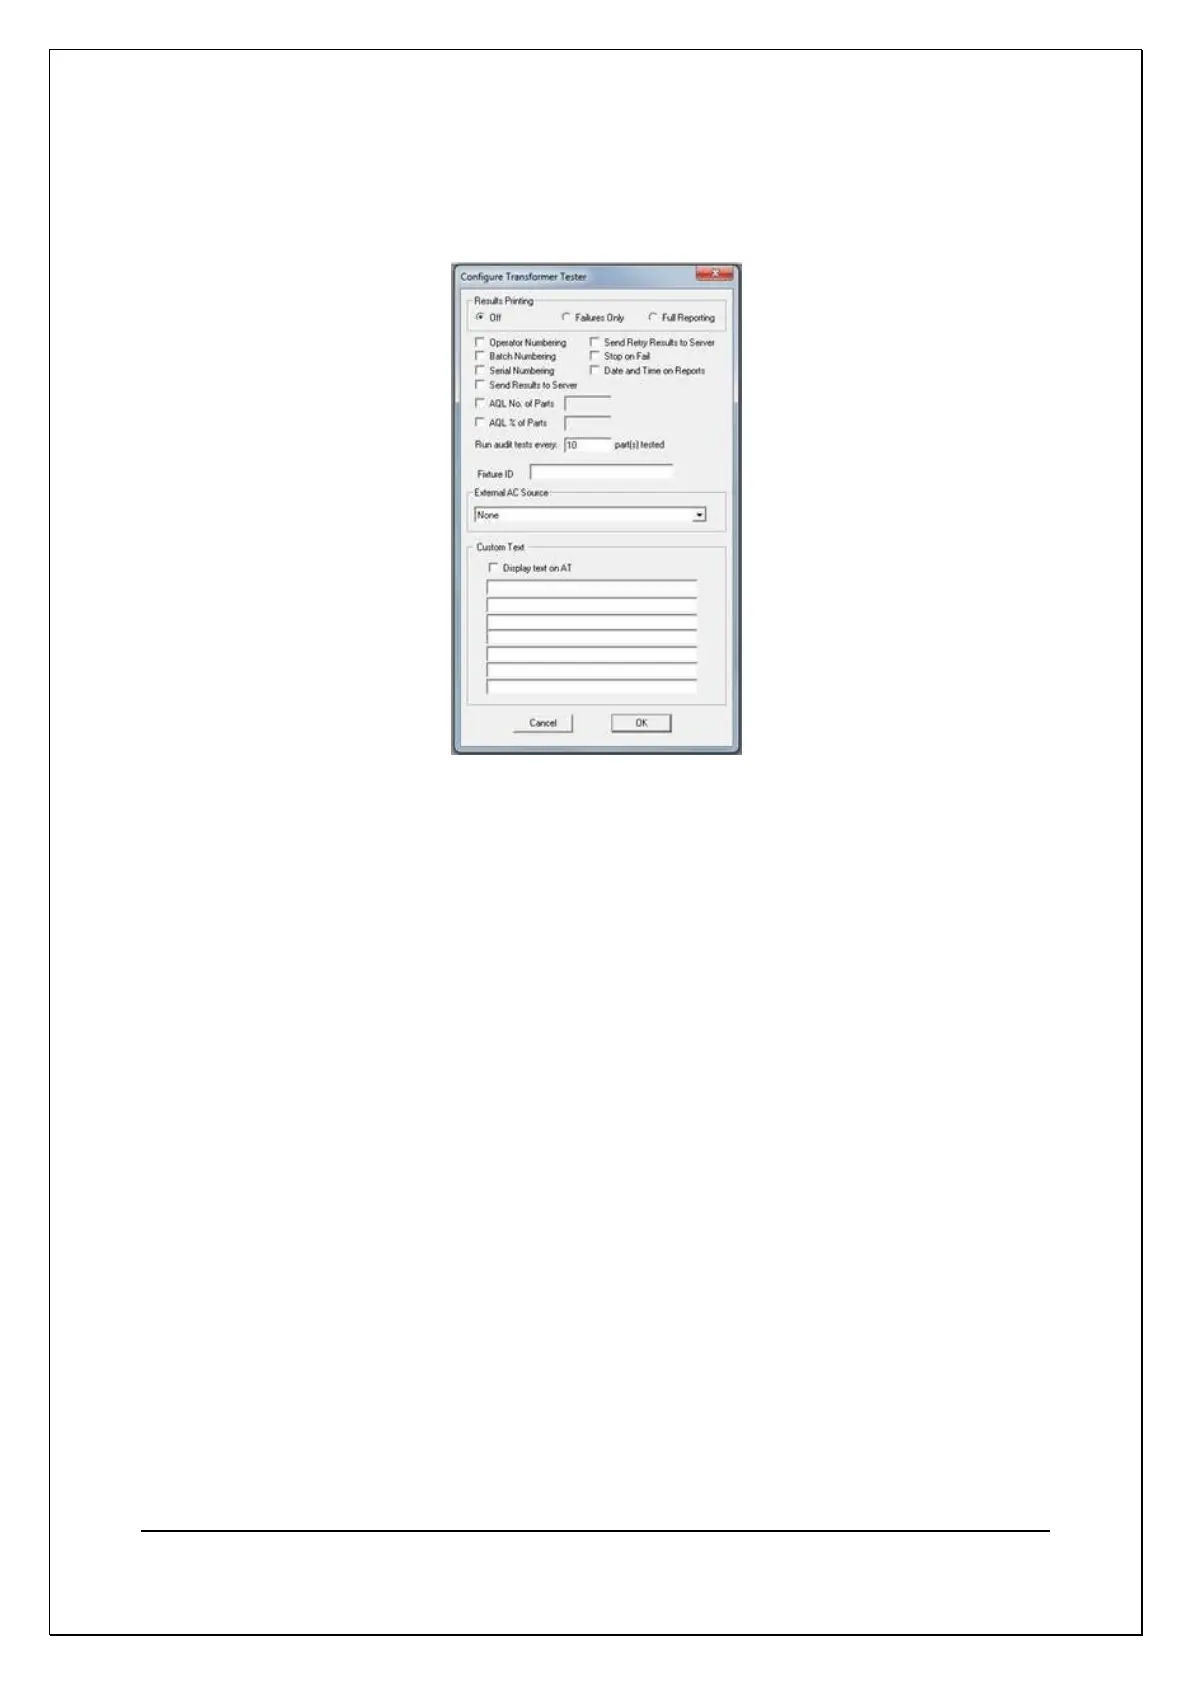
1. Set up the program options:
From the top-level menu bar select: ‘Program’ menu, then select ‘Options’
The following dialogue box will appear:
Using the left mouse button, click to enable the following option
‘Send Results to Server’
In the Fixture ID box, enter the name:
‘UNIVERSAL’
Click on ‘OK’ or press [Return] to accept the changes and close the dialogue
box.
2. Create the test program:
From the Top Level ‘Program’ menu, then select ‘Edit’.
The screen will now be made up of three Windows;
Top left: The schematic window showing the two windings.
Right side: The available tests window listing all the tests available on your
AT5600. (Any test that is not available shall be grayed-out).
Lower left: The Program window displaying the tests programmed so far.
There are three tabs; General Tests, Audit Tests, and Diagnostic
Tests
• General Tests
• Audit Tests
• Diagnostic Tests