Chapter 3 Installing a Stand-Alone Controller in a Rack or Panel
68 Adept MV Controller User’s Guide, Rev. B
For installations in Europe to maintain compliance with
EN 60204-1, the mounting of the controller and all terminations at
the controller must be performed in accordance with this standard.
Space Around the Chassis
When the stand-alone controller is installed, you must allow 25 mm (1 inch) at the
left and right sides of the chassis for proper air cooling. You must also allow 75
mm (3 inches) at the front of the chassis for power and signal cable clearance.
The air filter must be kept clean so the forced air cooling
system can work efficiently. See Chapter 13 for details on cleaning
the filter.
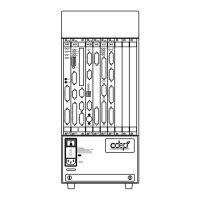
Rack Mounting
To rack mount the Adept MV-5 or MV-10 stand-alone controller in a standard
19-inch equipment rack, you must use the mounting brackets from the accessories
kit. See Figure 3-7 for instructions. See Appendix A for dimensions.
Figure 3-7. Rack Mounting for MV-5/MV-10 Stand-Alone Controller
Panel Mounting
To panel mount the Adept MV-5 or MV-10 stand-alone controller, you must use
the mounting brackets and screws from the accessories kit. See Figure 3-8 for
instructions.
Front
Side View of MV-5 or MV-10
To install mounting brackets in rack mount
position:
• Remove 4 existing screws and washers
from side of chassis at locations shown
in drawing.
• Place bracket in position and secure
with same screws and washers removed
above.
• Repeat process for other side of controller.
To install mounting brackets in rack mount
position:
• Remove 4 existing screws and washers
from side of chassis at locations shown in
drawing.
• Place bracket in position and secure with
same screws and washers removed above.
• Repeat process for other side of controller.
Side View of MV-5 or MV-10
Front
Artisan Technology Group - Quality Instrumentation ... Guaranteed | (888) 88-SOURCE | www.artisantg.com