9960 Self-Propelled Peanut Combine Operator’s Station
MAN091 06/03/05 45
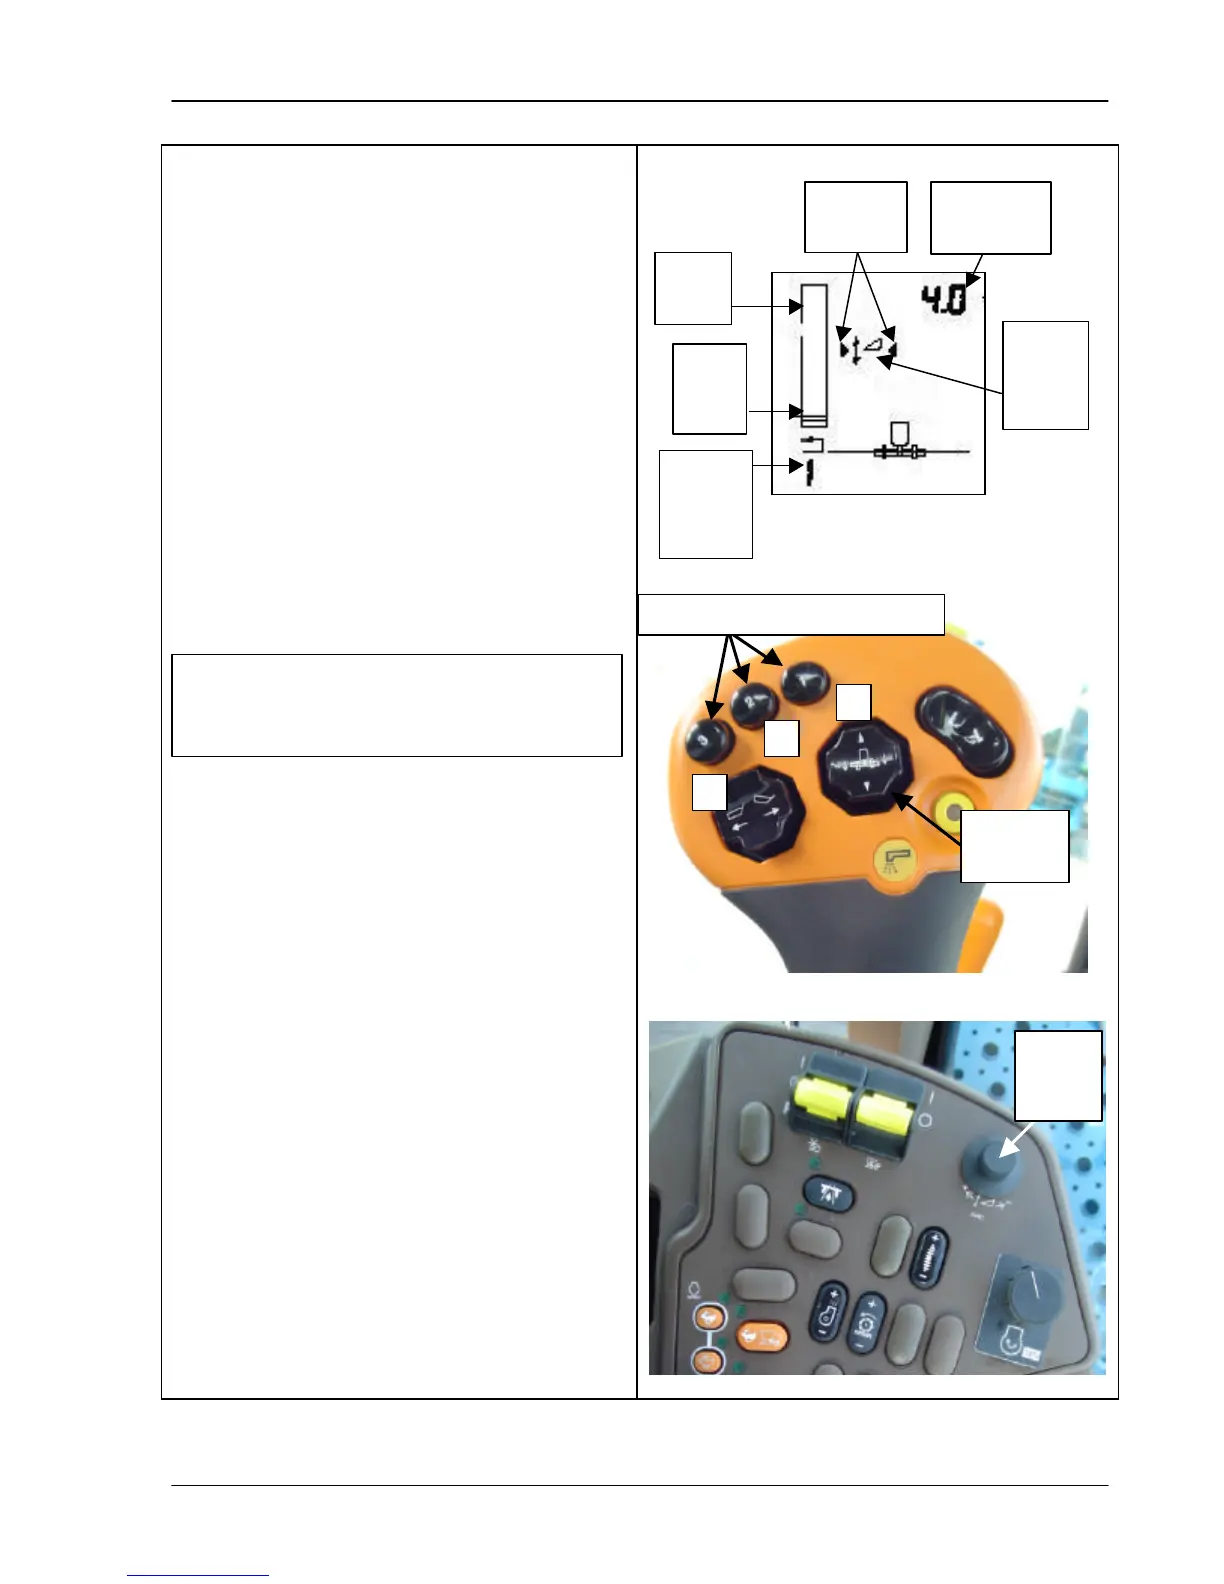
Using Header Height Sensing
When you press the Header Height Sensing
button on the AHC display to enable the
system, the display screen shows the header
height resume symbol (see drawing to the
right).
• To activate the system, press one of the
activation buttons on the multi-function
handle (middle photo). The number of the
selected button displays along with
indicator arrows to show the system is
active.
• To change the height set point of any of
the buttons, press the button and turn the
height control dial (bottom photo) until you
achieve the desired height. The bar graph
and relative number display the height.
• To disable Header Height Sensing and
manually adjust the height, press the
header lift switch in the handle (middle
photo).
• To reactivate the system, press any of the
header height activation buttons (middle
photo).
• To turn off the Header Height Sensing
system, press the Header Height Sensing
switch on the display unit of the corner
post (previous page, bottom photo).
control
dial
inches
arrows
height
sensing
symbol
graph
Set
point
of
button
selected
The range of height adjustment for
header height sensing is less than that of
header height resume.
Header height activation buttons
switch